Can Solo Stove Go on a Wood Deck? Safety & Tips
Discover if a Solo Stove can be used on a wood deck, plus setup steps, safety guidelines, and practical alternatives from Stove Recipe Hub.

Can a Solo Stove go on a wood deck? Yes, but only with strict precautions. Start with a noncombustible base such as a metal mat, ensure ample clearance from any wood surfaces, and place a spark screen in place. Keep a water source nearby and supervise the burn at all times. Always verify local rules before lighting.
Can a Solo Stove Go on a Wood Deck? Practical Reality
Can a Solo Stove go on a wood deck? This is a frequently asked question for home cooks who love stove-top meals but worry about heat and embers. According to Stove Recipe Hub, it is possible to use a Solo Stove on a wood deck, but only when you implement strict safety measures, choose the right surface, and comply with local rules. In this section, we set the foundation: why deck heat matters, how deck materials respond to high temperatures, and what you should assess before lighting. We will explore real-world scenarios, such as dry weather, nearby vegetation, and maintenance routines that keep deck surfaces in good condition. By understanding these factors, you can decide whether on-deck use is appropriate for your space and how to prepare for it safely, so your family can enjoy outdoor meals without unnecessary risk.
Deck Safety Fundamentals
Deck safety starts with controlling radiant heat, preventing sparks from landing on wood, and ensuring the structure can handle occasional high temperatures. Stove Recipe Hub analysis shows that the primary risks come from heat exposure, stray embers, and wind-driven sparks. Mitigation involves selecting a heat-resistant surface, using a quality spark screen, and keeping a ready water source nearby. Regulations vary by location, so a quick check with local authorities or HOA guidelines helps ensure you stay compliant. By framing deck-use around these fundamentals, you can reduce the chance of heat-related damage and keep your cooking routine enjoyable and safe for everyone nearby.
Surface Prep and Fireproofing
The surface you choose under a Solo Stove on a wood deck should be noncombustible and flat. A metal deck mat or a purpose-built fireproof pad protects the deck from radiant heat and ash. Fireproofing isn’t just about the surface; it’s about sealing and insulating the immediate area around the stove to minimize radiant heat transfer to wood trim, railings, and planters. Inspect the deck for dry rot, splinters, or warped boards—these conditions can worsen with heat and time. Regular checks before seasonal outdoor cooking sessions help maintain safety. When you add a spark screen and a heat shield, you create an effective buffer that supports safer operation and easier cleanup after use.
Placement Guidelines on Wood Decks
Placement is critical. Position the stove with clear space on all sides, away from railings, overhangs, and any combustible items. Ensure there is sufficient ventilation and that airflow isn’t blocked by furniture or plants. The goal is to keep embers and heat away from wood surfaces while allowing heat to dissipate. If your deck is elevated, consider adding an additional heat buffer and wind protection, since wind can carry embers farther than you expect. In all cases, avoid placing the stove directly against the house, siding, or any storage boxes that could trap heat. Consistent, deliberate placement reduces accidental ignition risks and helps you enjoy the stove safely.
Operational Guidance on Wood Decks
When you’re ready to cook, light the stove only after you’ve completed surface prep and placement checks. Keep a water source or extinguisher within reach, and wear heat-resistant gloves to handle hot surfaces. Never leave the stove unattended while it’s burning, and regularly glance at the flame to ensure it remains controlled. If embers escape or there’s a sudden gust of wind, calmly slow airflow or extinguish the flame and recheck your surface and clearance before re-lighting. After cooking, allow the stove to cool completely before removing your spark screen or cleaning the surface. A calm, methodical approach minimizes risk and keeps your deck in good condition for future use.
Maintenance, Cleaning, and Post-Use Care
Cooling periods are essential. Allow the stove to cool fully, then remove ashes safely using a metal container. Clean the surface beneath the stove to prevent ash buildup, and inspect the deck for any heat-related discoloration or minor damage. Regular maintenance includes checking the spark screen for wear, tightening any loose components, and keeping the area free of dry leaves or debris that could ignite from stray heat. If the deck shows signs of heat stress, postpone on-deck use and explore safer alternatives. Keeping a consistent cleaning routine not only lengthens the life of your stove but also preserves the deck’s finish.
Alternatives to On-Deck Use
If your space doesn’t tolerate heat or embers well, there are practical alternatives. Consider a ground-level fire pit setup on a noncombustible base away from wooden features, a portable propane option with built-in safety features, or indoor-safe cooking methods that mimic the stove’s cooking profile. Using a stand or cart designed for outdoor stoves can also improve stability and airflow while reducing direct contact with wood surfaces. Understanding these options helps you choose the safest approach for your home layout and local rules, while still enjoying the flavor and efficiency of your stove-top cooking.
Common Mistakes and Quick Fixes
Avoid common mistakes like placing the stove directly on wood, neglecting to use a spark screen, and ignoring wind conditions. Quick fixes include relocating to a more open location, using a heat shield underneath, and ensuring water or an extinguisher is within reach. If you notice heat discoloration or softened wood, stop using the setup immediately and reassess your placement, surface, and clearance. By recognizing mistakes early and implementing small adjustments, you’ll maintain deck safety and keep your cooking routine enjoyable.
Authoritative External Sources
To support safe outdoor cooking practices, consult authoritative resources such as government and university extension materials as well as major safety organizations. These sources offer general outdoor-fire safety principles that apply to on-deck use and help you align with broader safety standards. Always verify the credibility and applicability of any guidance to your local area and deck configuration.
Tools & Materials
- Noncombustible surface (deck mat or metal base)(Place directly beneath the stove to absorb radiant heat.)
- Spark screen or guard(Prevents embers from escaping during use.)
- Water source or small extinguisher(Keep within arm’s reach for flare-ups.)
- Heat-resistant gloves(Protect hands when moving hot components.)
- Long-handled poker or tongs(Use to adjust the flame or move logs safely.)
- Fireproof ash bucket or metal disposal container(Cool ashes before disposal.)
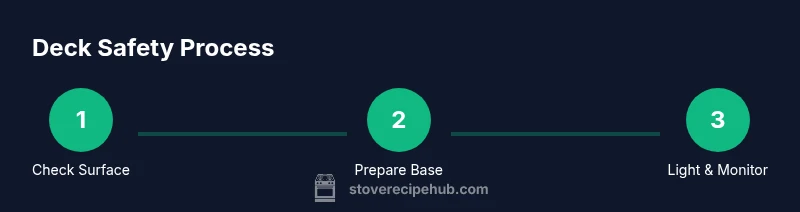
Steps
Estimated time: Estimated total time: 45-75 minutes
- 1
Assess Location and Surface
Survey the deck area to identify a flat, stable surface with clear space on all sides. Check for nearby wood trim, railings, planters, and any potential ignition sources. Decide on a location that allows for easy airflow and safe heat dissipation.
Tip: Choose a site with minimal foot traffic directly around the stove to reduce accidental contact. - 2
Prepare Noncombustible Base
Set up a metal mat or fireproof pad that completely covers the stove's footprint. Ensure the base sits level and cannot shift when heat is applied. This base is essential to protect the wood deck from radiant heat and embers.
Tip: If the mat isn’t perfectly flat, place a shim or small spacer to prevent wobbling. - 3
Clear Surrounding Area
Remove dry leaves, paper, and anything flammable from a wide radius. Move lightweight furniture and decorations away from the setup. Clear wind corridors so embers don’t drift toward wood surfaces.
Tip: Keep a dedicated path to and from the seating area for quick access. - 4
Position and Secure the Stove
Place the stove on the prepared base and ensure it’s level. Double-check that the spark screen is in place and that the base remains free of debris. Verify the stove isn’t too close to edges or overhangs.
Tip: Lightly secure any loose items nearby to prevent wind-driven contact. - 5
Light and Monitor Flame
Ignite the stove following the manufacturer’s instructions. Maintain a controlled flame and keep an eye on wind conditions. Do not leave the stove unattended while it’s hot or smoldering.
Tip: Keep a bucket of water nearby for quick control in case of flare-ups. - 6
Manage Embers During Use
Use the long-handled tool to nudge logs without bending over the flame. If embers escape, calmly reduce flame, adjust airflow, or extinguish and reattempt later. Do not toss logs that could create a larger spark.
Tip: Avoid adding large amounts of fuel mid-burn to keep flame steady. - 7
Extinguish and Cool
When finished, extinguish the flame fully and keep the stove on the base until it cools. Remove the spark screen only after cooling and store components in a safe, dry area away from combustibles.
Tip: Do not handle hot components until they are cool to prevent burns. - 8
Clean Up and Storage
Sweep away ash and debris from the base and deck. Inspect for heat marks or damage and store the stove according to the manufacturer’s guidance. Return the area to a safe, clean state before your next use.
Tip: Record any wear or damage to plan for timely maintenance.
Common Questions
Is it legal to use a Solo Stove on a wooden deck in my area?
Local fire codes and HOA rules vary. Always check with your municipality and property rules before using any fire source on a wood deck. When permitted, follow strict safety guidelines and use protective surfaces and barriers.
Local codes vary. Check with authorities before using a Solo Stove on a deck and follow safety guidelines if permitted.
What surface is best for deck use?
A noncombustible surface, such as a metal deck mat or fireproof pad, is essential. It protects the wood and helps prevent heat damage from radiant heat and embers.
Use a noncombustible surface to protect the deck and reduce heat transfer.
Can I use a Solo Stove on an elevated balcony?
Elevated balconies present wind and ember risks. If you must use one, ensure ample clearance, wind protection, and a robust noncombustible base, and confirm building restrictions before proceeding.
Balconies pose extra ember risks; confirm rules and use strict safety measures.
What safety accessories help improve deck safety?
A spark screen, heat-resistant gloves, a heat shield, and a readily available water source are all helpful. They reduce embers escaping and make handling safer.
Spark screen, gloves, heat shield, and water source boost safety.
How do I know if the deck is too hot for use?
If you notice heat discoloration, softening wood, or a scorching smell, stop using the area and reassess surface, placement, and clearance. Address any signs of heat stress before continuing.
Look for heat marks or soft wood; stop and reassess if seen.
Are there safer alternatives to on-deck use?
Yes. Consider a ground-based fire pit on a noncombustible base, or a portable propane setup with safety features. These options reduce heat exposure to wooden decks while still enabling outdoor cooking.
Ground-based or propane alternatives can be safer for decks.
Watch Video
Top Takeaways
- Assess deck suitability and surface before lighting.
- Use noncombustible bases and a spark screen every time.
- Maintain clearances and monitor wind conditions.
- Keep water or extinguisher nearby and never leave unattended.
- Follow local rules and consider safer alternatives when in doubt.