How to Clean a Stove Vent Filter: A Practical Guide
Learn how to clean stove vent filters (reusable and disposable) with practical steps, safety tips, and maintenance guidance to improve airflow, reduce grease buildup, and extend hood life.

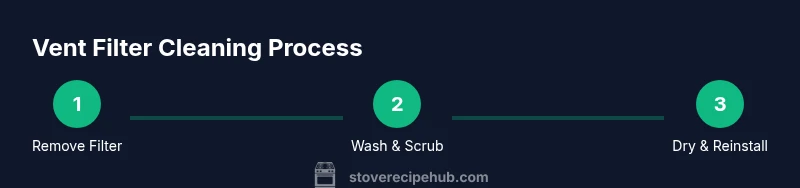
Goal: you will learn to clean a stove vent filter to restore airflow, reduce grease buildup, and extend your hood’s life. This guide covers removing the filter, washing, drying, and reinstalling, plus when to replace disposable filters and how often you should clean. According to Stove Recipe Hub, consistent vent maintenance saves energy and improves kitchen safety.
Why cleaning a stove vent filter matters
Grease and dust naturally accumulate in kitchen vents, creating a barrier that reduces suction, increases energy use, and heightens fire risk. A clean stove vent filter improves airflow, which helps your range hood pull heat, steam, and odors more effectively. Regular maintenance also lessens grease buildup on internal components, making deeper cleanings less daunting and extending the life of the hood’s fan and housing. By committing to a routine, you’ll notice faster vent action, quieter operation, and a kitchen that feels fresher after cooking with high-heat methods like searing or wok-tirring. For home cooks, this isn’t just about aesthetics—it’s about safety, efficiency, and consistency in weeknight meals.
Understanding vent filter types
There are two common categories: reusable metal mesh filters and disposable fiberglass or film filters. Metal mesh filters are designed to be washed and re-used many times, offering the best long-term value if you keep them clean and free of excessive buildup. Disposable filters are easier to replace but create recurring costs and waste. Your hood model will indicate compatible filter types; replacing like-for-like ensures optimal airflow and fit. When in doubt, photograph the filter before removal so you can shop for the correct replacement later.
Cleaning frequency guidelines
The frequency of cleaning depends on cooking habits, the kitchen’s grease level, and how often the hood runs. In a busy family kitchen or a home with frequent frying, aim for a monthly clean. If you cook light meals and rarely fry, every 2–3 months may be sufficient. In high-humidity or humid climates, more frequent cleaning helps prevent hard grease that simple washing can’t remove. Use a standing schedule or calendar reminders to keep on track, and adjust as you notice changes in suction or odor control.
Cleaning reusable metal vent filters (washing process)
Reusable metal filters require more than a quick rinse. Start by removing the filter from the hood and brushing off loose debris. Soak it in warm water with a mild dish soap for 10–15 minutes to loosen grease, then scrub with a non-abrasive sponge or soft brush to lift adhered grease. Rinse thoroughly under warm running water, inspecting for any remaining buildup. Let the filter air-dry completely before reinstallation to prevent mold or odor formation. If you notice persistent grease that won’t come off, repeat the soak or use a degreasing spray designed for kitchen filters—but avoid harsh solvents that could corrode metal.
Cleaning disposable filters (replacement workflow)
Disposable filters are designed for one-time use. If your hood label indicates disposal, simply remove the old filter and replace it with a new one, following the hood’s installation guidance. Dispose of the used filter according to local waste rules. While disposable filters save time, they do contribute to ongoing costs and waste, so consider your kitchen’s grease level and budget when choosing between disposable versus reusable options.
Drying, reinstalling, and testing suction
After washing, shake off excess water and place the filter in a dry, warm area to air-dry completely—this can take 1–2 hours for metal mesh. Once dry, reinstall carefully, ensuring the filter sits flush and the clips or rails engage securely. Turn on the hood at a low setting first to check for proper suction and noise levels; then test at higher speeds to confirm consistent performance. If suction remains weak, recheck the seal around the filter and inspect for cracks or warping in the hood housing.
Common mistakes and safety warnings
Avoid using abrasive sponges that can scratch metal surfaces, and never wash disposable filters with the intent of reusing them unless the label explicitly allows it. Take care when lifting the hood—filters can be heavy, and cords or switches should be de-energized if you need to unplug. Always dry filters completely before reinstalling to prevent mold growth. If you notice smoke, unusual smells, or persistent poor suction after cleaning, stop using the hood and consult a professional.
Maintenance checklist and seasonal care
Create a simple checklist: (1) Inspect the filter condition, (2) Clean or replace according to type and frequency, (3) Dry thoroughly, (4) Reinstall and test suction, (5) Note next cleaning date on a wall calendar. Keeping a log helps identify patterns—if suction declines too quickly after cleaning, it may indicate deeper hood issues, such as duct blockages or fan wear. Seasonal maintenance can align with spring cleaning or fall prep to ensure consistent performance year-round.
Troubleshooting: poor suction after cleaning
If suction remains weak after cleaning, check for duct obstructions, a clogged charcoal filter (if your hood uses one), or a loose seal around the filter/frame. Inspect the fan blades visually for damage or debris, and listen for unusual noises that suggest motor strain. If you find signs of damage or if airflow does not improve after a cleaning cycle, schedule professional service to avoid inefficient operation or fire risk.
Tools & Materials
- Gloves (nitrile or rubber)(Protect hands from grease and steam)
- Dish soap (mild)(Dilute in warm water for washing)
- Warm water bucket(Soak and rinse filters)
- Non-abrasive sponge or soft brush(Avoid scratching metal)
- Old toothbrush(Target grooves and mesh holes)
- Towel or microfiber rag(Dry surfaces and filters completely)
- Degreasing spray (kitchen-safe)(For stubborn buildup on reusable filters)
- Replacement disposable filter (if applicable)(Keep on hand for quick swap)
- Plastic bag or trash bag(Dispose of disposable filters properly)
- Screwdriver (if needed)(Some hoods require panel removal)
Steps
Estimated time: 25-40 minutes
- 1
Power down and locate filter
Turn off the range hood and unplug if possible. Locate the vent filter inside the hood, usually behind a metal frame or removable panel. This prevents accidental startup and keeps debris from falling into the hood during removal.
Tip: If the hood is mounted high, use a stable step stool and avoid overreaching. - 2
Remove the vent filter
Carefully release the clips or rails holding the filter in place and slide the filter out. Note its orientation so you can reinstall it correctly. Keep the screws or frame pieces in a safe spot for reassembly.
Tip: Take a quick photo of the installed position before removal for reference. - 3
Inspect for damage and buildup
Check for warping, tears, or heavy grease buildup. If the filter appears damaged, replace instead of attempting a wash. Document any heavy grime so you know how aggressive your cleaning needs to be on subsequent cycles.
Tip: A magnifying glass can help you spot hairline cracks. - 4
Wash the filter (reusable filters)
Soak the metal mesh in warm, soapy water for 10–15 minutes, then scrub with a soft brush to lift grease from both sides. Rinse thoroughly until water runs clear. Repeat if necessary for stubborn residue.
Tip: Avoid hot water that can warp metal and use gentle scrubbing to preserve filter pores. - 5
Rinse and dry
Rinse again to remove all soap, then shake off excess water. Place the filter on a dry towel in a warm, well-ventilated area and allow it to air-dry completely (at least 60 minutes, longer in humid spaces).
Tip: Do not reinstall until completely dry to prevent mold. - 6
Reinstall the filter
Position the filter back into the hood, aligning edges with rails or slots. Reattach clips or screws securely. Ensure the frame sits flush and there are no gaps where air can bypass the filter.
Tip: Ensure the gasket or seal around the filter is intact. - 7
Test the hood suction
Turn the hood to a low setting, then gradually raise to high to observe consistent suction and no unusual noises. If airflow is weak, recheck alignment and seals. Schedule a professional check if performance doesn’t improve.
Tip: Listen for a steady, smooth air rush rather than whistling or rattling. - 8
Replace disposable filters when needed
If you’re using disposable filters, remove and replace with a new one following the hood’s instructions. Seal the old filter in a bag before disposal to control odor.
Tip: Keep a spare disposable filter on hand for fast swaps.
Common Questions
How often should I clean a stove vent filter?
Frequency depends on cooking style and grease exposure. In high-grease kitchens, aim for monthly cleaning of reusable filters and replacement when disposable filters become visibly dirty. For lighter usage, every 2–3 months may be sufficient. Use a calendar reminder to stay on track.
In busy kitchens, clean monthly for reusable filters and replace disposables when dirty. For light use, every two to three months works, but set reminders to stay on schedule.
Can I use vinegar or bleach to clean the vent filter?
Mild dish soap with warm water is usually sufficient for metal mesh filters. Avoid bleach or concentrated cleaners on metal and varnished surfaces, as strong chemicals can damage coatings and seals. If you have stubborn buildup, use a dedicated degreaser designed for kitchen filters.
Stick with mild soap and warm water for metal filters. Avoid bleach; use a kitchen-safe degreaser if needed.
What if the filter is damaged or warped?
If the filter is torn or visibly deformed, replace it. A damaged filter can fail to seal properly, reducing suction and increasing fire risk. Check the hood manual for compatible replacements and install a new filter following the recommended orientation.
If it’s torn or warped, replace it to maintain proper suction and safety.
Are disposable filters more cost-efficient than reusable ones?
Disposables are convenient but create ongoing costs and waste. Reusable filters cost more upfront but usually pay off over time with repeated washes. Consider your cooking frequency, maintenance willingness, and environmental concerns when deciding.
Disposables are easier but cost more over time; reusable filters save money if you’re willing to wash them regularly.
What should I do if I still smell grease after cleaning?
Persistent odors may indicate deeper duct buildup or a clogged filter stack. Ensure all surfaces are thoroughly dry, inspect the duct path for obstructions, and consider a professional cleaning if odors persist after several cycles.
If odors persist, there may be deeper duct or fan issues—consider a professional inspection.
Do I need to turn off power before cleaning?
Yes. Always turn off power to the hood and unplug if possible before removing or cleaning any vent components to avoid shocks or injuries. This is a basic safety step you should never skip.
Always power off the hood and unplug if possible before starting.
Watch Video
Top Takeaways
- Clean stove vent filter regularly to restore suction.
- Know your filter type: reusable metal vs disposable.
- Dry completely before reinstalling to prevent mold.