How big should the flame be in a pellet stove
Learn how big the flame should be in a pellet stove for safe, efficient heating. This guide explains ideal flame height, how to observe it, safe adjustments, common issues, and maintenance tips to keep your stove running cleanly.

A proper flame size for a pellet stove is a small, steady blue flame that stays just above the burn pot when the stove is operating. Avoid tall, yellow flames or flickering flames, as they indicate inefficient combustion and potential buildup. According to Stove Recipe Hub, maintaining this steady flame supports heat efficiency and safe operation.
How big should the flame be in a pellet stove?
The flame height on a pellet stove is a key indicator of combustion quality. The general rule is: keep a small, steady flame that remains blue and stable, just above the burn pot during normal operation. A flame that rises too high or burns yellow signals incomplete combustion, wasted fuel, and higher creosote buildup. By maintaining a controlled flame, you maximize heat transfer to the room, reduce emissions, and lower the risk of chimney fires. Throughout this guide, we’ll use the phrase how big should the flame be in a pellet stove to anchor practical adjustments and observations. According to Stove Recipe Hub, flame management is a practical skill that improves both safety and efficiency in day-to-day stove operation.
Why flame height matters for efficiency and safety
Flame height and color reveal how well air and fuel are mixing inside the combustion chamber. A short, blue flame implies efficient burning, better heat output, and cleaner exhaust. Conversely, a tall, yellow flame often means insufficient primary air, dirty burn pot, or poor pellet quality. When flame height drifts, the stove may burn pellets faster, create more ash, and require more frequent emptying. The right flame also reduces the risk of smoke, odors, and CO buildup in the living space. Keeping the flame at a moderate height helps preserve components, extends the stove’s life, and keeps maintenance costs predictable.
Observing flame height safely and accurately
Safety first: ensure the stove is cool before inspecting the flame. Look through the viewing window and note color, stability, and height relative to the burn pot opening. A healthy flame appears predominantly blue with a steady base and small flickers. If you have an infrared thermometer, you can gauge surface temperatures near the burn pot and around the door edge to ensure you’re not overheating any critical parts. Take photos or keep a notebook entry for future reference so adjustments are based on trends, not one-off observations.
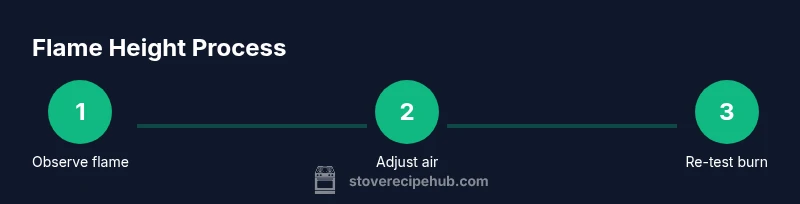
Step-by-step approach to adjusting flame height safely
To adjust flame height, make small, incremental changes to the air intake and/or feed rate as recommended by your stove’s manual. Start with a 1/8 to 1/4 turn of the primary air control and let the stove burn for 5–10 minutes to settle. If the flame remains blue and stable, you’ve found a good baseline; if it grows taller or yellows, reduce air or adjust the feed rate slightly. Always document what worked and re-check after a complete burn cycle to confirm consistency. Remember: small tweaks are more reliable than large jumps.
Common flame-height issues and their fixes
Yellow or orange flames often indicate lingering stove creosote, dirty burn pot, or pellet moisture issues. A flickering flame may point to pellet quality problems or inconsistent hopper feed. If you notice smoke, odor, or a dramatic flame change after a routine maintenance, stop the stove, inspect the burn pot and exhaust path, and re-check the pellet quality. In some cases, cold weather or poor installation can affect airflow, so re-test after a short period of normal operation.
Maintenance practices that stabilize flame height
Regular cleaning is essential for stable flame height. Empty the ash pan and clean the burn pot, flue, and heat exchanger according to the manufacturer’s schedule. Use high-quality pellets with low moisture content to maintain predictable combustion. Check gaskets and air passages for leaks, and replace worn components promptly. Finally, ensure the pellet hopper and auger are feeding consistently; a misfeed can cause flame height to fluctuate.
Authority sources
For deeper guidance, consult reputable resources:
- https://extension.psu.edu
- https://extension.oregonstate.edu
- https://www.nfpa.org These sources cover stove safety, maintenance, and combustion principles that apply to pellet stoves and help you interpret flame behavior safely.
Tools & Materials
- Owner's manual for your pellet stove(Model-specific guidance on flame height and settings.)
- Heat-resistant gloves(Protect hands when inspecting burn pot and vents.)
- Infrared thermometer (optional)(Helps verify surface temps around the burn area.)
- Non-flammable ash scoop(Used to manage ash buildup in the burn pot.)
- CO/Smoke detector(Ensure device is functional before testing.)
- Flashlight(Illuminate the burn area during inspection.)
Steps
Estimated time: 60-90 minutes
- 1
Prepare safety and surroundings
Power down the stove, unplug if possible, and allow the unit to cool completely before handling any components. This reduces burn risk and prevents accidental adjustments while parts are hot. Have a smoke/CO detector nearby and ensure good ventilation.
Tip: Never poke or force components—let the stove cool and use gloves. - 2
Inspect burn pot and ash
Open the access panel and remove ash from the burn pot using a non-flammable scoop. A clean pot improves airflow and ensures the flame responds predictably to adjustments. Do not over-clean; retain a light ash layer that protects the pot.
Tip: Document ash depth and any unusual deposits for future reference. - 3
Observe current flame color and height
Look through the viewing window and assess color (blue vs yellow) and height relative to the pot. A healthy flame is blue and sits at a moderate height with minimal flicker. If you’re unsure, capture a quick photo to compare over time.
Tip: Use a thermometer to check nearby surface temps if available. - 4
Make a small adjustment
Turn the primary air control slightly (about 1/8 to 1/4 turn) toward increased air to lower the flame height or toward reduced air to raise it. Allow the stove to burn for 5–10 minutes to settle and re-evaluate.
Tip: Make the smallest possible adjustment; avoid sweeping changes. - 5
Re-check flame stability
After the burn cycle, reassess flame color and height. Confirm it remains blue and steady. If it shifts back toward yellow or grows unstable, repeat the adjustment in smaller increments.
Tip: Record the baseline setting for future reference. - 6
Finalize and safety confirm
Ensure there is no smoke, unusual odor, or alarm activation. Check for leaks or abnormal sounds. Restore the stove to normal operation and monitor for a longer burn to validate stability.
Tip: If issues persist, consult the manual or a qualified technician.
Common Questions
What is the right flame size for a pellet stove?
The right flame is small, steady, and blue. It indicates efficient combustion and safe operation under normal conditions.
Aim for a small, steady blue flame for best performance, not a tall yellow one.
Why is my flame yellow or orange?
Yellow or orange flame usually means incomplete combustion due to insufficient air, a dirty burn pot, or poor pellet quality. Addressing air flow and cleaning typically helps.
A yellow flame usually means incomplete combustion; check air flow and clean the burn area.
Can I burn with a tall flame while testing?
Tall flames can indicate unsafe combustion conditions. Stop, cool the stove, and re-check air settings in small increments after cleaning.
Tall flames are not safe; adjust gradually after cooling.
How often should I adjust the flame height?
Adjust only after a burn cycle has started, and always while the stove is cool. Re-test with a short burn to confirm stability.
Adjust after cooling and test with a short burn to confirm.
Is it safe to adjust the flame while the stove is on?
No. Always turn off, allow cooling, and perform adjustments when safe. Sudden adjustments while hot can cause burns or damage.
Don’t adjust while the stove is hot; wait for it to cool.
What maintenance helps flame stability?
Regularly clean the burn pot, verify air passages, and use high-quality pellets. Proper venting and gasket checks also support stable flame height.
Clean the burn pot and vents regularly to keep the flame stable.
Watch Video
Top Takeaways
- Maintain a small blue flame for efficient combustion.
- Adjust in tiny increments and test with burn cycles.
- Regular cleaning supports flame stability.
- Yellow flames indicate a need for maintenance or pellet quality checks.
- Record a baseline flame height for future reference.