How to Cover a Stove: A Practical, Step-by-Step Guide
Learn a clear, step-by-step approach to cover your stove safely. We cover materials, measurements, installation, maintenance, and safety tips to protect surfaces and simplify cleanup in busy kitchens.

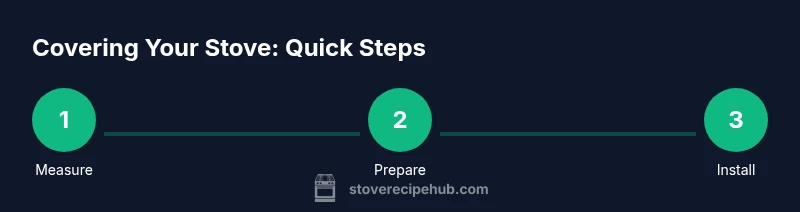
Goal: cover your stove safely and neatly to protect surrounding surfaces, reduce mess, and simplify cleanup. You’ll choose a heat-resistant cover that fits your stove, gather the right tools, and follow a clear, step-by-step process. This quick guide also flags safety considerations and maintenance tips to keep the setup durable and easy to remove when needed.
Why covering a stove matters
Covering a stove isn't just about aesthetics; it serves practical safety and cleanliness goals. According to Stove Recipe Hub, a purpose-built cover can reduce heat transfer to nearby countertops, prevent grease splatter, and create a defined work surface when the stove is not in use. For households with kids or curious pets, a cover adds an extra layer that discourages accidental contact with hot burners. A well-chosen cover also keeps dust and cooking fumes away from sensitive controls, extending the life of switches and knobs. In daily cooking, a sturdy cover acts as a temporary ready-made trivet or extra prep space, letting you place cutting boards or cooling racks without dragging items across a slick stove top. The human factors are worth noting: a cover that sits flush and remains stable reduces the chance of slips or tipping pots. Finally, remember that a cover is not a substitute for regular cleaning; scheduled wipe-downs keep grease from hardening and edge gaps from forming.
Choosing the right cover: materials and fit
When selecting a stove cover, balance durability, heat resistance, and fit. Good options include tempered glass panels, stainless steel sheets, and high-temperature silicone mats. For a traditional kitchen, a ceramic tile slab or a lightweight aluminum panel can also work well. Consider full-width covers that span the entire cooktop or partial covers that leave space for knobs and controls. Edge finishing matters: rounded edges reduce snag hazards, while a flush fit minimizes tripping or snagging towels and pots. Ventilation gaps are essential if you still want some airflow around burners; without them, you risk heat buildup near controls. Thickness matters too: a 2–6 mm panel provides sturdiness without feeling overly heavy. Finally, ensure you can clean the cover easily; smooth surfaces wipe down fast and resist staining.
Measuring and preparing the stove surface
Accurate measurements save time and avoid misfits. Start by measuring the overall width of the cooktop, then the depth from front to back. Don’t forget to account for any protruding knobs, handles, or raised edges that a cover must clear. Use a tape measure and mark your dimensions on a scrap piece of paper or a note app. If you plan to install hinges or brackets, measure the available depth for installation hardware and clearance for hand access. Before cutting or ordering a custom panel, double-check that the surface is dry, clean, and free of loose debris. A clean surface helps the cover sit evenly and reduces the chance of slipping.
Installation methods: floating cover, hinged, or molded
There are several viable installation approaches depending on your cover material and kitchen setup. A floating panel rests on the surface and uses anti-slip pads to stay in place; it’s easy to remove for cleaning. A hinged cover provides a compact flip-up option, useful if you need quick access to the burners. Molded or formed covers are built to fit a specific stove shape, offering a clean, seamless look but requiring careful measurement and possibly professional help for a perfect finish. When using any method, test the fit by placing the panel and gently pressing around the edges to confirm it doesn’t shift. Avoid forcing a tight fit that could crack the panel or damage the stove. For gas stoves, never block burner access or ventilation paths; keep clearance around knobs and flame openings. The goal is a safe, stable surface that wipes clean in seconds.
Maintenance and safety reminders
Regular maintenance keeps a stove cover functional and long-lasting. Clean spills immediately with a mild detergent; avoid abrasive cleaners that can scratch surfaces. Inspect edges for chips or rough patches that could cut or snag towels or gloves. If you installed hardware like brackets or hinges, check fasteners monthly and tighten as needed. Remove the cover before heavy cooking or high-heat tasks to prevent warping and ensure safe operation. Store the cover in a dry place when not in use to prevent moisture damage. Finally, always follow manufacturer recommendations for heat exposure and cleaning to preserve the cover’s integrity.
Tools & Materials
- Measuring tape (metric and imperial)(Long enough to cover full width; precision matters)
- Pencil or marker(For marking cut lines on the cover material)
- Level or straightedge(Helps ensure the panel sits flat)
- Heat-resistant cover material (tempered glass panel, stainless steel sheet, or silicone mat)(Choose thick, smooth, and heat-rated to at least 300°C/570°F if possible)
- Safety gloves(Protect hands when handling hot or sharp edges)
- Non-slip pads or silicone feet(Helps prevent movement on slick surfaces)
- Hinges/fasteners (optional)(If choosing hinged or mounted cover; select corrosion-resistant hardware)
- Cleaner wipe and microfiber cloth(Keep surfaces clean for accurate measurements and maintenance)
Steps
Estimated time: 45-60 minutes
- 1
Measure the stove
Use a measuring tape to determine the total width and depth of the cooktop, accounting for knobs and any protrusions. Record measurements clearly so you can reference them when selecting or cutting the cover material. A second check with a calm, clean surface avoids mistakes.
Tip: Double-check measurements at multiple points to catch curves or asymmetries. - 2
Choose and prep the cover material
Select a heat-resistant material that matches your stove size and kitchen style. Clean the surface and dry it completely before placing the material on it to prevent trapping dust or moisture under the cover.
Tip: If cutting, lay the panel on a stable surface with a scrap protective layer and mark lines clearly. - 3
Cut or trim to size
Transfer measurements to the cover material and cut using appropriate tools for your material (glass, metal, or composite). Smooth edges with a file or sandpaper to reduce sharpness. Re-check fit against the stove before proceeding.
Tip: Wear safety gloves and eye protection when cutting or filing edges. - 4
Prepare mounting or edge features
If using hinges or brackets, align them with measured positions and pre-drill holes as needed. Install anti-slip pads or feet to prevent shifting. Ensure there is enough clearance for knobs and any control panels.
Tip: Dry-fit first to confirm clearance before final mounting. - 5
Install the cover
Place the cover on the stove, align edges evenly, and secure any hardware. If the cover is a floating type, press gently around the edges to confirm a snug but removable fit. If hinged, ensure the latch or hinge action works smoothly.
Tip: Test removal and reattachment a few times to confirm durability. - 6
Test and finish
Wipe down the surface, verify there are no gaps or wobble, and confirm no interference with burner controls. Document any adjustments for future reference. Store tools and cleanup supplies nearby for quick maintenance.
Tip: Observe the cover during a light cooking session to ensure it stays in place.
Common Questions
Is it safe to cover a gas stove top?
Covering a gas stove top is not generally recommended while burners are in use. If you must cover the area, keep all burner openings and knobs unobstructed and use a cover only when the cooktop is completely cool. Always consult the stove manufacturer’s guidance.
Gas stoves should not be covered while in use. Keep burners and controls clear, and only cover when everything is cool.
What materials are best for stove covers?
Choose heat-resistant materials such as tempered glass, stainless steel, or high‑temp silicone mats. Ensure the material is easy to clean, doesn’t warp with heat, and has smooth edges to prevent cuts.
Tempered glass, stainless steel, or heat‑resistant silicone are good choices. Make sure edges are smooth and cleaning is easy.
How do you measure for a custom cover?
Measure the full width and depth of the cooktop and account for knobs, handles, and any protrusions. Use a straightedge to verify right angles and re-check measurements before cutting.
Measure width, depth, and knob clearance, then verify with a straightedge and re-check before cutting.
Can a stove cover be temporary or permanent?
Covers can be temporary mats or semi-permanent panels with mounting hardware. Choose a method that allows easy removal for cleaning and changes in cooking needs.
Covers can be temporary mats or more permanent panels; pick what you’ll remove easily for cleaning.
How long does installation take?
Most setups take about 30 to 60 minutes, depending on the cover type and your preparation. Plan extra time for precise measurements and cuts.
Typically 30 to 60 minutes, depending on the cover type and measurement accuracy.
Watch Video
Top Takeaways
- Measure accurately before shopping.
- Choose heat-resistant, durable materials.
- Ensure edge safety and stable fit.
- Maintain and clean the cover regularly.
- The Stove Recipe Hub approach emphasizes safe, removable covers.