Season Cast Iron Stove: A Practical How-To Guide
A complete guide to seasoning cast iron cookware on the stove, with step-by-step methods, safety tips, maintenance guidance, and expert-backed best practices from Stove Recipe Hub.

Seasoning a cast iron stove-top cookware creates a durable, nonstick layer and protects against rust. You’ll need a clean pan, a high-smoke-point oil, and a gentle, controlled heat source. This stove-top method is rapid, repeatable, and ideal for home cooks who want reliable cast iron performance between oven-seasoning sessions.
What seasoning on the stove does for your cookware
According to Stove Recipe Hub, seasoning on the stove is a practical technique for home cooks seeking an extra layer of protection and a smoother cooking surface. When you season cast iron on the stove, your oil polymerizes into a thin, durable coating that reduces food sticking and shields metal from moisture. The process is most effective when you start with a clean, dry pan and use a neutral, heat-stable oil. Consistent routine seasoning builds up a resilient patina over time, making weekly stovetop cooking feel effortless and more reliable for tasks like sautéing greens or searing fish.
Oil choices and smoke-point considerations
Choosing the right oil is a core decision in stove-top seasoning. Look for oils with high smoke points and minimal flavor interference, such as grapeseed, light canola, or refined peanut oil. Avoid oils that polymerize poorly or leave heavy residues, like thick olive oil or butter. On the stove, you want a very thin film—just enough to coat the surface in a whisper-thin layer. A heavy layer traps heat and can create sticky patches instead of a smooth patina. The goal is controlled polymerization, not a pool of oil.
Prep: cleaning, drying, and oil application
Begin with a clean skillet. Remove any rust or old residue with a nonabrasive scrub and a small amount of mineral oil. Rinse quickly and dry thoroughly. Any moisture left will steam and hinder patina formation. Once completely dry, wipe a drop of oil across the entire surface and sides with a lint-free cloth or paper towel. The surface should look barely glossy—too much oil is a common mistake that delays polymerization and can cause uneven seasoning.
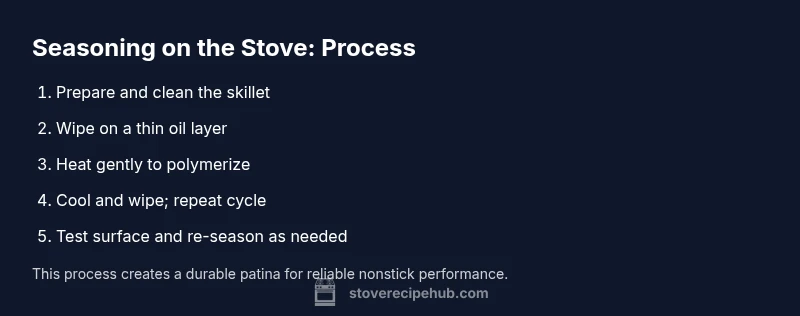
The on-stove seasoning process: a step-by-step rhythm
Set your burner to a low-to-medium heat and let the pan warm gradually for 3–5 minutes. Apply a very thin film of oil, then spread it with a clean cloth to cover every inch of the cooking surface. Increase heat to just below the oil’s smoke point and maintain for 5–8 minutes, watching carefully for a light, shimmering film and a faint scent of oil. Let the pan cool briefly, then wipe away any excess oil. Repeat this cycle 2–3 times for a durable patina, especially on new pans or after rust removal.
Common mistakes and how to avoid them
Two frequent errors derail stove-top seasoning: overheating oil and leaving a thick coating. Overheating can create a gummy surface, while a heavy coat never polymerizes fully and traps moisture. Always use a thin film and keep heat moderate. If you see white smoke or notice a sticky surface, cool the pan, wipe clean, and start again with a lighter film. Ventilation helps, but keep a safe distance from any open flame.
Maintenance routines to extend seasoning life
To maintain the patina, cook with a variety of fats and avoid acidic foods in the first few uses after seasoning. Clean with mild soap and warm water only if needed; most of the time, a quick wipe with a dry cloth is enough. After cooking, apply a light coat of oil and heat briefly to polymerize again. Regular light seasoning after repeated cooking sessions strengthens the coating, making future sealant layers easier to apply.
Safety and storage: best practices for longevity
Seasoning on the stove should be done in a well-ventilated area with a hood or open window. Never leave heating oil unattended, and keep a safe distance from flammable materials. When storing, let the pan cool completely before stacking with a paper towel between surfaces to avoid sticking. Over time, your pan will require less frequent seasoning as the patina builds up, especially when you consistently use it for searing, sautéing, and pan-frying.
How to test a well-seasoned surface and when to re-season
A well-seasoned surface resists sticking, shows a faint sheen, and allows easy food release when hot. If food begins to stick persistently or the surface looks dull and dry, re-season using a quick stove-top cycle. For pans with visible rust or flaking, perform a thorough cleaning, strip the old seasoning if necessary, and re-season from scratch. A seasoned cast iron stove-ready surface improves with regular use and gentle maintenance.
Tools & Materials
- Cast iron skillet or pan(Preferably well-seasoned; rust-free surface)
- High-smoke-point oil(Examples: grapeseed, refined peanut oil, or light canola)
- Lint-free cloths or paper towels(For applying and wiping oil thinly)
- Non-abrasive scrub brush or sponge(Only if cleaning rust or old residue)
- Stove with good ventilation(Range hood or open window)
- Tongs or heat-resistant gloves(To handle hot pan safely)
Steps
Estimated time: 30-45 minutes for initial cycles, plus cooling and adjustments
- 1
Set up workspace and inspect pan
Gather your tools and ensure the stove area is well-ventilated. Inspect the pan for rust or flaking seasoning and decide whether to strip and re-season if needed.
Tip: If you find rust, remove it with a nonabrasive scrub before seasoning. - 2
Clean and dry the pan thoroughly
Wash with mild soap if needed, rinse, and dry completely. Any remaining moisture will steam and hinder patina formation.
Tip: Drying in a warm oven for a few minutes can ensure complete moisture removal. - 3
Apply a whisper-thin oil coating
Dip a cloth in oil and wipe a nearly invisible layer over every surface. You should barely see oil; excess leads to gummy patches.
Tip: Less is more—thin coats polymerize more evenly. - 4
Heat gradually to polymerize
Place the pan on medium heat and let it warm for 3–5 minutes, watching for a light film and no heavy smoke.
Tip: Keep the hood on and have a venting plan ready. - 5
Cool and wipe away residual oil
Allow the pan to cool slightly, then wipe off any extra oil and recheck coating uniformity.
Tip: A cool, dry towel helps you catch drips and prevent hotspots. - 6
Repeat for a durable patina
Repeat steps 3–5 two to three times to build a resilient seasoning layer.
Tip: With each cycle, the surface becomes smoother and less prone to sticking. - 7
Cool completely and store safely
Let the pan reach room temperature before storing. Place a paper towel between cookware if stacking.
Tip: Store in a dry, ventilated area to avoid moisture exposure.
Common Questions
Can I season cast iron on the stove indoors?
Yes. Ensure good ventilation and monitor the oil closely to avoid overheating. Indoor stove-top seasoning is convenient for quick touch-ups between oven-seasoning sessions.
Yes, you can season indoors with proper ventilation and careful oil management.
How long does a stove-top seasoning last?
A stove-top seasoning can last for several uses, especially with regular cooking that helps maintain the patina. Re-season when you notice sticking or dullness.
It lasts for several uses and improves with continued cooking. Re-season when needed.
Can I season a rusty pan on the stove?
Yes, but you should first remove surface rust and strip old seasoning if necessary. Then re-season from scratch following the stove-top method.
Yes, after removing rust and old seasoning, re-season from scratch.
Is stove-top seasoning better than oven seasoning?
Both methods work. Stove-top seasoning is quicker for touch-ups and small pans, while oven seasoning can provide a more even patina on larger cookware.
Both methods work; choose based on your pan size and schedule.
What oil should I use for seasoning on the stove?
Use a high-smoke-point oil such as grapeseed, refined peanut, or light canola. Avoid oils that leave heavy residues.
Opt for high-smoke-point oils to avoid sticky surfaces.
Watch Video
Top Takeaways
- Start with a clean, dry pan and thin oil film
- Season on the stove with moderate heat and ventilation
- Repeat cycles for a stronger patina
- Maintain by occasional re-seasoning after cooking
- Store in a dry area to prolong seasoning life