What to Clean Stove With: A Practical Guide for Home Cooks
Learn safe, effective cleaners for every stove surface and how to clean without damage. This guide explains what to clean stove with, plus maintenance tips to keep your appliance looking and performing like new.

By the end of this guide, you’ll know what to clean stove with to remove grease, grime, and stuck-on food safely. Start with common kitchen staples like warm water, dish soap, baking soda, and white vinegar, then choose surface-appropriate methods. Avoid harsh solvents on delicate finishes, ventilate the area, and follow these steps to keep your stove looking and performing at its best.
Why this matters: what to clean stove with matters for safety and performance
Keeping a stove clean isn't just about aesthetics; it's about safety and efficiency. According to Stove Recipe Hub, knowing what to clean stove with helps protect heating elements, prevent grease fires, and extend appliance life. Different stove surfaces (glass-ceramic, enamel, stainless steel, cast iron grates) react differently to cleaners, so selecting the right agent matters. A thoughtful approach reduces scratches, minimizes chemical damage, and keeps heat control precise for everyday cooking. Regular, careful cleaning also helps you avoid unexpected malfunctions that can disrupt dinner prep. By choosing appropriate cleaners and applying them correctly, you create a safer cooking environment and improve overall performance.
This section grounds you in the why behind cleaner choices and surface compatibility, so you can approach each cleaning task with confidence.
Common cleaners and surfaces: what to use and what to avoid
Different stove surfaces require different treatment. Glass-ceramic tops shine with non-abrasive cleaners and soft applicators; avoid scouring pads that scratch the surface. Enamel finishes tolerate mild dish soap and a baking soda paste for baked-on grime. Stainless steel treatments work best with a dedicated stainless cleaner or a vinegar-water mix, always wiped with the grain to preserve the finish. Grates, drip pans, and burner caps can usually survive a soak in warm, soapy water or a baking-soda paste, but always avoid soaking electrical components on gas models. Never mix bleach with ammonia or other cleaners, and never spray cleaners directly onto controls or electronic components. When in doubt, read the manufacturer’s cleaning instructions and test in a hidden spot before full-applying a product.
How surface composition guides cleaner choice
Knowing the material composition of your stove helps you target the right cleaner. Glass and ceramic surfaces are prone to scratching, so use soft cloths and non-scratch sponges. Enamel is tougher but can discolor with aggressive solvents; stick to milder formulations. Cast iron grates and metal components are durable but can rust if left damp; ensure a thorough dry after cleaning. For stubborn grease or carbon buildup, consider a paste made from baking soda and water, applied to a damp dishcloth, then buffed with a microfiber cloth. Always perform a patch test on a small, inconspicuous area before applying any new product broadly. If you’re unsure about a product’s compatibility, contact the manufacturer or consult the manual for recommended cleaners.
This section helps you translate surface science into practical cleaning choices so you don’t accidentally degrade finishes.
Practical strategies for grime and heavy buildup
Heavy buildup benefits from a deliberate, multi-step approach. Begin with warm water and dish soap to loosen surface grime; for stuck-on residue, apply a baking soda paste and let it sit for 5–10 minutes before scrubbing with a soft brush. For enameled or glass surfaces, use a circular motion to lift dirt without abrading the finish. Rinse with a clean, damp cloth and dry thoroughly to avoid water spots and potential rust on metal parts. If you’re cleaning around burners, remove grates and knobs (when safe to do so) to expose all hidden grime and wipe down those areas separately. Ventilate the kitchen and avoid letting any cleaner dry on surfaces, which can leave streaks or residues behind.
Maintenance habits to prevent future mess
Prevention is easier than correction. Wipe down the stove after cooking to remove splatters while they’re fresh. Use a splatter screen if you frequently cook sauces that splatter. Regularly clean knobs, drip pans, and grates to prevent buildup from becoming baked on. Keep a small spray bottle with a diluted cleaner for quick touch-ups, and replace any worn gaskets or seals that could allow grease to accumulate behind control panels. Finally, schedule a monthly or biweekly quick clean to maintain shine and function across all surfaces.
Quick-start cleaning checklist
- Gather tools and cleaners: warm water, mild dish soap, baking soda, white vinegar, soft cloths, and a non-abrasive sponge.
- Remove grates and knobs (if safe) and soak in warm soapy water.
- Wipe surfaces with a soapy solution, then treat stubborn spots with a baking soda paste.
- Rinse, dry, and reassemble components. Inspect for any residue or streaks and buff them out.
Tools & Materials
- Warm water(For pre-wash rinse and dilution)
- Dish soap (mild, pH neutral)(Cuts grease without leaving residue)
- Baking soda(Gentle abrasive for baked-on grime)
- White vinegar(Degreasing and disinfecting properties)
- Spray bottle(Dilute cleaners and apply evenly)
- Non-abrasive sponge(Soft finish for delicate surfaces)
- Soft-bristle brush or toothbrush(Reach grates, burners, and controls)
- Microfiber cloths(Dry and buff to a streak-free shine)
- Gloves(Protect hands from cleaners)
- Degreaser (optional)(For heavy buildup, follow label)
- Old towels or rags(Lay down to catch drips)
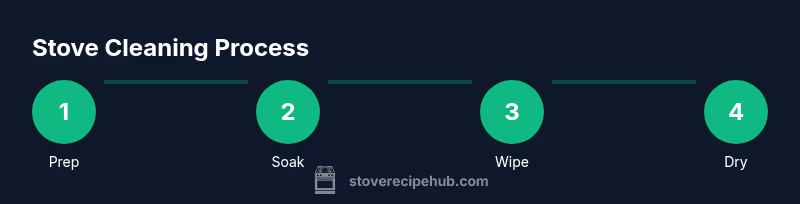
Steps
Estimated time: 25-40 minutes
- 1
Prep the area
Power off the stove and remove grates, burner caps, and knobs if safe. Place removed parts on a towel to catch drips, and fan the area to vent any fumes. This minimizes disruption during cleaning and protects electrical components.
Tip: Take a quick photo of knob positions to ensure correct reattachment. - 2
Mix and test cleaners
Prepare a mild cleaning solution with warm water and dish soap in your spray bottle. For tough grime, mix a baking soda paste with a little water. Test a small, inconspicuous patch first to confirm compatibility.
Tip: Never spray directly onto controls or electrical areas. - 3
Soak removable parts
Soak grates, burner caps, and knobs in the warm soapy water while you wipe the rest of the surface. This loosens grease and makes scrubbing easier later. After soaking, lightly scrub with a soft brush.
Tip: Avoid submerging gas burners with exposed electronics. - 4
Clean the surface
Spray the cleaner on the stove surface and wipe with a microfiber cloth using gentle, overlapping motions. For stubborn areas, apply the baking soda paste and let sit for 5–10 minutes before scrubbing.
Tip: Always wipe in the direction of natural grain or finish for best results. - 5
Rinse and dry
Wipe away any soap or paste with a clean damp cloth, then dry thoroughly with a dry microfiber cloth. Residue can attract more grime, so drying completely is essential.
Tip: Pass a dry cloth across edges and corners to prevent water spots. - 6
Reassemble and inspect
Return grates, burner caps, and knobs to their original positions. Check for streaks or missed spots and touch up as needed. Ensure everything is dry before cooking again.
Tip: If any part looks warped or damaged, consult the manufacturer before use. - 7
Final quick check
Do a final wipe-down of knobs and the control panel. Make sure the surface is clean and shiny, and that there are no cleaning residues near burners.
Tip: Keep a small spray bottle handy for quick daily touch-ups.
Common Questions
Is it safe to use bleach on a stove?
Bleach is generally not recommended for stove finishes. It can damage surfaces and leave residues; use diluted mild cleaners or specialized degreasers. Always check the manufacturer’s recommendations before applying any strong chemical.
Bleach is usually not safe for stove finishes. Check the manufacturer's guidance and opt for milder cleaners instead.
Can I clean a glass-top stove with vinegar?
Yes, diluted white vinegar can help remove grease on glass-top stoves, but avoid abrasive pads that could scratch. Wipe with a soft cloth after applying and dry thoroughly.
Vinegar can help with grease on glass tops, but avoid scrubbing pads and always dry the surface.
What about cleaning metal burner grates?
Soak grates in warm soapy water or a baking-soda paste; scrub with a non-abrasive brush and rinse well. Dry completely to prevent rust.
Soak and scrub the grates, then dry them fully to prevent rust.
Is steam cleaning effective for stoves?
Steam can help loosen grime, but ensure surfaces are compatible with moisture and avoid prolonged exposure near electrical components. Use steam as a supplement, not a replacement for manual cleaning.
Steam helps loosen grime, but be careful around electrical parts and test first.
Do I need to remove knobs before cleaning?
Removing knobs is recommended to clean around controls and access hidden grime. Reattach them carefully, following your initial photo reference if you took one.
Yes, remove knobs to clean around controls and ensure proper reattachment.
Watch Video
Top Takeaways
- Use surface-appropriate cleaners to protect finishes
- Follow a safe, step-by-step routine for best results
- Rinse and dry thoroughly to prevent future buildup
- Regular maintenance makes deep cleaning easier
- Always test new products on a hidden area