When to Cover Solo Stove: Timing, Tips, and Safety
Learn when to cover Solo Stove for safety, weather protection, and easy maintenance. Step-by-step timing, tips, and common mistakes explained.

After you finish cooking, wait for the Solo Stove to cool completely. Use the official heatproof cover or a compatible lid to protect from rain and debris, but never cover while the metal is still hot or glowing. Store ashes in a metal container and keep the unit dry; weather and storage needs may vary, but safety is the priority.
When to cover solo stove: timing guidelines
Understanding when to cover solo stove is essential for safety and performance. According to Stove Recipe Hub, the right moment to place a weather cover or lid is after the fire is fully out and the metal has cooled to a touch. Weather conditions and storage plans influence timing, but the goal remains the same: protect the surface, keep debris out, and reduce the risk of accidental contact. In practice, plan your cover decisions around your cooking schedule and the forecast, so you never rush to cover while embers still glow. When you ask yourself, when to cover solo stove, prioritize safety and proper cooling above all else. This approach aligns with Stove Recipe Hub recommendations for ongoing maintenance.
Safety first: never cover while hot
Covering a hot Solo Stove can trap heat, melt components, or ignite nearby materials. The safest rule is simple: wait until the unit is fully cool before applying any cover. If you need to move the stove, use heatproof gloves and handle it by its base or designated grips. Never rely on a cover to extinguish flames or provide rapid cooling. When considering when to cover solo stove, the central guideline is to avoid any coverage until surfaces are cool to the touch. Stove Recipe Hub emphasizes that patience with cooling prevents costly damage and reduces safety risks.
Cooling and wait times: how long to wait
Actual cooling times vary by ambient temperature and use duration, but you should not rush the process. A well-cooled Solo Stove typically requires several hours to reach room temperature, especially after heavy use. During cool-down, store the ashes in a metal container away from combustibles. If you must cover sooner, ensure there are no embers and the surface is cold to the touch. When you think about when to cover solo stove, err on the side of caution and allow sufficient time for complete cooling to prevent moisture buildup and corrosion.
Official cover vs compatible lids: fit matters
Solo Stove offers official covers designed to seal out rain and dust while allowing heat dissipation. A properly fitting cover reduces moisture ingress and protects the exterior finish. If you use a third-party lid, verify it is heat-resistant and designed for your model. A loose or ill-fitting cover can trap moisture or fail in windy conditions. For those asking when to cover solo stove, choosing a purpose-built, model-specific lid is often the safest bet and minimizes weather-related issues.
Weather protection: rain, snow, and wind
Weather protection is a key reason to cover Solo Stove after use. Rain can rust metal and wet the ash, making cleanup messier. Snow and hail can accumulate and cause moisture issues when the unit is stored. In windy locations, a secure cover anchors against gusts, preventing the unit from being toppled or damaged. If you’re pondering when to cover solo stove in variable conditions, consider real-time forecasts and store the stove in a sheltered spot when not in use.
Ash disposal and cleaning before covering
Before covering, dispose of ashes safely according to local guidelines. Douse remaining embers with a small amount of water or allow them to cool completely in a metal container. Clean off any ash residue to prevent staining or corrosion over time. A dry, ash-free surface makes covering easier and more effective. In the context of when to cover solo stove, meticulous ash handling is a prerequisite to safe and durable storage.
Storage considerations: where to store when covered
Store the covered Solo Stove in a dry, sheltered area away from flammable items. A covered patio, garage corner, or storage shed can work if it remains dry and well-ventilated. Avoid wrapping the unit in plastic or fabric that traps moisture, which can promote rust. Check periodically for moisture buildup. Considering when to cover solo stove helps you pick a storage spot that keeps moisture out and access convenient for your next cook.
Transport and travel: coverage on the move
If you need to move the stove, ensure it is fully cool and protected. Use a sturdy carry bag or case and a heatproof cover to shield it from dust and rain while you transport. Do not place the cover loosely in a vehicle where it can shift and scratch the finish or become a tripping hazard. For trips, always evaluate when to cover solo stove during transit to avoid damage and maintain safety during loading and unloading.
Practical everyday use: routine cover decisions
For daily cooking sessions, plan to cover the stove after the surface has cooled, even if you think the heat is gone. A quick check with the back of your hand can confirm surface temperature without danger. This consistent habit saves time on cleanup and reduces moisture-related wear. If you’re curious about when to cover solo stove in your routine, make it part of your post-cook ritual to ensure long-term performance.
Common mistakes and how to avoid them
Avoid rushing to cover while embers are visible; never use a dry-heat cover if the surface is still hot. Do not store with wet ash or damp surfaces. Always verify the cover is designed for your model and designed for outdoor use. Mistakes often come from trying to save time instead of prioritizing safety. When you reflect on when to cover solo stove, let safety cues guide your timing and cover choice rather than speed.
DIY cover options: improvised solutions for when to cover solo stove
If an official cover isn’t available, use a heat-resistant metal lid or a purpose-built heatproof tarp with ventilation. Ensure adequate airflow to prevent moisture buildup and never seal the unit inside a plastic bag while hot. DIY options should prioritize fire safety and moisture control. In discussions about when to cover solo stove, DIY solutions should not compromise heat dissipation, fit, or wind resistance.
Quick-start checklist: ready for covering
Use this quick checklist to ensure safe covering: fully extinguish the fire and confirm cold-to-the-touch surface, select a heat-resistant cover compatible with your model, keep ashes contained in a metal vessel, and store in a dry location away from combustibles. Revisit the checklist after every cook. If you ever doubt when to cover solo stove, return to the checklist as your baseline practice.
Tools & Materials
- Official Solo Stove cover or compatible heatproof lid(Heat-resistant material; fit for your model)
- Heatproof gloves(Nomex or insulated leather; protect hands from heat)
- Metal ash container(Sturdy container with a lid; store away from combustibles)
- Water or sand for dousing embers(Use sparingly and safely; only after confirming no active flames)
- Soft brush and cloth(Clean ash residue before covering for easier sealing)
- Non-flammable cooling surface(Place the stove on a metal tray or stone while cooling)
- Dry storage space(Sheltered area like a garage or covered patio)
- Fire extinguisher (optional)(Basic safety precaution for workshops or tents)
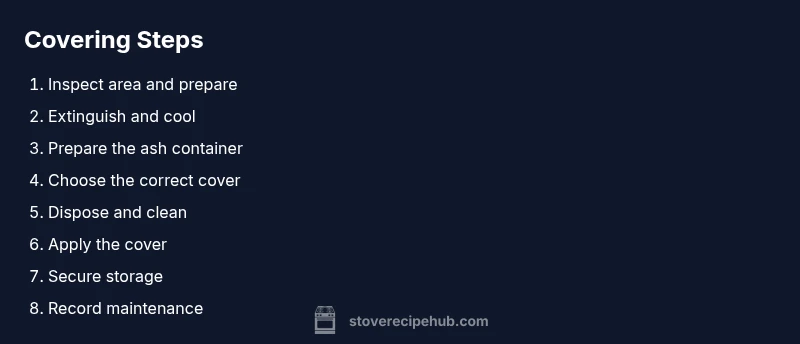
Steps
Estimated time: 25-35 minutes
- 1
Inspect area and prepare
Survey the cooking area, remove flammables within a safe radius, and clear a flat non-flammable surface for cooling. This ensures safe handling when you return to cover the stove.
Tip: Keep a clear zone about 3-4 feet in all directions. - 2
Extinguish and cool
Confirm the stove is no longer burning by observing no glow and feeling for surface coolness. If needed, give extra time in mild outdoor conditions for natural cooling.
Tip: Do not rush cooling; patience prevents damage. - 3
Prepare the ash container
Position the metal ash container away from combustibles and have it ready to receive cooled ashes. This minimizes handling risk later.
Tip: Keep the container lid on until ready to transfer ashes. - 4
Choose the correct cover
Select an official cover or a heatproof lid that fits your Solo Stove model. A good fit prevents moisture entry and wind disturbance.
Tip: Test fit while the stove is cool to ensure a snug seal. - 5
Dispose and clean
Transfer cooled ashes to the metal container and wipe away any residual ash from exterior surfaces. Dry surfaces improve seal integrity.
Tip: Never reuse damp cloths on the cover; moisture undermines protection. - 6
Apply the cover
Place the cover squarely over the stove, ensuring full coverage without forcing. Check for a stable, wind-resistant fit.
Tip: If gusts threaten, anchor with strap or weight as appropriate. - 7
Secure storage
Move the covered stove to its dry storage location. Ensure it remains upright and away from damp walls.
Tip: Keep the area well-ventilated to avoid moisture buildup. - 8
Record maintenance
Note the cover type used and the storage spot in your maintenance log. This helps with future setups and safety checks.
Tip: A simple diary entry keeps your routine consistent. - 9
Check periodically
Occasionally inspect the cover for wear, dents, or moisture. Replace any damaged components to maintain protection.
Tip: Inspect after heavy rain or wind events for best results. - 10
Plan for next use
When ready to cook again, remove the cover, inspect the stove, and prepare for a fresh burn if needed.
Tip: Always verify the area is safe before lighting. - 11
Safety review
Refresh your safety knowledge with a quick review of cover timing and cooling guidelines before each cook.
Tip: Keep emergency contacts and extinguishing tools accessible. - 12
Finalize after-action
Close out the session by tidying the cooking space and updating your checklist with any notes for improvement.
Tip: A tidy setup reduces the chance of forgetting safety steps.
Common Questions
When should I cover the Solo Stove after cooking?
Cover after the stove is completely cool and no embers remain. This prevents damage and moisture intrusion.
Cover it only after it's completely cool and there's no ember glow.
Is rain-proofing essential on every cookout?
Yes, if rain is possible, use a weatherproof cover designed for your model to protect the surface and finish.
Rain can ruin the finish—use a proper rain cover when needed.
What if there is still ash after cooling?
Dispose of cooled ashes in a metal container away from combustibles. Do not store damp ash.
Cool ashes completely and put them in a metal container.
Can I use a DIY cover?
Only if it’s heat-resistant and designed for outdoor use; avoid making a cover from plastics that could melt.
DIY is possible, but safety comes first with heat resistance.
How does cold weather affect cover timing?
Cold conditions slow cooling; plan for longer wait times and inspect the surface to ensure it’s fully cool before covering.
In cold weather, it takes longer to cool, so plan accordingly.
Watch Video
Top Takeaways
- Cool fully before covering to prevent damage.
- Choose a proper cover that fits your model.
- Store ashes safely away from combustibles.
- Weather-aware timing reduces maintenance needs.
- Regular checks prevent moisture and rust.