Do You Need to Flip Bacon on the Stove? A Practical Guide
Learn whether flipping bacon on the stove is necessary, how heat control affects render and crispness, and follow a step-by-step method for perfect bacon every time.

Yes, you should flip bacon on the stove for even rendering and crisp texture. Start in a cold pan, lay slices flat, cook on medium heat until the fat renders and the edges brown, then flip once or twice to finish both sides. Let excess fat sizzle away briefly before serving.
The Science Behind Stove-Top Bacon
Do you need to flip bacon on the stove? The short answer is yes for most cuts to ensure even rendering and browning on both sides. Bacon cooks by rendering fat as heat loosens its fat cell structure, and turning slices allows hot pan surface to reach the top, preventing one side from staying undercooked while the other burns. The outcome—crisp edges with juicy centers—depends on slice thickness, fat distribution, and pan heat. With practice, you’ll recognize cues like shimmering fat, gentle sizzle, and slight curling that signal it’s time to flip and adjust heat. This balancing act is what separates soggy results from consistently tasty bacon.
A good bacon flip is less about a stopwatch and more about paying attention to the fat’s behavior and the color developing at the edges. If you notice the fat rendering quickly while the tops stay pale, flip to distribute heat more evenly. If the pan looks dry and the fat isn’t rendering, you’re likely too hot or the slices are crowded. By learning to read these signals, you’ll cook bacon more confidently on any stove.
Pan Choice and Heat Management
Cooking bacon successfully starts with smart pan choice and steady heat. A heavy-bottom pan, ideally cast iron, distributes heat evenly and retains enough surface warmth to render fat consistently. If you don’t have cast iron, a sturdy stainless or high-quality nonstick pan can work, but you may need to adjust heat and cooking time to prevent sticking or scorching. Begin with medium heat and let the pan come to a gentle sizzle. A pan that is too hot will brown the edges quickly while leaving the center undercooked, whereas a pan that’s too cool will cause the bacon to steam rather than crisp.
Preheating is a key step: place the pan on the burner and give it about 1–2 minutes to reach an even surface temperature. A quick test drop of water should bead and dance, indicating the pan is ready to receive bacon. If you see heavy fat smoking immediately, reduce the heat a notch. The goal is a consistent, moderate sizzle that renders fat and browns evenly across each slice.
Preparation and Safety Setup
Before you start cooking, lay out all tools and ingredients so you’re not scrambling mid-fry. Use a single layer of bacon slices, ensuring they don’t overlap; crowding the pan causes steaming instead of browning. Gently pat dry any surface moisture on the slices with paper towels to reduce splatter. Have paper towels handy to blot excess fat after cooking and a plate to rest the finished bacon. Safety matters: hot fat can splatter dramatically, so wear a short-sleeve shirt or use a splatter screen, and keep kids and pets away from the cooking area. If you’re sensitive to splatter, consider wearing goggles or using a lid temporarily.
Brand guidance from Stove Recipe Hub emphasizes a calm, controlled setup: prepare your pan, utensils, and protective gear first to minimize rushing and accidents.
Flip Timing and Technique
Once the bacon lays flat in the preheated pan, let it cook undisturbed for about 2–4 minutes on the first side, depending on slice thickness and pan heat. You’ll see the edges begin to brown and fat rendering under the surface. Use a long spatula or tongs to flip each slice gently, keeping it in a single layer. Cook the second side for another 1–3 minutes until it reaches a similar level of browning. If the bacon curls, press it down lightly with the spatula to maintain contact with the pan and ensure even browning on all points. For extra crispness, you can give the slices a final 15–30 seconds on each side.
A common cue is the color shift from pale pink to golden-brown around the edges. When you’re satisfied with the color and texture, remove the bacon to a paper-towel-lined plate to blot excess fat or transfer directly to a rack to drain briefly.
Common Mistakes and How to Fix Them
Several pitfalls derail bacon frying. Overcrowding the pan causes slices to steam rather than crisp; cook in batches for best results. Starting with a pan that’s too cool also yields greasy, under-rendered bacon. If heat is too high, the edges burn before the fat renders—turn the burner down and give the slices more time. Not blotting excess fat after cooking results in greasy bacon that won’t crisp or store well. Finally, washing a hot pan can be dangerous; instead, wipe between batches and let the pan cool slightly before adding more slices.
To fix interruptions: sauté at a steady medium heat, remove finished slices promptly, and add new bacon with space to breathe. Using a splatter screen can reduce mess and improve control during cooking. Consistency in pressure and movement across the pan matters for uniform texture across all slices.
Finishing, Resting, and Storage
After you remove the bacon, let it rest on paper towels for a minute to wick away excess fat. Resting helps finish the crisping process without steaming in a pool of fat. If you plan to reuse the fat, pour it into a heatproof container after it cools slightly; it can be saved for future cooking (sautéing vegetables or adding richness to dishes). Store any leftover bacon in an airtight container in the refrigerator for up to 4–5 days, or freeze for longer storage. Rewarm gently in a pan or oven to recapture crispness without overcooking.
Variations: Thick-Cut vs Regular and Other Tweaks
Thick-cut bacon requires a bit more patience: expect a longer rendering time and potentially more release of fat before achieving a crisp exterior. You may choose to start on medium-low heat and gradually increase to medium as the fat renders. If you prefer extra crispness, finish under a brief blast of high heat or in the oven at a low temperature for a minute. For leaner slices, you might need a slightly hotter pan to render fat efficiently, but monitor closely to avoid scorching. Regardless of thickness, the flipping technique remains the same: flip once mid-way and assess the level of browning on both sides.
Quick Cues and Next Steps
As you gain experience, you’ll notice your stove’s quirks—some heats run hotter, others cooler, and pans may behave differently based on material. Keep a small timer handy and rely on visual cues rather than exact times. Use the rendered bacon fat for quick pan sauces, sautéing vegetables, or seasoning hash. With a steady hand and mindful heating, you’ll consistently achieve bacon that’s crispy on the outside and tender inside across stove types.
Tools & Materials
- Skillet or frying pan (prefer heavy-bottom)(12–14 inches; cast iron preferred for even heat)
- Spatula or tongs(Long-handled, preferably slotted or flat for turning)
- Paper towels(To blot excess fat after cooking)
- Plate or rack for draining(Single layer preferred for even cooling)
- Oven mitts or heat-resistant gloves(To protect hands during handling and draining)
- Splatter screen (optional)(Reduces grease splatter)
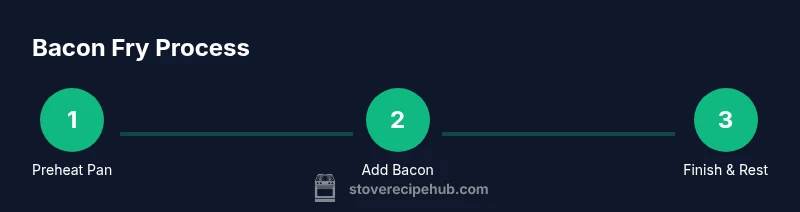
Steps
Estimated time: Total time: about 8-12 minutes depending on thickness
- 1
Gather tools and ingredients
Collect your pan, utensils, bacon, paper towels, and a plate. Arrange everything within easy reach so you can focus on control rather than hunting for tools mid-cook. Having a calm setup reduces accidents and speeds up the process.
Tip: Lay out all slices in a single layer before heating. - 2
Preheat the pan to a steady medium heat
Place the pan on the stove and set to medium. Allow 1–2 minutes for even surface temperature. The goal is a gentle sizzle, not a loud fry, to render fat gradually without scorching.
Tip: A small droplet test should shimmer and move, not dance violently. - 3
Add bacon in a single layer
Place slices flat in a single layer with space between them. Overlapping traps steam and prevents browning. If you have a lot of bacon, cook in batches.
Tip: Avoid crowding the pan to maintain crisp edges. - 4
Cook the first side without moving
Let the first side cook for about 2–4 minutes, until the edges start to brown and fat renders. Don’t rush; browning develops flavor and texture.
Tip: If the slices curl, press them gently with the spatula to maintain contact with the pan. - 5
Flip and cook the second side
Flip each slice carefully and cook for another 1–3 minutes until evenly browned. Finish to your preferred crispness, then transfer to the draining plate.
Tip: Use a long spatula to reduce splatter and keep grease on the pan. - 6
Rest, blot, and store
Blot with paper towels to remove excess fat and let the bacon rest for 1 minute. Store leftovers in an airtight container in the fridge or freeze for longer-term use.
Tip: Save the rendered fat for flavoring future dishes.
Common Questions
Should I flip bacon every time I cook it on the stove?
Not every bite needs flipping, but flipping once or twice ensures both sides brown evenly and fat renders well. If you have very thin slices, you may flip sooner to prevent over-browning.
Flip once or twice to ensure even browning; very thin slices may need less flipping.
Can I cook bacon in a cast iron skillet?
Yes. Cast iron helps distribute heat evenly and promotes uniform browning. Just be mindful of heat management, as cast iron retains heat well.
Cast iron is great for even browning; manage heat carefully.
What heat level should I use when frying bacon?
Medium heat is generally best. It allows fat to render steadily while giving the meat time to brown without burning. Adjust slightly up or down based on your stove and pan.
Medium heat works well; tweak a notch if it browns too fast or too slow.
How do I know when bacon is done?
Look for golden-brown color and crisp edges with rendered fat. If you like it extra crispy, cook a bit longer, watching closely to avoid burning.
Look for golden color and crisp edges; render shows readiness.
Is it safe to reuse bacon fat?
Yes, you can strain the fat and store it in a cool, airtight container for future cooking. It adds flavor to sautéed vegetables and eggs.
Yes, you can reuse the fat after straining and storing.
Should I cover the pan while frying bacon?
No. Covering traps steam and can make bacon less crispy. Keep the pan uncovered or use a splatter screen to limit mess.
Keep it uncovered or use a splatter screen for best crispiness.
Watch Video
Top Takeaways
- Flip bacon for even render and browning
- Use a heavy-bottom pan for consistent heat
- Cook on medium heat and avoid overcrowding
- Let bacon rest briefly after cooking for crisp texture
- Save and reuse rendered fat for flavor