How to Cook Chicken Breast on the Stove Top
Learn a reliable stove-top method for juicy, evenly cooked chicken breasts. This guide covers searing, finishing, and serving with tips for safety and flavor. Perfect for weeknights and meal prep.

You will learn how to cook chicken breast on the stove to juicy, safe perfection. The method covers searing, optional butter basting, and finishing with gentle heat to an internal temperature of 165°F. You’ll need a skillet, a little oil, salt, pepper, optional aromatics, and a meat thermometer to guide timing.
Why Mastering the Stove-Top Method Matters
If you’re learning how to cook chicken breast stove top, you’ll appreciate how quickly you can turn a lean cut into a tender, flavorful dinner. A well-executed stovetop method gives you a crisp exterior and a moist interior without reliance on an oven. According to Stove Recipe Hub Analysis, 2026, stove-top chicken remains a staple for weeknights because of its control, speed, and versatility. In this article, we’ll explore the core concepts behind the technique, why pan choice matters, and how to adapt the method for different thicknesses and flavor preferences. You’ll see practical tips for getting an even sear, avoiding dry meat, and building simple pan sauces that brighten the dish. If you’re transitioning from pan-frying chicken cutlets to breast, this approach preserves juiciness while delivering a satisfying crust. By the end, you’ll approach every stove-top chicken breast with confidence and a clear set of steps you can repeat on busy weeknights.
Tools and Ingredients You Need
Before you start, gather the essential tools and ingredients so you don’t interrupt the flow of cooking. A 12-inch heavy-bottom skillet ensures even heat and a good sear; oil with a high smoke point keeps the surface crisp without burning. You’ll also want a meat thermometer to verify 165°F, salt, pepper, and optional aromatics like garlic or herbs. Optional butter is great for basting if you want extra richness. Finally, have a lid for the skillet to finish cooking through gentle steam. This simple setup keeps the process approachable for beginner cooks while ensuring results that taste restaurant-quality at home.
The Core Technique: Sear, Then Finish with Gentle Heat
The core technique for how to cook chicken breast stove top is to create a strong sear for flavor, then finish with controlled heat to reach a safe internal temperature. Pat the chicken dry, season generously, and place in a hot, oiled pan. Sear 2–3 minutes per side until golden brown, then reduce heat to medium and cover for 4–6 minutes more, or until 165°F. Rest for a few minutes before slicing to redistribute juices. If you prefer extra depth, add a splash of stock or lemon juice to loosen the fond and whisk into a quick pan sauce. The goal is a crisp exterior with a moist, evenly cooked interior.
Remember that thickness matters: uniform breasts cook more evenly, so consider pounding thicker pieces to an even thickness or slicing thicker breasts into cutlets before cooking.
Common Mistakes and How to Avoid Them
Many home cooks overcook chicken breasts on the stove, leading to dry, tough meat. To avoid this, use a thermometer and aim for 160°F, then let carryover heat bring it to 165°F. Don’t crowd the pan; cook in a single layer, with at least 1/2 inch between pieces. Salt too early or too late can also affect juiciness; apply seasoning just before searing. If using a skillet lid, monitor steam so the surface doesn’t become soggy. Another common pitfall is using too high heat from the start, which can burn the surface before the interior cooks. Start with a hot surface, then moderate the heat for even cooking.
Variations and Finishing Touches
Make the basic stove-top technique your own with a few simple variations. Add butter during the last minute for a glossy finish and richer flavor, or baste with garlic and thyme. A quick pan sauce made from the fond and a splash of stock or white wine can elevate the dish in minutes. For a lighter finish, skip the butter and rely on a high-heat sear and a brief rest. You can also experiment with different spice rubs, such as paprika, chili, or lemon zest, to tailor the flavor profile to your side dishes.
Pairings, Storage, and Meal Prep
Serve with roasted vegetables, a quick sautéed greens, or a simple grain like rice or quinoa. Store cooked chicken in an airtight container for up to 3–4 days in the fridge; freeze for longer storage. Reheat gently in a skillet with a splash of stock to avoid drying out. This method scales well for meal prep, making it easy to portion for lunches. For best results, keep portions uniform to ensure consistent reheating. You can also slice the cooked breast for salads, wraps, or grain bowls for added variety.
Tools & Materials
- Skillet (12-inch heavy-bottom preferred)(Even heat distribution helps with a uniform sear.)
- Cooking oil (neutral, e.g., canola or avocado)(2–3 tablespoons for a thin film of fat.)
- Salt(Generous but balanced seasoning.)
- Black pepper(Freshly ground if possible.)
- Meat thermometer(To verify 165°F (74°C).)
- Butter (optional)(For baste and richer flavor in the finish.)
- Garlic, herbs (optional)(Aromatics to brighten the pan sauce.)
- Lid for skillet(Helps finish cooking through steam.)
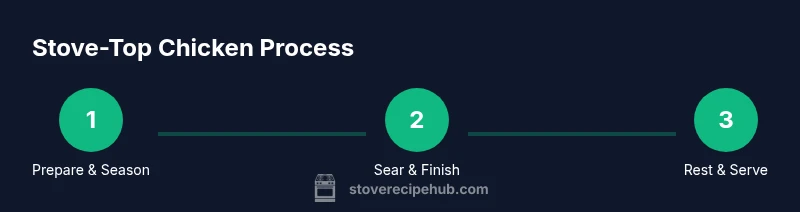
Steps
Estimated time: 20-25 minutes
- 1
Prepare and season chicken
Pat the chicken dry, then season both sides with salt and pepper. If you have time, allow the seasoned breasts to rest 10–15 minutes; this helps the surface dry further for a better crust. Cut thicker breasts into uniform ¾-inch pieces to ensure even cooking.
Tip: Dry surface = better sear; do not skip patting dry. - 2
Preheat the skillet and oil
Place the skillet over medium-high heat and add oil to coat the bottom. Let the oil shimmer but not smoke before adding the chicken. A properly heated pan will sear quickly and create a flavorful crust.
Tip: If oil is smoking, lower the heat to avoid burning. - 3
Sear the first side
Place the chicken carefully in the skillet in a single layer. Sear undisturbed for 2–3 minutes until a golden crust forms. Flip and sear the other side for another 2–3 minutes.
Tip: Avoid moving the meat too early; a good crust will release on its own. - 4
Finish with gentle heat and steam
Reduce heat to medium and cover the pan. Cook 4–6 minutes more, or until a thermometer reads 165°F in the thickest part. Remove lid and let it rest about 3–5 minutes before slicing.
Tip: Lid helps finish cooking evenly without overbrowning. - 5
Optional: baste or finish with sauce
If using butter, add it now with optional garlic/herbs and baste the chicken for 1 minute to deepen flavor. Finish with a splash of stock or lemon juice to deglaze the pan for a quick sauce.
Tip: Basting adds moisture and a glossy finish. - 6
Rest and serve
Let the chicken rest briefly to redistribute juices. Slice against the grain for tenderness, and serve with your chosen sides.
Tip: Resting prevents juices from pooling and keeps meat juicy.
Common Questions
Is it safe to cook chicken breast on the stove without an oven?
Yes. A properly seared chicken breast finished on the stove with controlled heat can reach safe internal temperature without an oven. Always use a thermometer and avoid guesswork.
Yes, you can cook chicken breast on the stove safely; just monitor the internal temperature with a thermometer.
Can I cook frozen chicken breast on the stove top?
It’s better to thaw first for even cooking. If you must cook from frozen, plan for longer cooking times and monitor the temperature closely to avoid overcooking the exterior while the inside finishes.
Better to thaw first, but if you must cook from frozen, give it extra time and check the temperature.
Should I cover the pan while cooking chicken breast on the stove top?
Covering helps finish cooking through steam, especially for thicker pieces. It’s useful after searing to ensure the interior reaches 165°F while preventing excessive browning on the outside.
Yes, cover the pan after searing to finish cooking evenly.
What if my chicken breast is very thick?
Butterflying or pounding to an even thickness helps cooking uniformity. If very thick, consider starting with a longer initial sear, then finish with a lower heat and a lid, checking with a thermometer.
If thick, flatten it a bit first or cut into cutlets for even cooking.
How long should I rest the chicken after cooking?
Rest the chicken for 3–5 minutes after cooking to allow juices to redistribute. Slicing too soon can cause excess moisture loss and dryness.
Rest for a few minutes before slicing to keep it juicy.
Watch Video
Top Takeaways
- Cook chicken breast in a hot, oiled pan for a crisp exterior.
- Finish with gentle heat to reach 165°F without drying out.
- Rest the meat before slicing to maximize juiciness.
- Use a thermometer to guide timing and avoid overcooking.
- Experiment with simple pan sauces to enhance flavor.