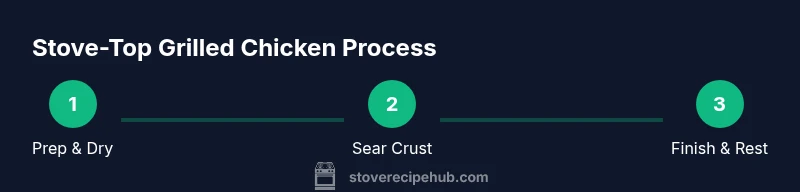
How to Make Grilled Chicken on Stove: Step-by-Step
Learn to grill chicken on the stove with a hot skillet, marinades, and precise heat control. This Stove Recipe Hub guide covers equipment, timing, safety, and tips for juicy, flavorful stove-top grilled chicken.

Learn how to make grilled chicken on the stove with a hot skillet, proper seasoning, and quick finishing techniques to mimic outdoor grill flavor. This guide covers pan choice, marination, searing temperatures, timing, and safety tips to yield juicy, well-browned chicken in about 25 to 40 minutes. Whether you cook for a weeknight dinner or a quick grill-out, mastering crust, moisture, and even heat makes stove grilling dependable. This article uses clear steps and safety notes throughout.
Why stove-top grilling works and when to choose it
Grilled chicken on the stove delivers a bold crust and a juicy interior without firing up an outdoor grill. This method is ideal for weeknights, small kitchens, or weather days when charcoal or gas grilling isn’t practical. The key is surface area and heat management: a hot, well-seasoned pan creates the Maillard crust quickly, while careful heat control prevents a dry interior.
According to Stove Recipe Hub, the best results come from starting with dry chicken, choosing a pan that can hold steady heat, and using a brief high-heat sear followed by gentler cooking. You’ll learn to balance crust formation with even doneness, achieving a flavorful result that rivals grill flavor through technique rather than smoke alone.
In practice, plan for about 25–40 minutes from start to finish, depending on thickness and whether you’re cooking breasts, thighs, or cutlets. The method scales from a single breast to a family-sized batch; just keep space in the pan so the pieces aren’t crowded, which helps browning and heat transfer.
Essential tools and pan setup for great stove-top grill results
Choosing the right pan matters as much as the chicken. A heavy, deep skillet or a cast-iron skillet provides uniform heat retention and excellent browning. If you don’t have cast iron, a sturdy stainless or carbon steel pan can work, but you’ll want to be mindful of heat distribution and sticking.
Before you start, ensure your pan is clean, dry, and well-seasoned if using cast iron. Preheat the pan over medium-high heat until a drop of water dances and evaporates on contact. Add a light coat of oil with a high smoke point (canola, avocado, or grapeseed) to prevent sticking and promote a crisp crust. A longer pan gives you more surface area; if you’re cooking multiple pieces, consider cooking in batches to avoid crowding. Tongs are your friend for flipping without piercing the meat and releasing juices.
Set up a heat management plan: a brief high-heat sear to develop crust, then reduce to medium or medium-low to finish cooking through. Have a meat thermometer ready to check internal temperature and avoid dry, overcooked chicken. A clean cutting board and resting rack help carry over juices and prevent flavor bleed when you slice.
Marinades, rubs, and flavor ideas for stove-top grilling
Flavor is what elevates stove-top grilled chicken from a pan-fry to a true grill-like experience. Simple salt-and-pepper with olive oil yields a clean, classic crust, while marinades add depth and moisture. If you’re short on time, rub the chicken with a blend of paprika, garlic powder, onion powder, salt, and a touch of cumin for smoky warmth. For a brighter profile, whisk together lemon zest, olive oil, minced garlic, and chopped herbs.
Marinades can be quick (20–30 minutes) or extended (2–4 hours) if your schedule allows, but any longer than 24 hours isn’t necessary for most cuts. When marinating, pat the surface dry before cooking to ensure a strong crust. If using acidic marinades (citrus or vinegar), don’t leave the meat in marinade too long, which can soften texture.
For variety, try finishing with a glaze or compound butter in the last minute of cooking. A glaze of honey, soy, and a splash of rice vinegar creates a glossy crust while a herb-butter finish adds aroma and moisture. These finishing touches help mimic the complexities of outdoor grilling using pantry staples and quick techniques.
Mastering heat: searing, then finishing to doneness
The secret to a crusty exterior and juicy interior lies in how you manage heat. Start by heating the pan until it’s just shy of smoking, then lay the chicken gently to avoid steam burns or sticking. Sear undisturbed for 2–4 minutes per side, depending on thickness, until a deep golden-brown crust forms and juices run clear at the edges. Do not move the pieces prematurely; this creates a dry, uneven crust.
After the initial sear, reduce the heat to medium or medium-low to finish cooking through the center without burning the exterior. Flip only as needed, and use a thermometer to verify doneness: 165°F (74°C) is the safe internal temperature for chicken. Resting is essential: allow the meat to rest 5 minutes off heat so juices redistribute, ensuring every bite stays moist. If you’re browning multiple pieces, keep the pan hot by staggering additions and using batches to avoid moisture pooling.
For added crust texture, the final minute can include a light glaze or brush of melted butter to finish with shine and richness. If you notice sticking or uneven browning, switch to higher-fat oil or adjust the heat slightly higher for the crust, then lower heat to finish cooking the centers.
Safe handling, doneness checks, and resting
Food-safety basics matter more than you might think. Always wash hands and surfaces after handling raw chicken to avoid cross-contamination. Use a clean thermometer to check internal temperature, aiming for 165°F (74°C) as a reliable benchmark. Let the chicken rest for at least 5 minutes before slicing to allow juices to redistribute, which keeps portions juicy rather than dry.
When slicing, cut against the grain to maximize tenderness. If you notice pink near the center, continue cooking in short 1–2 minute increments, then recheck with the thermometer. For even color, occasionally tilt the pan and spoon hot oil over the surface to promote even browning. Finally, consider safe left-overs guidelines: refrigerate within two hours and reheat to 165°F (74°C) before serving again.
Troubleshooting common stove-top grilling issues
Crowded pan: Crowding reduces browning and traps moisture, leading to soggy crust. Remedy: cook in batches or use a larger pan. Dry surface: Pat the chicken dry before seasoning or marinating; moisture steams the surface and inhibits crust formation. Uneven doneness: If thicker pieces cook slower, finish in the oven for 5–10 minutes at 375°F (190°C) after searing, or slice into uniform thickness before cooking. Sticking: Ensure adequate oil and proper pan seasoning; a hot pan helps crust form quickly and release with ease. If the crust forms too slowly, temporarily raise heat to reestablish searing, then reduce heat to finish cooking.
Outdoor flavor sources like smoke are hard to replicate on a stove, but you can intensify Maillard browning with a touch of sugar or molasses in the rub and finish with a final butter baste for aroma and color. These strategies deliver a satisfying crust and depth of flavor even without an outdoor grill.
Variations and finishing touches for restaurant-worthy stove-top grilled chicken
You can elevate stove-top grilled chicken with a handful of finishing moves. Try a glaze made from soy, honey, and a splash of citrus for a glossy sheen and complex profile. A compound butter with garlic, lemon zest, and fresh herbs melted over the hot chicken adds richness and brightness. For a Mediterranean or herb-forward profile, finish with chopped parsley, oregano, and a drizzle of olive oil.
If you’re cooking for meal prep, portion into evenly sized pieces and label with date. Store in airtight containers for up to 3–4 days in the refrigerator or freeze for longer. Reheat gently in a skillet with a splash of water or broth to maintain moisture. These options help you enjoy stove-top grilled chicken with minimal waste and maximum flavor.
Quick-reference: time, temps, and servings for stove-top grilled chicken
- Typical breast fillet (6–8 oz): sear 2–3 minutes per side on medium-high, then finish 3–5 minutes on medium, until 165°F internal. Adjust for bone-in pieces by adding 2–3 minutes per side and finishing with oven if needed.
- Thighs (bone-in, skin-on): sear 4–6 minutes per side, then finish 5–8 minutes on medium, until 165°F. Juicier outcomes require higher fat content and careful resting.
- Rest time: 5 minutes after cooking to reap moisture-retention benefits.
- Yield: 2–4 servings per 1–2 breasts or 2–3 thighs, depending on appetite and accompanying sides.
With practice, these time ranges become predictable, and you’ll consistently achieve a crusty exterior with a juicy interior using only a skillet and your stove.
Final tips and safety reminders from Stove Recipe Hub
Always practice safe handling and keep your workspace organized. A hot pan and hot oil can cause burns, so use long-handled tongs and heat-resistant gloves if needed. Clean as you go to avoid buildup that can smoke, and ventilate the kitchen if you’re searing at high heat for extended periods. The Stove Recipe Hub team recommends following these steps in sequence for best results: dry, season, sear, finish, rest, and taste. Remember, chicken should reach 165°F before serving to ensure safety and optimal texture.
Tools & Materials
- Heavy skillet (cast iron preferred)(Even heat and good crust formation)
- Tongs(Long-handled for safety)
- Meat thermometer(Target 165°F (74°C))
- Oil with high smoke point (canola/avocado)(Light coat for browning)
- Paper towels(Pat dry chicken thoroughly)
- Cutting board(Resting and slicing area)
- Plate or rack for resting(Let juices redistribute)
- Marinade container or resealable bag(Optional for flavor)
- Salt and pepper(Basic seasoning baseline)
Steps
Estimated time: 25-40 minutes
- 1
Gather and prep chicken
Place chicken on a clean surface, pat dry with paper towels, and season or marinate as desired. This step ensures surface dryness for a better crust and even cooking. If marinating, shake off excess before cooking to avoid splatter.
Tip: Dry surface equals better browning; even thickness helps uniform doneness. - 2
Pound to even thickness (optional)
If your chicken pieces vary in thickness, gently pound to even out to about ¾ inch thickness. This reduces hot spots and ensures the center cooks before the edges burn. Use a meat mallet or rolling pin with a plastic wrap barrier.
Tip: Even thickness improves predictability of doneness. - 3
Preheat the pan and oil
Preheat your skillet over medium-high until just shy of smoking. Add a thin layer of high-smoke oil and swirl to coat. This creates the first crust and prevents sticking.
Tip: A hot pan is essential for crust formation. - 4
Sear to form crust
Place chicken in the pan without crowding. Sear 2–4 minutes per side until a deep golden crust forms and juices start to move to the surface. Avoid moving the pieces too early to prevent tearing and sticking.
Tip: Resist the urge to peek constantly; steady heat builds crust. - 5
Finish cooking through
Lower heat to medium or medium-low and cook until the internal temperature reaches 165°F (74°C). If pieces are thick, move to the oven for 5–10 minutes at 375°F (190°C) after searing. Resting afterward is crucial.
Tip: Use a thermometer for precise doneness. - 6
Rest and slice
Transfer chicken to a resting surface and tent loosely with foil for 5 minutes. Resting redistributes juices, keeping slices moist. Slice against the grain for tenderness.
Tip: Resting prevents juice run-off when cutting. - 7
Add finishing touches
Finish with a glaze or herb butter if desired. In the last minute, brush with glaze and let it set for a glossy finish. This mimics grilled-sauce flavor without extra tools.
Tip: Keep glaze thin to avoid soggy crust. - 8
Serve and store leftovers
Serve immediately with sides or refrigerate in airtight containers for 3–4 days. Reheat gently to preserve moisture.
Tip: Cool, then refrigerate promptly to maintain quality.
Common Questions
Can I use any pan to grill chicken on the stove?
A heavy skillet or cast-iron pan provides the best heat retention and browning. A sturdy stainless pan can work, but you may need to monitor heat more carefully to avoid sticking.
Use a heavy skillet or cast iron for best browning; stainless works but needs careful heat control.
What’s the safest internal temperature for chicken?
The recommended internal temperature for cooked chicken is 165°F (74°C). Check with a meat thermometer at the thickest part.
Cook chicken to 165 degrees Fahrenheit and check with a thermometer.
How do I prevent sticking during searing?
Pat the surface dry, preheat the pan properly, and apply a light coat of oil. Avoid moving the meat too soon; let a crust form before flipping.
Dry surface, hot pan, and a light oil coat help prevent sticking.
Can I finish cooking in the oven?
Yes. Sear on the stove, then transfer to a 375°F (190°C) oven for 5–10 minutes to finish, especially for thicker cuts.
Sear first, then finish in a hot oven for thicker pieces.
How long can cooked stove-top chicken be stored?
Cooked stove-top chicken can be refrigerated for 3–4 days in airtight containers and reheated gently.
Store cooked chicken for 3–4 days and reheat gently.
Watch Video
Top Takeaways
- Preheat a heavy pan for fast searing and crust formation.
- Dry surface and even thickness improve browning and doneness.
- Use a thermometer to ensure 165°F internal temperature.
- Rest the chicken 5 minutes before slicing to retain juices.
- Finish with a glaze or herb butter for extra flavor