Rice to Water Ratio on Stove: Mastering Stove-Top Rice
Master the rice to water ratio on the stove with practical steps, precise measurements, and troubleshooting to achieve fluffy, evenly cooked rice every time.

By following the stove-top rice method, you will learn how to determine the rice to water ratio, choose the right pot, and achieve fluffy, separate grains. This guide covers common ratios for white and brown rice, rinsing and resting times, and simple adjustments for pot size and altitude. You’ll have a clear, actionable set of steps to cook perfect rice on the stovetop.
Why the rice to water ratio on stove matters
Cooking rice on the stove is a balance between moisture, heat, and time. The ratio of rice to water directly influences texture: too little water yields hard, undercooked grains; too much water creates a mushy, sticky pot of rice. The rule of thumb isn’t universal—different rice varieties (white, brown, basmati, jasmine) and even brands absorb water differently. Understanding the principle helps you adjust for your specific stove, pot, and altitude. At Stove Recipe Hub, we emphasize consistency: start with a reliable baseline, then fine-tune per batch. The right ratio also minimizes the need for excessive stirring, which can break grains and release starch.
Understanding common rice-to-water ratios
There isn’t a single universal ratio, but common baselines work well for home cooks:
- White long-grain rice: typically 1 cup rice to 2 cups water (1:2).
- White short-grain rice: often 1:1.5 to 1:1.75, depending on brand.
- Brown rice: commonly 1 cup rice to 2.5–3 cups water (1:2.5 to 1:3).
- Parboiled rice: often 1:2.25 to 1:2.75, depending on the grind and age.
Always check the packaging as brands vary in absorption. If you’re new, start with the 1:2 baseline for white rice and adjust up or down in small increments (a quarter cup water at a time) based on results. This approach minimizes waste and helps you develop a feel for your stove.
Preparing rice: rinsing, soaking, and measuring
Rinsing removes surface starch that can make rice gummy. Rinse the rice under cold running water until the water runs clear, then drain thoroughly. Soaking for 10–20 minutes can improve texture for some rice types, particularly long-grain varieties, but it’s optional. Measure water with a consistent method (cups or a measuring cup) and keep the rice-to-water ratio steady. Use a pot with a snug lid to trap steam, which helps grains finish cooking evenly. Finally, have salt or aromatics ready if you like extra flavor, but avoid adding fats or seasonings that could cause scorching at the bottom during simmering.
Step-by-step stovetop method for white rice (1:2 ratio)
This section walks you through a reliable, repeatable approach using a 1:2 ratio for most white rices. Start with a clean pot, a tight-fitting lid, and measured ingredients. Bring water to a gentle boil, simmer covered, then rest off heat. The steam finishes the cooking and yields fluffy grains with separation between kernels. Adjust for your stove by reducing heat slightly if you notice rapid boiling that splashes starch onto the lid or sides.
Step-by-step stovetop method for brown rice (1:2.5 to 1:3 ratio)
Brown rice needs more water and a longer simmer. Begin with the lower end of the water range (1:2.5) if you’re unsure, then check texture after the initial simmer. If the grains are too firm after resting, add a splash of hot water, re-cover, and let steam for a few minutes. Resting remains crucial to allow starch to set and prevent a mushy finish. Be patient: brown rice can take 35–45 minutes on the stove, depending on the grain and your heat control. Gentle simmering is key to avoiding scorching and uneven doneness.
Adjusting for pot size, heat, and altitude
Pot size and material influence heat distribution. A heavy-bottomed pot distributes heat evenly, reducing hotspot scorching and ensuring uniform cooking. If you’re cooking at altitude, water boils at a lower temperature, and rice may need up to 0.5 cup more water or a longer simmer. If your lid doesn’t seal well or your pot is shallow, you’ll lose steam and require adjustments. Start with your standard ratio, observe the grains, and adjust water amount by ¼ cup increments until you achieve the texture you want.
Troubleshooting: mushy, undercooked, or sticky rice
If rice is mushy, reduce the water by ¼ cup and verify you’re simmering with a gentle boil rather than a vigorous one. If undercooked, add a little hot water, return to a gentle simmer, and continue cooking with the lid on. For sticky rice, rinse more thoroughly and consider a slightly shorter rest time. If the bottom crust is hard or burnt, move the pot to a cooler burner and rinse the bottom with water to prevent scorching in future batches.
Fine-tuning: rinsing, resting, and flavoring
Rinsing is a simple but powerful step—clear water means less surface starch and fluffier grains. Rest the rice for 5–10 minutes after removing from heat to let the grains finish steaming and to firm up, which helps prevent clumping. Flavoring ideas include a pinch of salt, a small splash of oil or butter, or a bay leaf added during simmer. If you prefer softer rice, use a hair more water; for firmer rice, use a touch less. With practice, you’ll anticipate the exact timing for your stove and cookware.
AUTHORITY SOURCES
- USDA: Cooking Rice Guidelines: https://www.usda.gov/
- Extension (Cornell/OSU) rice cooking tips: https://extension.osu.edu/ or https://extension.cornell.edu/
- Additional cooking science references: major educational publications and government resources for everyday kitchen practices.
Verdict: Practical takeaways for home cooks on the stove
In practice, start with a trusted baseline for your rice type, keep a consistent pot and lid, and adjust in small increments until you reach your preferred texture. The key is consistency: measure water and rice the same way every time, and give resting time after cooking. With practice, you’ll reliably produce fluffy, separate grains without guesswork.
Tools & Materials
- Sturdy pot with tight-fitting lid(Prefer heavy-bottom, 2–3 quart size for 2 cups rice; ensures even heat.)
- Measuring cups and spoons(Use the same set for rice and water; precision matters.)
- Measuring cup for water(Clear, marked cup; avoid estimating mid-cooking.)
- Fine-mesh strainer(Useful for rinsing rice until water runs clear.)
- Spatula or fork(Gentle fluffing at the end prevents grain breakage.)
- Kettle or pot for hot water(Optional quick water addition if rice finishes early.)
Steps
Estimated time: 25-30 minutes
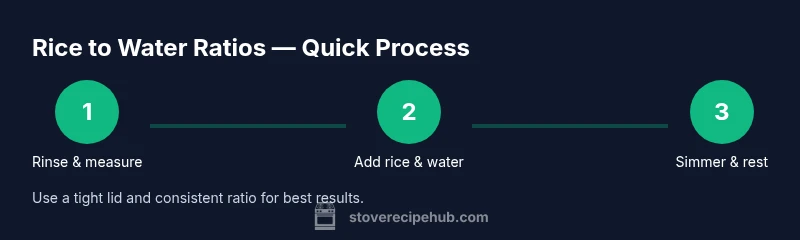
- 1
Rinse and measure
Rinse the rice under cold water until it runs clear to remove surface starch. Drain thoroughly. Measure your rice with a standard cup and set aside.
Tip: Rinsing helps prevent a gummy texture; repeat if starch remains cloudy. - 2
Add rice and water to pot
Place the rinsed rice in the pot and add the measured water based on your target ratio. Do not salt yet unless you plan to flavor aggressively.
Tip: Use a consistent ratio (e.g., 1:2 for white rice) to build reliability. - 3
Bring to a gentle boil
Set the burner to a medium-high heat until the water just begins to boil, then reduce heat to maintain a steady simmer.
Tip: Avoid a rolling boil that can cause uneven cooking and splashing. - 4
Cover and simmer
Cover with a tight lid and simmer for the recommended time (about 12–15 minutes for white rice, longer for brown). Do not lift the lid during cooking.
Tip: If your rice looks dry, reduce heat a touch and let it steam gently. - 5
Rest off the heat
Turn off heat and let the pot rest, still covered, for 5–10 minutes to finish steaming.
Tip: Resting avoids sticky, clumpy grains by letting steam finish evenly. - 6
Fluff and season
Remove lid, fluff with a fork, and add salt or aromatics if desired. Taste before serving to adjust seasoning.
Tip: Fluff gently to avoid breaking grains. - 7
Evaluate texture
Assess grain by grain: should be tender with a slight bite and separate grains.
Tip: If too firm, re-cover with hot water and steam for a few minutes. - 8
Serve and store
Serve hot or cool for later use. Refrigerate within two hours; reheat with a splash of water to rehydrate.
Tip: Store in an airtight container to minimize aroma transfer.
Common Questions
What is the best rice to water ratio for white rice on the stove?
For most white rice, start with a 1:2 ratio and adjust based on brand and texture. Rinse, simmer covered, then rest before fluffing.
For most white rice, start with 1 to 2 water to rice, then adjust as needed after testing texture.
Can I cook rice without rinsing?
Rinsing removes surface starch that can make rice sticky. Skipping rinsing may yield denser, stickier grains.
Rinsing helps reduce stickiness and improves texture.
Why is my rice undercooked even with a 1:2 ratio?
Undercooking often results from insufficient simmer time, too high heat, or a poor lid seal. Extend simmering time or adjust heat to maintain a gentle boil.
Often it’s too little simmer time or too much heat; adjust the simmer and lid fit.
How long should rest time be after cooking?
Rest the rice off heat for 5–10 minutes to finish steaming and set the texture before fluff.
Let it rest 5 to 10 minutes off the heat for best texture.
How do altitude or pot size affect the ratio?
High altitude may require more water; larger pots can evaporate water faster if not tightly sealed. Start with the baseline and adjust.
Altitude and pot size can change how quickly water evaporates; adjust water slightly.
Watch Video
Top Takeaways
- Use a consistent 1:2 ratio for many white rices as a starting point.
- Rinse rice to reduce surface starch before cooking.
- Let the rice rest 5–10 minutes off heat for perfect texture.
- Adjust water in ¼ cup increments based on results.
- A heavy-bottom pot improves even cooking and reduces scorching.