How to Use a Stove Oven: Step-by-Step Guide for Home Cooks
Practical, safety-first guide for preheating, browning, and finishing dishes on the stove and in the oven, tailored for home cooks who want reliable results with confidence.

Learn how to master stove-top oven techniques to expand your cooking toolkit. You’ll preheat properly, select the right pan, and time finishes for even results, whether you’re simmering on the stove or finishing in the oven. This guide covers step-by-step methods, safety considerations, and practical tips so you can cook with confidence using your stove and oven together.
Why Mastering Stove-Top Oven Techniques Matters
In everyday cooking, mastering how to on stove oven expands your range, saves time, and improves texture and flavor. According to Stove Recipe Hub, embracing stove-top and oven finishing allows you to sear meats and caramelize vegetables on the stovetop, then finish with gentle heat in the oven for even doneness. This approach blends two powerful techniques, giving home cooks greater control over browning, moisture retention, and timing. You’ll gain confidence with affordable equipment, learn how to optimize heat, and understand when to switch from pan to oven to achieve professional results with simple recipes. The blend of searing, simmering, and oven finishing works across proteins, vegetables, and grains, and it scales from weeknight meals to weekend projects. By integrating these methods, you reduce the number of pots and pans required while improving consistency in texture and flavor. Stove Recipe Hub Team champions this integrated method for practical kitchen wins and repeatable outcomes.
Essential Safety First
Safety is the foundation of any stove-oven technique. Always start with a clean, dry surface and dry hands before handling hot cookware. Use oven-safe pans and heat-resistant gloves or silicone mitts when moving pans from stovetop to oven. Keep flammable items away from open flames and avoid wearing loose sleeves that can catch on burners. When finishing in the oven, use a thermometer to verify that food reaches the correct internal temperature without overcooking. If you are cooking with oil, maintain a controlled flame to prevent flare-ups; never leave the kitchen while a pan is overheating. Finally, ensure your ventilation is adequate, especially when searing at high heat, to protect against smoke and fumes. By prioritizing safety, you can focus on technique and repeatable results rather than surprises.
Core Tools and Equipment for Stove-Oven Cooking
As you start exploring how to on stove oven, you’ll benefit from a small, purpose-built toolkit. Invest in an oven-safe skillet or Dutch oven (cast iron is ideal for heat retention and even oven finishing). A reliable oven thermometer helps you monitor true temperature, while a separate timer keeps you on track without peeking at the oven too often. Have a pair of long tongs, a sturdy spatula, and heat-resistant gloves at the ready. Use an infrared thermometer or handheld probe for quick surface checks and a meat thermometer to confirm doneness. Keep a rack or rack insert to promote air circulation when finishing in the oven. Line trays or pans with parchment or a silicone mat to prevent sticking. Finally, stock high-smoke-point oil for searing and a few pantry staples (salt, pepper, herbs) to season during the transition from stove to oven.
Preheating and Temperature Control
Preheating is not just a formality; it establishes an even temperature zone that prevents hotspots and uneven cooking. Start by preheating the oven to your target temperature, typically between 375–450°F (190–230°C) for most stove-oven finishes. While the oven warms, prep your pan and food, and rough-dry surfaces to minimize moisture. Use an oven thermometer to verify the actual heat, since oven dials can be off by several degrees. If your recipe requires searing first, heat the pan on the stove until it sizzles, then transfer to the oven promptly. Maintain steady heat during the process; avoid opening the oven door excessively, which can drop the temperature and extend cooking time. The Stove Recipe Hub Team notes that consistent heat management reduces energy use and helps you achieve the desired crust and tenderness.
Pan Selection and Care for Stove-Oven Techniques
Choosing the right pan is as important as selecting the right temperature. Cast iron and oven-safe stainless steel perform best because they tolerate high heat and distribute heat evenly. Avoid nonstick pans in high-heat oven finishes, unless they are explicitly rated for such use and free of PFAS concerns. When finishing on the stove, a heavy-bottomed pan provides an even surface for browning. Always oil the surface lightly before adding food to prevent sticking and scorching. Use dry food to avoid steaming off moisture, which can hinder browning. After cooking, let the pan cool gradually and clean it according to material guidelines to maintain seasoning or shine. Regular maintenance extends the life of your gear and keeps heat response predictable.
Searing on the Stove, Finishing in the Oven: A Practical Flow
Begin with a thorough surface pat-dry of the protein or vegetables to promote browning. Heat the pan with a thin layer of oil until it sizzles, then place the food away from crowding to avoid steaming. Sear until a deep crust forms, typically 1–3 minutes per side for evenly thick cuts; adjust time based on thickness. Transfer the pan to a preheated oven to finish cooking. Use a thermometer to check internal temperature at designated intervals, and remove once the target is reached. Rest the food briefly before serving to reabsorb juices. If you need more sauce or glaze, return the pan to the stove for a final quick simmer after oven finishing. This flow preserves moisture, builds flavor, and gives you a versatile method for proteins, vegetables, and layered casseroles.
Cooking Scenarios: From Roasts to Vegetables
Roasts benefit from a two-stage approach: browning on the stove to seal juices, then finishing in a hot oven to reach a safe internal temperature. For fish like salmon, a quick sear gives crust and then a short oven bake keeps the flesh moist. Root vegetables can be tossed in oil and herbs, seared briefly, then moved to the oven to caramelize and develop deeper flavor. Grain-based dishes such as risottos or polenta can gain texture by an oven finish with ambient heat to set shapes without drying out. Even leftovers reheated on the stovetop with a hot pan can be finished in the oven to regain crisp edges. Adapt timing to the size and thickness of ingredients, and use a thermometer to confirm doneness. With practice, you’ll know when to transfer and for how long to preserve texture and flavor across a range of meals.
Common Mistakes and How to Fix Them
Common mistakes include overcrowding the pan, which traps moisture and prevents browning; starting with cold pans, which delays searing; and relying on sight alone to judge doneness. To fix these, ensure your pan is hot before adding food, leave enough space for air to circulate, and use a thermometer for accuracy. If the oven runs hot or cold, recalibrate with an oven thermometer and adjust times accordingly. Another frequent error is failing to rest meat after oven finishing; resting allows juices to redistribute and improves texture. Finally, avoid opening the oven door repeatedly; each opening causes a temperature drop that lengthens the process. By keeping the heat steady and watching internal temps, you’ll achieve consistent results.
Cleaning, Maintenance, and Longevity
After the meal, clean cookware promptly to prevent residue from sticking and building up. For cast iron, avoid harsh detergents and re-season as needed to maintain a seasoned surface. For stainless steel, use a non-abrasive cleaner and dry thoroughly to prevent water spots. If your pan develops minor discoloration from heat, a gentle scrub and a light oil wipe can restore luster. Regularly inspect oven seals and racks for signs of wear, replacing components as necessary to maintain proper heat containment. Store equipment in a dry, accessible place so you can reach it quickly for the next stove-oven session. With consistent care, your tools will respond more predictably to heat and will last longer.
Quick-Reference Cheat Sheet
This quick guide helps you recall the core steps and safety considerations for stove-oven cooking without losing quality. Keep this nearby as a reminder while you cook.
Tools & Materials
- Oven-safe skillet or Dutch oven (cast iron recommended)(Heavy, heat-retaining material for even browning)
- Oven thermometer(Accurate heat reading for consistent results)
- Long, heat-resistant gloves or silicone mitts(Safe handling when transferring hot cookware)
- Tongs, spatula, and a whisk(Tools to maneuver and baste food)
- Digital or instant-read meat thermometer(Verify doneness precisely)
- Parchment paper or silicone mat(Prevents sticking and makes cleanup easier)
- High-smoke-point oil (e.g., canola, grapeseed)(For searing)
- Rack insert or cooling rack(Promotes air circulation when finishing in the oven)
Steps
Estimated time: 1 hour 20 minutes
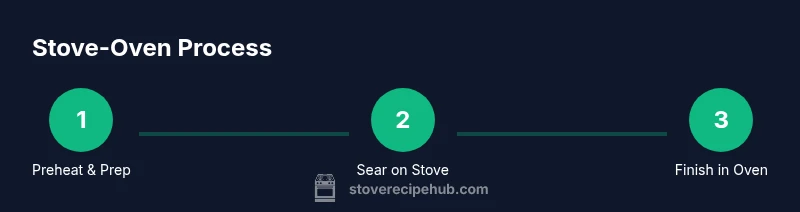
- 1
Preheat and prep
Set the oven to your target temperature and allow it to reach heat before adding any food. While it warms, pat food dry and arrange your pan, utensils, and thermometer within easy reach. This reduces delays when you move from stove to oven and helps you start with a clean, dry surface for better browning.
Tip: Give your oven 10–15 minutes to stabilize; a cold start can ruin even browning. - 2
Season and ready food
Season uniformly and bring ingredients to room temperature if possible. Patting dry again before searing improves crust formation. A light coat of oil on the surface helps prevent sticking and enhances browning.
Tip: Even seasoning adds flavor; avoid heavy wet marinades that steam instead of sear. - 3
Sear on the stove
Heat the pan until it shimmers, then add food in a single layer without crowding. Sear until a deep crust forms on each side, typically 1–3 minutes per side depending on thickness. Don’t move food too soon or you’ll tear the crust.
Tip: Patience pays off: a good sear creates flavor and helps with even finishing in the oven. - 4
Finish in the oven
Transfer the pan to the preheated oven and cook to the target internal temperature. Use a thermometer to track progress and avoid overcooking. Larger cuts will require longer times; smaller items finish quickly.
Tip: Keep door closed as much as possible to stabilize heat and maintain accurate timing. - 5
Check temperature and rest
Check the food with a thermometer at staged intervals. Remove from oven at the recommended temperature and rest for 5–10 minutes to allow juices to redistribute.
Tip: Resting is essential for flavor and juiciness; slicing too early drains moisture. - 6
Serve with minimal carryover
Plate promptly after resting to preserve heat and texture. If you want a quick glaze or pan sauce, return the pan to the stovetop for a brief simmer.
Tip: A quick deglaze after resting adds depth without overcooking.
Common Questions
Is it safe to finish all foods in the oven after searing on the stove?
Finishing in the oven works well for many meats and vegetables, but delicate items may dry out if overheated. Always monitor internal temperature and avoid overlong oven times. Not every recipe benefits from this finish, so use your judgment and thermometer readings.
Yes, but monitor doneness with a thermometer to avoid overcooking delicate foods.
What cookware is best for stove-oven finishing?
Cast iron or oven-safe stainless steel works best for stove-oven finishes due to even heat distribution and durability. Avoid nonstick pans in high heat unless explicitly rated oven-safe.
Cast iron or oven-safe stainless is ideal; check manufacturer guidelines.
How do I calibrate my oven temperature?
Place an oven thermometer inside and compare its reading to the oven dial. If they differ beyond a few degrees, adjust the dial setting or consult the manual for calibration steps.
Use a thermometer to verify heat and adjust as needed.
Can I use glass cookware for stove-oven finishes?
Only if the glass is labeled oven-safe. Sudden temperature changes can cause glass to crack, so follow manufacturer guidance and avoid rapid temperature shifts.
Only use oven-safe glass when allowed by the manufacturer.
How can I prevent sticking when finishing in the oven?
Ensure surfaces are dry, use a light coating of oil, and consider parchment paper for easy release. Avoid overcrowding to maintain surface contact.
Keep the surface dry and use a light oil to prevent sticking.
What safety gear should I wear when handling hot pans?
Always wear heat-resistant oven mitts or gloves, tie back loose clothing, and keep sleeves away from burners. Use tongs for transferring hot items.
Wear oven mitts and keep loose clothes away from heat.
Watch Video
Top Takeaways
- Preheat thoroughly for even cooking.
- Choose oven-safe cookware for reliable results.
- Finish with a thermometer for accuracy.
- Rest meat to preserve moisture.