Stove Fan Installation: A Practical Step-by-Step Guide
Learn how to install a stove fan safely and efficiently. This guide covers heat-powered options, vented hoods, required tools, step-by-step installation, essential safety checks, and maintenance tips for home cooks.

By the end of this guide, you’ll be able to install a stove fan that safely removes steam and odors from your cooking space. This article covers choosing between heat-powered stovetop fans and vented range hoods, selecting placement, mounting hardware, and basic wiring or ducting considerations. You’ll also learn safety checks and maintenance steps to keep the fan performing well.
Understanding Stove Fan Types and How They Work
Stove fans come in a couple of main varieties, each with its own installation considerations. Heat-powered stovetop fans sit directly on the stove and turn purely from heat produced by simmering pots. They require no electrical wiring or ductwork, which makes them appealing for apartments or spaces with limited access. The other major category is vented range hoods or external exhaust fans that vent to the outdoors or recirculate air back into the kitchen through filters. These systems typically involve mounting above the stove, routing ductwork if you vent outside, and possibly wiring for the motor.
When deciding, compare airflow needs, kitchen size, and existing ventilation. Heat-powered fans rely on the stove’s heat to spin the blades and typically move air, but the overall airflow is often less controllable than a powered hood. Vented hoods provide more consistent steam and odor removal, but require ducting and can be more complex to install. If you’re renting or want a quick upgrade, a good heat-powered model can be enough. If you cook with high heat often or have multiple burners in use, a vented hood may be worth the extra effort. According to Stove Recipe Hub, selecting the right type starts with space, ventilation goals, and safety constraints. Always check local codes and the manufacturer’s installation guidelines before you begin.
Planning Your Installation: Space, Venting, and Safety
Planning an installation involves deciding whether you’ll vent to the outside or use a ductless recirculating hood. Measure countertop and cabinet clearances, ceiling height, and the path for any ducting. Consider proximity to windows and doors to minimize re-circulation of heat, and ensure there is a convenient power source if the fan is electrically powered. Determine whether you’ll need a new vent cap on an exterior wall or roof and whether a backdraft damper is required. From a safety perspective, map out access for future maintenance and ensure you won’t obstruct gas lines, electrical outlets, or water lines. Based on Stove Recipe Hub analysis, outside venting often yields the best removal of steam and odors, but it demands more structural work and potential permits in some jurisdictions. If you go ductless, verify filter availability and plan for filter changes. Always keep a clear maintenance pathway and avoid obstructing the range’s burners.
Choosing Between Heat-Powered Fans and Vented Hoods
Heat-powered stovetop fans are compact, silent when not heated, and require no electricity, which makes them a simple upgrade. They’re ideal for small kitchens or rental spaces where modifying ductwork isn’t possible. Vented hoods, by contrast, handle higher volumes of air and can remove more moisture and smells in busy cooking scenarios. They require ducting to the exterior or a sophisticated recirculation system with filters. If you cook primarily with a single burner and want effortless installation, a heat-powered fan is a solid fit. If your kitchen sees frequent simmering, frying, and higher heat, a vented hood will typically perform better. Stove Recipe Hub emphasizes planning for future needs and confirming space for ducting, mounting, and service access. Consider noise level, fan speed options, and compatibility with existing cabinetry when choosing.
Safety Considerations, Maintenance, and Compliance
Safety should be the guiding principle for any installation. Before you start, turn off the relevant circuit or gas supply and verify power with a tester. If you’re drilling or mounting near plumbing or wiring, double-check clearances and local codes. After installation, perform a careful inspection of all joints and seals, ensuring duct tape is foil or metal-backed and that joints don’t leak. Schedule regular maintenance, such as cleaning filters, checking duct joints, and lubricating moving parts if applicable. This section also covers basic compliance: ensure vented installations meet exterior venting requirements and that electrical connections follow local electrical codes and regulations. For extra reassurance, see authoritative resources from government and university extensions that discuss safe ventilation practices, electrical safety, and building codes. The Stove Recipe Hub team recommends documenting the installation steps and keeping a simple maintenance log for your stove fan.
Tools & Materials
- Stove fan (heat-powered or vented hood)(Choose model based on space, venting, and noise tolerance)
- Mounting hardware (screws, brackets)(Sized for cabinet material; include anchors for drywall if needed)
- Measuring tape(For clearance and placement accuracy)
- Level(Ensure horizontal alignment for optimal performance)
- Drill with drill bits(For mounting holes; use appropriate bit size)
- Screwdriver set(Phillips and flathead for mounting and wiring)
- Pencil or marker(Mark drill points and mounting locations)
- Safety gear (gloves, goggles)(Protect hands and eyes during installation)
- Ducting materials (for vented install)(Flexible duct, dampers, and clamps if venting outside)
- Duct tape/foil tape(Seal joints to prevent leaks)
- Voltage tester(Confirm power is off and connections are safe)
- Wire nuts or connectors(Secure electrical connections if needed)
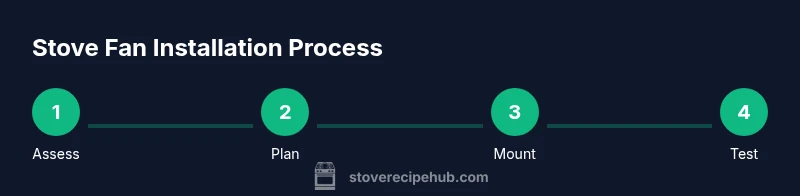
Steps
Estimated time: 1-2 hours
- 1
Assess space and select fan type
Survey your kitchen and decide whether a heat-powered stovetop fan or a vented hood best fits your space and cooking style. Consider cabinet clearance, window placement for vented setups, and whether you’ll rely on ducting. This decision affects mounting options and future maintenance. According to Stove Recipe Hub, start with space, ventilation goals, and safety constraints.
Tip: Choose heat-powered for quick installs; choose vented if you need higher airflow. - 2
Gather tools and prepare the work area
Pull all required tools from your tools list and clear the area around the installation site. Have a clean workspace, drop cloths on the floor, and a place to set screws and brackets. Turn off the related electrical circuit or gas supply before you touch any wiring or gas lines.
Tip: Double-check that you have all mounting screws and anchors before starting. - 3
Power down and verify circuits
If wiring or electrical connections are involved, switch off the breaker and test the circuit with a voltage tester. For non-electric heat-powered fans, this step helps ensure you won’t accidentally turn on a live outlet while mounting.
Tip: If unsure, pause and consult a licensed electrician. - 4
Mark mounting points and check clearance
Use a measuring tape and level to mark the exact location for brackets or the hood mounting. Verify there’s enough clearance from cabinets, backsplash, and any nearby gas lines or electrical outlets to avoid interference.
Tip: Mark multiple points so you can adjust without re-drilling. - 5
Mount the fan or install the ducting
Attach the mounting brackets or bracketry to the wall or cabinet per the manufacturer’s instructions. If venting, install ducting from the hood to the exterior with the appropriate dampers. Ensure all connections are secure and level.
Tip: Use foil tape on duct joints instead of standard tape for better sealing. - 6
Connect electrical wiring or motor connection
If your fan requires wiring, follow the wiring diagram precisely and secure all connections with wire nuts. For ducted installations, ensure the vent motor is aligned with the duct path and that there’s no strain on cables.
Tip: Keep wires away from heat sources and sharp edges. - 7
Test operation and finalize
Restore power and test the fan at low and high settings. Listen for abnormal noises, check for air leaks, and verify that the airflow meets expectations. Finish by sealing any penetrations and cleaning up the work area.
Tip: Record model details and a maintenance plan for filter changes.
Common Questions
What is a stove fan and how does it work?
A stove fan sits on the stove and uses heat from cooking to spin its blades, moving air to reduce steam. It typically requires no wiring or ductwork. A vented hood, by contrast, uses electricity and ducting to remove air from the kitchen.
A stove fan sits on the stove and uses heat to spin, moving air to reduce steam. It usually needs no wiring, while a vented hood uses power and ducting to vent air outside.
Do I need a professional to install a stove fan?
Most heat-powered stovetop fans require no professional installation. If you choose a vented hood or encounter electrical or gas line work, a licensed professional is recommended.
A heat-powered fan usually doesn’t need a pro, but for vented hoods or wiring, hire a licensed professional.
What’s the difference between heat-powered and vented range hood fans?
Heat-powered fans rely on stove heat with no electricity or ducting, offering a simple upgrade. Vented range hoods use electricity and ducts to exhaust air outside or recirculate it with filters, delivering higher airflow but requiring more installation work.
Heat-powered fans use stove heat and need no electrical work, while vented hoods use power and ducts for greater airflow.
How do I maintain a stove fan?
Regularly clean the fan blades or filters if present, check for dust buildup in ducts, and inspect seals and joints for leaks. Replace filters as recommended by the manufacturer.
Clean the blades or filters regularly, inspect ducts and seals, and replace filters as recommended.
Is venting always required for a stove fan installation?
Not always. Heat-powered fans don’t vent air outside, but vented hoods do. Check local codes and your kitchen requirements to decide whether exterior venting is necessary or if a ductless system meets your needs.
Venting isn’t always required—heat-powered fans don’t vent outside, but vented hoods do. Check local codes.
Watch Video
Top Takeaways
- Choose the right fan type based on space and ventilation needs
- Plan space, ducting, and clearance before mounting
- Safety is a priority when dealing with electrical or gas lines
- Seal joints and secure mounting for efficient airflow
- Test thoroughly and establish a maintenance routine