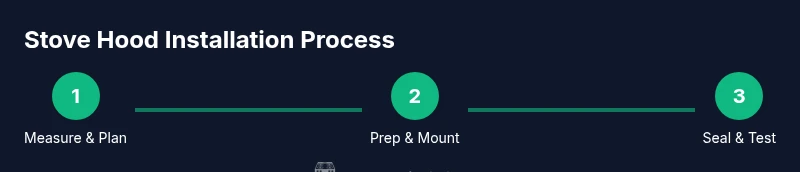
Stove Hood Installation Guide: Step-by-Step for Safe Ventilation
Learn stove hood installation with a clear, safety-focused step-by-step guide. Plan, vent, mount, wire, and test your range hood for better kitchen airflow and smoke control.

By the end of this guide, you’ll confidently complete a stove hood installation that improves kitchen ventilation and smoke management. Plan around your stove type and ceiling/wall structure, choose the right hood size, and follow safe electrical and ducting practices. Basic tools and a vent path are essential for success. This quick answer signals the 2-3 key requirements: measuring, mounting, and venting.
Planning Your Stove Hood Installation
According to Stove Recipe Hub, planning is the foundation of a successful stove hood installation. Start by assessing your kitchen layout, ceiling height, and the location of the stove. A well-planned layout reduces duct length, minimizes bends, and helps you choose a hood that matches your stove width and cooking style. Consider whether you will vent to the outside or rely on a recirculating unit with filters. Budget time for measurements, material selection, and any cabinetry adjustments. A solid plan also helps you identify electrical requirements and permits that may apply in your area. In this stage you should settle on a hood width (often matching the stove width), determine the venting route, and check for any clearance constraints with cabinets or shelving. According to Stove Recipe Hub analysis, accurate planning correlates with smoother installation and better long-term performance. Keep notes of your measurements and decisions for reference during mounting and wiring.
Choosing the Right Hood Size, Venting Route, and Power
Selecting the correct hood size is critical for performance and aesthetics. Hood width should match, or be slightly wider than, the cooktop to capture rising steam and reduce grease on surrounding walls. Decide whether you’ll vent air outdoors via ductwork or use a recirculating model with replaceable filters if exterior venting is not feasible. If you choose a ducted system, plan the shortest, straightest path to minimize pressure loss and noise. For power, confirm whether your hood requires a dedicated circuit or can plug into an existing outlet, and verify that your electrical box can support the hood’s current draw. This stage is where you compare vent capacities, CFM ratings, and noise levels to balance performance with comfort in the kitchen. Venting performance often depends on duct diameter, number of elbows, and seal quality at joints. Remember to consult the hood’s installation guide and your local electrical and building codes.
Measuring, Clearance, and Mounting Surface Preparations
Before drilling or mounting any hardware, double-check your measurements for an even, level installation. Measure from the countertop to the planned underside of the hood and confirm clearances to any cabinets or range hoods above. Locate studs in the wall or ceiling where brackets will anchor the hood securely. If you’re mounting into a cabinet, ensure the cabinet structure can bear the hood’s weight in use and during cleaning. Prepare the mounting surface by cleaning and sanding any dust from the area, which helps with sealant adhesion and bracket grip. This preparation reduces the risk of wobble and noise after installation. Always have a helper when lifting the hood into place and use a level to confirm horizontality across the front and sides. A solid mounting foundation translates into safer operation and better vent performance over time.
Ducting Options: Vent to Exterior vs Recirculating Systems
Vent choice affects performance, energy use, and air quality. A ducted system vents air to the outside, providing the strongest removal of smoke and odors but requiring a routed duct path through walls or ceilings. A recirculating hood uses filters to clean air and return it to the kitchen—useful when exterior venting is impractical. If you choose ducting, select smooth-walled metal ducting to minimize resistance and noise; avoid flexible plastic ducts where possible. Seal all joints with metal foil tape and test for leaks. If you opt for recirculation, plan for higher maintenance (filter changes) and verify the hood’s filtration efficacy with the manufacturer’s recommendations. Your decision should align with your kitchen’s layout, local codes, and noise tolerance.
Electrical Considerations and Wiring Safety
Electrical work is a common sticking point for stove hood installation. Verify whether the hood requires hard-wiring to a dedicated circuit or if it can plug into a nearby outlet. Always turn off power at the breaker before touching wiring, and use a voltage tester to confirm circuits are dead. If you’re unsure about wiring, hire a licensed electrician; improper connections can create shock or fire hazards. When possible, mount the hood near a wall switch for easy control. Follow the hood manufacturer’s wiring diagram, use proper strain relief, and ensure connections are inside an approved electrical box with a cover plate. This step protects both the installer and the kitchen occupants.
Mounting the Hood: Brackets, Studs, and Leveling
Mounting hardware must anchor into structural framing to withstand hood weight and fan vibrations. Locate and mark stud positions, then install mounting brackets or a mounting rail as per the manufacturer’s instructions. Use a level repeatedly during the mounting process to keep the hood square with the stove and cabinets. If mounting requires a chimney or chimney extension, ensure compatibility with the venting route and ceiling clearance. Attach the hood to brackets first to help with alignment, then tighten all fasteners securely. Proper mounting minimizes movement, reduces wear on ducts, and keeps the unit operating quietly.
Sealing Ducts, Fire Safety, and Vent Caps
Seal all duct joints with appropriate metal tape or mastic sealant to prevent leaks and maintain efficiency. Install a vent cap or roof/sidewall termination as required by your vent route, ensuring weatherproofing and backdraft protection. Check for any combustible materials near the hood’s enclosure and provide clearances as recommended by the hood manufacturer. Install a grease shield or liner if your hood design includes one, to simplify cleaning and protect surrounding cabinetry. Fire safety considerations include ensuring the hood has a heat-resistant canopy and that cooktop area has unobstructed airflow for safe operation. Proper sealing and termination reduce energy waste and improve performance.
Testing, Calibration, and Performance Checks
With the hood installed, perform a series of checks to confirm operation and sealing. Turn on the hood and verify that air is being drawn through the filters and exiting via the duct (or recirculating through filters if appropriate). Listen for unusual fan noise and look for air gaps along joints; reseal as needed. Check that the hood lights function correctly and that the switch or remote operates as expected. If you used a ducted route, confirm there are no obstructions at the outlet, and inspect for any moisture or condensation around joints. A proper test ensures efficient smoke capture, reduces grease buildup, and preserves kitchen air quality over time.
Maintenance, Cleaning, and Long-Term Care
Routine maintenance extends the life of your stove hood installation. Clean the filters as recommended by the manufacturer, typically every few weeks or monthly depending on use. Wipe the canopy and interior surfaces to remove grease, and inspect ducts for signs of loose joints or corrosion. Schedule semi-annual checks to verify wiring connections, mounting security, and vent termination integrity. Keeping a simple maintenance log helps you track filter replacements and cleaning cycles. Proactive care reduces malfunctions and keeps your kitchen environment healthier.
Tools & Materials
- Stove hood (matching width to stove)(Choose a model with the same width as the cooktop; consider height and depth for ceiling clearance)
- Ducting (rigid metal preferred)(Aim for the shortest path with minimal bends; avoid plastic where possible)
- Duct tape / foil tape(Seal joints to prevent leaks and reduce noise)
- Mounting brackets or rail kit(Ensure compatibility with your hood model)
- Stud finder(Locate framing for secure mounting)
- Level and square(Keep the hood plumb and aligned)
- Measuring tape(Accurate measurements prevent misfit)
- Drill with bits, screwdriver set(For pilot holes and fastening)
- Silicone sealant or gasket maker(Seal around the hood canopy and duct interfaces)
- Electrical supplies (per code)(Wire nuts, cable clamps, strain relief; dedicated circuit if required)
- Vent cap or wall/roof termination(Proper termination for exterior vent routes)
- Safety gear (goggles, gloves)(Eye and hand protection during cutting and drilling)
Steps
Estimated time: 2-4 hours
- 1
Measure and plan layout
Take precise measurements of the stove width, cabinet clearance, and ceiling height. Use these measurements to select a hood with the appropriate width and depth, and map the shortest vent path. Confirm that there is a safe electrical access nearby. Planning reduces rework and ensures a clean, professional result.
Tip: Double-check measurements with a second person to avoid misreads. - 2
Locate studs and mark mounting points
Use a stud finder to locate wall studs or ceiling joists where brackets will anchor. Mark the exact mounting positions with a pencil, ensuring the marks align with the hood’s mounting holes. Begin with a light pilot drill to test fit and adjust if necessary.
Tip: Mark two studs per side for heavy hoods to maximize support. - 3
Prepare duct route and cut access openings
Plan the duct path, avoiding sharp turns. If you must drill through a wall or cabinet, use a proper drill bit size and finish with a clean opening. Dry-fit the duct pieces to confirm fit before final assembly.
Tip: Keep bends gentle; each 90-degree elbow reduces efficiency. - 4
Mount brackets and lay out duct components
Install mounting brackets first, ensuring they are level and firmly anchored. Lay out ducts and connections to verify alignment with the hood. Keep hardware organized to speed up final assembly.
Tip: Use temporary supports if needed to hold the hood during dialing-in alignment. - 5
Hang hood and level the unit
With assistance, lift the hood onto brackets and adjust for level front-to-back and side-to-side. Tighten all mounting hardware gradually while re-checking level. Ensure the hood is securely seated before connecting ducts.
Tip: Re-check level after the first connection; final alignments are easier when the system is secure. - 6
Connect ducting and seal joints
Attach duct sections to the hood outlet and any through-wall or ceiling segments. Seal all joints with metal foil tape or appropriate sealant to prevent leaks. Avoid crushing the duct and ensure smooth interior surfaces.
Tip: Always test and re-seal after initial run to ensure airtight connections. - 7
Handle electrical hookup safely
Follow the hood’s wiring diagram exactly. If required by code, hard-wire to a dedicated circuit or install a proper outlet. Turn off power at the breaker before touching wiring and use approved connectors.
Tip: If unsure, hire a licensed electrician to certify code compliance. - 8
Install termination/vent cap and seal exterior
Install the vent cap or wall/roof termination per manufacturer guidance. Seal any exterior penetrations to prevent moisture ingress and drafts. Verify the exterior vent opening is clear of obstructions.
Tip: Ensure a rain cap or backdraft damper is installed if required by climate. - 9
Test, calibrate, and finalize
Power up the hood and verify airflow through the duct or filters. Check for unusual noises, verify light operation, and ensure the control panel responds correctly. Complete any final sealing and mounting adjustments as needed.
Tip: Record model numbers and settings for future maintenance.
Common Questions
Do I need a professional to install a stove hood?
Not always. If you’re comfortable with basic electrical work, mounting, and duct routing, you can do it yourself with careful planning. Local codes may require a licensed electrician or HVAC pro for certain connections or permits.
You might not need a pro if you’re confident with electrical and mounting tasks, but check local codes first.
What venting options should I consider for stove hood installation?
Ducted venting to the outdoors offers the best performance but requires a viable exterior route. A recirculating hood uses filters and vents air back into the kitchen when external venting isn’t possible.
Choose between ducted or recirculating based on your home layout and local codes.
Can a stove hood be installed over a gas stove?
Yes, but verify clearance, venting, and heat protection. Always follow the hood manufacturer’s recommendations and local safety codes for gas stovetops.
Yes, just follow clearance and venting guidelines and local codes.
What clearance should exist above the cooktop?
Clearance requirements vary by hood model and local codes. Check the manufacturer’s instructions and your jurisdiction to determine the safe distance.
Check the hood manual and local rules for the required distance.
Is electrical wiring required or can I plug into an outlet?
Most installations require a dedicated circuit or hard-wired connection. Some models offer plug-in options; always follow the hood’s diagram and local codes.
Hard-wiring or a dedicated circuit is common, but check your hood’s needs and local codes.
Watch Video
Top Takeaways
- Plan before you drill to prevent misfits.
- Match hood width to stove and choose venting cautiously.
- Anchor securely into studs for safety and longevity.
- Test airflow and seal joints for optimal performance.