How Long to Cook Bacon on the Stove
Master stove-top bacon timings with practical guidance on pan choice, heat control, and crispness. Learn precise cook times, safety tips, and how to tell when bacon is perfectly done.

You can cook bacon on the stove in about 8–12 minutes for regular slices, 10–15 minutes for thick-cut, using a preheated pan and single-layer placement. Drain on paper towels and rest briefly before serving.
Why timing matters for bacon on the stove
Bacon timing matters because thickness, cut, and pan heat interact to determine crispness. According to Stove Recipe Hub, the same slice type can finish in as little as 6 minutes or as long as 15, depending on heat and pan. The goal is to render fat while preserving the meat texture, achieving a balance between chewy and crispy. By understanding how long to cook bacon on the stove, home cooks can predict results and reduce guesswork. This guide breaks down the timing by thickness and pan type, with practical tips for consistent results.
Key variables that affect cook time
- Bacon thickness: Regular, thick-cut, and center-cut pieces all cook differently; thicker slices need more time to render fat and become crispy.
- Pan type: A heavy-bottom pan distributes heat more evenly and minimizes hot spots that overcook edges.
- Heat level: Starting at medium allows gradual rendering; high heat can burn fat while leaving the meat undercooked in the center.
- Slices per pan: Overcrowding traps steam and slows rendering; cook in a single layer with space between slices for even browning.
- Fat content and salt: Leaner bacon crisps faster but may dry out; extra fat renders quickly and can splatter, which some cooks embrace for flavor. Understanding these variables helps tailor cook time to your preferred level of doneness.
Pan and heat setup for consistent results
Choose a heavy skillet (cast iron or thick stainless) and preheat it to medium before adding bacon. If your bacon is very wet, pat it dry to reduce steaming. Lay slices in a single layer with minimal overlap; crowding can trap steam and slow rendering. A splatter screen is optional but helpful for keeping your cooking area clean while the fat renders. According to Stove Recipe Hub, preheating and avoiding overcrowding are two of the most reliable ways to lock in predictable cook times.
Timing by thickness and cut
- Regular sliced bacon: typically 8–12 minutes on medium heat; begin checking at 6 minutes for extra-crispy results.
- Thick-cut bacon: plan for 10–14 minutes, with some cooks pushing to 14 minutes for maximal crispness.
- Center-cut bacon: usually 9–13 minutes, since this cut can render differently but still benefits from even heat.
- Note: These ranges assume a single layer and a 12-inch pan on medium heat; actual times depend on pan, stove, and slice moisture.
Common mistakes and how to fix them
- Mistake: Starting with a cold pan. Fix: Preheat to medium before laying down bacon so fat renders evenly from the start.
- Mistake: Overcrowding. Fix: Cook in batches or use a larger pan to keep slices in a single layer.
- Mistake: Flipping too soon. Fix: Let the first side render; flip when edges start to crisp and fat shows on the surface.
- Mistake: Not draining fat. Fix: Transfer to paper towels to blot excess fat; reserve the grease if you plan to reuse it safely.
- Mistake: Cooking on too high heat. Fix: Reduce to medium or medium-low if fat begins to smoke.
How to tell when bacon is done without overcooking
Look for a golden-brown color along the edges and a uniform rendering of fat. The slices should be crisp at the edges but still slightly flexible in the center for most people’s preferred texture. If the center begins to bend or curl aggressively, they may be overcooked. Testing a single slice is a reliable way to calibrate your technique without wasting batches.
Safety and cleanup tips
Hot fat can splatter and ignite if left unattended. Keep a safe distance, use a splatter screen if possible, and maintain a stable, damp-free cooking area. After cooking, transfer bacon to a plate lined with paper towels and wipe the pan to remove excess fat before washing. If you plan to reuse the fat, strain and store it in a sealed container in the refrigerator.
Quick-start reference chart (at-a-glance timings)
- Regular bacon: 8–12 minutes on medium heat. - Thick-cut: 10–14 minutes. - Center-cut: 9–13 minutes. Tip: rely on color and texture more than time alone; adjust for your stove.
Flavor tips and serving ideas
Render extra bacon fat and use it to cook eggs or vegetables for extra flavor. If you want a less greasy finish, blot thoroughly and let air cool briefly on a rack. Leftovers can be refrigerated for up to 4 days and reheated in a hot skillet for 1–2 minutes per side.
Tools & Materials
- Skillet or frying pan (heavy-bottom)(12-inch cast iron or heavy stainless steel works best)
- Tongs or slotted spatula(For turning slices without splashing fat)
- Paper towels or a cooling rack(Drain cooked bacon and keep it crisp)
- Plate(Transfer cooked bacon here before serving)
- Timer (phone or kitchen timer)(Keep consistent cook times)
- Optional splatter screen(Reduces countertop mess)
- Bacon(Choose regular or thick-cut based on preference)
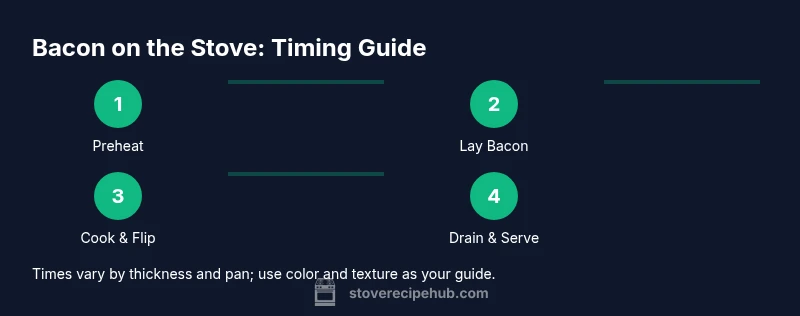
Steps
Estimated time: 8-15 minutes
- 1
Preheat the pan and set up
Place a heavy skillet on the burner and set it to medium. Allow the pan to heat for 2–3 minutes until the surface is warm to the touch. This preheating helps render fat evenly and reduces sticking.
Tip: Let the pan come fully to temperature before adding bacon. - 2
Arrange bacon in a single layer
Lay bacon strips flat in one layer, without overlapping. If slices touch, fat cannot render properly and browning will be uneven.
Tip: If you have many slices, cook in batches rather than stacking them. - 3
Cook until edges begin to crisp
Let the first side render for 4–6 minutes, watching for curl and fat rendering along the edges. Do not flip yet if the centers are not releasing fat.
Tip: Use tongs to lift a corner and inspect color. - 4
Flip to finish rendering
Turn slices over and cook 2–4 more minutes until the desired crispness is reached. If the fat starts to smoke, reduce heat to medium-low.
Tip: Flip gently to keep slices intact. - 5
Drain and rest
Carefully transfer bacon to a plate lined with paper towels. Let stand 1–2 minutes to blot additional fat and finish crisping from residual heat.
Tip: Avoid stacking hot slices on top of each other. - 6
Clean up and reuse fat (optional)
Pour cooled fat into a sealable container; strain if needed and refrigerate. Wipe pan clean to prevent rancid fat and reuse the pan for reheating future batches.
Tip: Store bacon grease to add smoky flavor to future dishes.
Common Questions
How long should bacon cook on the stove for crispy results?
Regular slices typically require 8–12 minutes on medium heat; thick-cut can take 10–14 minutes. Start checking earlier if you prefer less crisp, and adjust heat as needed.
Regular slices usually take about eight to twelve minutes; thicker cuts may take a bit longer. Check for desired crispness and adjust heat as needed.
Should I start with a cold pan or a preheated pan?
Preheating helps render fat evenly and prevents sticking. A cold pan can cause uneven cooking and longer overall cook times.
Preheat the pan before adding bacon to ensure even rendering.
Can I reuse bacon grease safely?
Yes. Let the fat cool, strain, and store in a sealed container in the refrigerator. Use within a reasonable time for best flavor.
You can reuse the fat after straining and refrigerating it.
Is a splatter screen necessary?
Not strictly required, but it helps keep your stove and surrounding area clean while fat renders.
A splatter screen is optional but helpful for cleanliness.
How should I store cooked bacon?
Cool it briefly, refrigerate in an airtight container, and reheat in a hot skillet for 1–2 minutes per side.
Refrigerate cooked bacon in an airtight container and reheat on the stove.
What causes bacon to curl during cooking?
Curling happens when slices are not flat on the pan or the heat is uneven. Pressing gently or trimming edges can help.
Bacon curls when pieces aren’t flat or heat is uneven; press gently to help.
Watch Video
Top Takeaways
- Preheat the pan for even fat rendering.
- Times vary with bacon thickness.
- Drain fat and rest briefly for crispness.
- Use a timer for consistent results.