Cook Bacon on the Stove: A Practical Step-by-Step Guide
Learn to cook bacon on the stove safely and evenly with practical tips, timing, and foolproof methods. Tools, temps, and cleanup for crispy results.

Goal: You will learn to cook bacon on the stove for crispy, evenly cooked strips. Start with a cold pan and gradually raise the heat to medium to render fat without scorching. This guide from Stove Recipe Hub covers the right tools, timing, flipping technique, and cleanup for reliable, restaurant-quality results. Whether you prefer crisper edges or more tender centers, this approach scales from quick weekday breakfasts to brunch-worthy batches.
Why cook bacon on the stove: control, texture, and flavor
According to Stove Recipe Hub, cooking bacon on the stove gives you precise heat control, renders fat gradually, and yields crispy, evenly cooked slices. This method minimizes soggy centers and offers better margins for flavor compared with rushed oven or microwave methods. A well-handled pan also reduces splatter and cleanup time, making it a reliable staple for breakfast and brunch alike. By managing heat and spacing, you can influence where fats render and where browning occurs, giving you consistent results across every batch. In short, stove-top bacon is a kitchen technique that rewards patience and attention to detail, especially when you’re cooking for family or guests.
Choosing the right pan and setup
The foundation of great stove-top bacon is a sturdy pan with even heat distribution. A heavy-bottom cast iron or robust stainless pan minimizes hot spots and promotes uniform rendering of fat. Use a burner that fits the pan well, and avoid overcrowding the pan—cook in batches if needed to keep edges crisp. Pre-seasoned cast iron can help non-stick release, but any well-loved skillet works with careful heat control. The surface matters for browning: a darker pan can accelerate browning slightly, so adjust heat accordingly. If you’re new to this, start with a 10–12 inch pan to allow room for flipping and turning without crowding.
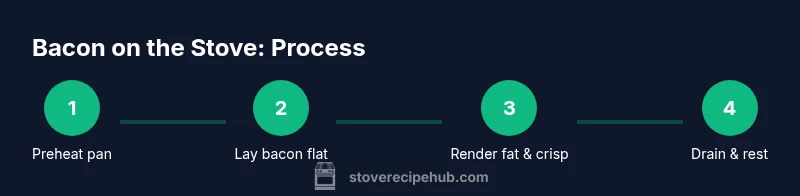
The optimal workflow: from cold pan to crispy edges
Begin with a cold pan to encourage gradual fat rendering and reduce splatter. Lay slices in a single layer, leaving space to flip. Cook slowly on low to medium heat, watching for the fat to begin shimmering and edges to curl. Flip once or twice to promote even browning, then finish in the pan until you reach the desired crispness. Remove to paper towels to drain fat and let the slices rest briefly to reabsorb surface oils for a uniform texture. This process yields bacon with crisp edges and a tender center without the risk of scorching fat at the surface.
Troubleshooting: common issues and adjustments
If bacon is curling or browning unevenly, adjust the slices so they lay flat and redistribute pieces that crowd the pan. If fat renders slowly, raise heat slightly for a moment and then reduce to maintain control while flipping frequently. If edges burn before centers render, reduce heat and allow fat to render more slowly; a splatter screen helps contain mess. Keep a small bowl handy for collecting excess fat, which you can reuse for flavoring vegetables or roasting potatoes. Practicing with different thicknesses will teach you how long to cook each batch for consistent results.
Variations and finishing touches
For extra crispness, you can finish bacon in a warm oven for a minute after pan-cooking, or pan-fry longer for chewier centers. For flavor, sprinkle light salt or pepper, or brush with a tiny bit of maple syrup toward the end for a sweet-salty profile. Let resting bacon stand briefly before serving to reabsorb fats. If you’re watching salt intake, you can pat the bacon dry halfway through cooking to remove surface moisture and reduce moisture-induced steaming, which helps with browning. These tweaks let you tailor bacon for breakfast plates, sandwiches, or salads.
Cleanup, safety, and staying efficient
Allow the pan to cool slightly before cleaning to avoid warping. Wipe excess fat with paper towels, then wash with warm soapy water. Ventilate the kitchen to manage smoke, and keep a metal utensil nearby to flip safely. Store cooked bacon in a container in the fridge if you plan to reuse later, or freeze for longer-term use. Always follow your pan manufacturer’s care instructions, especially for cast iron, to keep seasoning intact and prevent rust. A quick cleanup routine after each batch makes bacon a low-effort staple rather than a weekend project.
Quick recap: forming a reliable stove-top bacon routine
This method emphasizes a cold-pan start, gradual heat, and careful flipping for even render and crispness. Use the right pan, avoid overcrowding, and drain fat well. With practice, stove-top bacon becomes a dependable breakfast backbone for busy mornings and relaxed weekend brunches. The approach scales from a single serving to multiple people, and the same principles apply whether you’re cooking a few strips or a full batch for a crowd.
Tools & Materials
- Heavy-bottom skillet or cast-iron pan(10–12 inch is ideal for a single layer, larger for bigger batches)
- Spatula or tongs(Prefer sturdy, wide-head tools to flip without breaking slices)
- Paper towels(For draining fat after cooking)
- Stove with adjustable heat(Gas or electric; use medium-low to medium heat)
- Wire rack or plate lined with paper towels(For resting bacon and draining fat after cooking)
- Splatter screen (optional)(Helps keep the kitchen cleaner while frying)
Steps
Estimated time: 15-25 minutes
- 1
Preheat and arrange pan
Place the pan on the stove and set it to a low setting to begin warming. Do not add bacon yet; a dry, warming pan helps prevent sticking and uneven rendering. When the pan shows a light shimmer, you’re ready to lay down the first batch.
Tip: Use a cold pan trick to ensure fat renders gradually and reduces splatter. - 2
Lay bacon in a single layer
Gently lay each slice flat in a single layer with space between pieces. Overlapping causes uneven browning and can trap fat, leading to soggy edges. If needed, cook in batches to preserve even heat.
Tip: Do not crowd the pan; crowding lowers surface temperature and slows rendering. - 3
Render fat on low to medium heat
Let the fat render slowly as you monitor the edges for browning. Adjust the heat in small increments to keep fat shimmering but not smoking. Turn slices as needed to promote even crisping.
Tip: Be patient; faster heat often results in burnt edges and under-rendered centers. - 4
Flip and monitor for crispness
Flip slices once or twice until both sides develop a uniform brown color. Look for crisp edges and tender centers, not a uniform dark brown. Remove from pan promptly to prevent continued cooking.
Tip: A quick flip every 30–60 seconds keeps texture even. - 5
Drain fat and rest
Transfer bacon to paper towels or a rack to drain excess fat. Let it rest for a minute to reabsorb surface oils, which helps maintain crispness. Serve hot for best texture.
Tip: Pat lightly to remove surface oil without crushing the slices. - 6
Cleanup and storage
Cool the pan a bit, then wipe away excess fat with paper towels before washing. Store leftover bacon in an airtight container in the fridge for up to several days or freeze for longer storage.
Tip: Label dates when freezing to track freshness.
Common Questions
What is the best heat level for cooking bacon on the stove?
Medium heat is typically ideal, allowing fat to render while browning evenly. Adjust based on pan type and slice thickness.
Medium heat works best to render fat evenly without burning. If needed, tweak the heat as you cook.
Should I cover the pan while cooking bacon?
Covering traps steam and can soften texture, reducing crispness. A splatter screen helps keep mess down while letting moisture escape.
Typically, no cover; use a splatter screen for cleaner cooking.
Can I cook precooked bacon on the stove?
Precooked bacon cooks quickly and with less fat, mainly warming through. You can finish with a quick sear if you want extra crisp.
Yes, you can, mainly to reheat and crisp it up a bit.
How do I tell when bacon is done?
Look for evenly browned edges and rendered fat with a crisp texture. Centers should be tender, not rubbery or burnt.
When edges are crisp and color even, it’s done.
How should I clean up after cooking bacon on the stove?
Let fat cool, then wipe the pan with paper towels and wash with warm soapy water. Ventilate the kitchen to reduce smoke.
Cool the fat, wipe the pan, wash, and ventilate.
What pan is best for cooking bacon on the stove?
A heavy-bottom pan like cast iron or stainless distributes heat well and yields even rendering. Nonstick can work but may show its limitations at higher temps.
A cast-iron or heavy stainless pan is ideal.
Watch Video
Top Takeaways
- Start with a cold pan for even render.
- Cook on low to medium heat with space between slices.
- Drain fat and rest briefly before serving.
- Avoid overcrowding to maintain crispy edges.
- Tailor timing with pan type and thickness for best results.