Can You Wash Stove Burners? A Practical Cleaning Guide
Learn how to safely wash stove burners with step-by-step methods, whether you have gas or electric stoves, and which parts are washable. This Stove Recipe Hub guide covers tools, safety tips, and careful reassembly to keep your stove performing at its best.

Yes, you can wash most stove burners by removing removable parts and cleaning them with warm, soapy water. Do not submerge gas valves or igniters, and always dry everything completely before reassembly. This approach, supported by Stove Recipe Hub, restores shine and helps prevent buildup without compromising safety.
Is Washing Stove Burners Safe?
Cleaning stove burners is a common home task, and yes you can wash stove burners in most cases. The key is to avoid submerging elements that aren’t designed to get wet, especially gas valves, igniters, and electrical components. According to Stove Recipe Hub, washing removable parts with warm, soapy water can restore shine without compromising safety, as long as you dry everything thoroughly before reassembly. Start by turning off the stove, disconnecting power if it’s electric, and ensuring the surface has cooled. This reduces the risk of burns or electrical shock while you work. If a part looks corroded or warped, stop and replace it rather than forcing a cleaning process that could cause damage. When in doubt, consult the manufacturer’s instructions or a professional.
Which Burners You Can Clean This Way
Not every part of a stove is meant to be soaked. Burner caps, burner heads, and metal grates are typically dishwasher-safe or hand-wash friendly when removed from the cooktop. However, the ignition electrodes, thermocouples, and exposed electrical wiring should never be submerged or exposed to high moisture. For gas stoves, be mindful of the flame sensor and ignition wiring; for electric stoves, avoid wetting the control panel. Always check the manufacturer’s guidance if you’re unsure. In general, only remove and clean components that are designed to detach easily and dry completely. If your burner heads are heavily corroded, consider replacement rather than trying a deep clean that could compromise performance.
Preparing Your Burners for Cleaning
Before you begin can you wash stove burners, prepare a clean workspace. Remove knobs, grates, and all removable burner parts. Place non-removable parts on a protected surface. Create a warm, soapy bath using mild dish soap and warm water, and fill a sink or basin large enough to soak the parts. Have a soft brush and cloth ready for scrubbing. This preparation helps prevent grease from spreading and makes the cleaning process faster and more predictable. Remember to label parts if you disassemble multiple components so reassembly is exact. Stove Recipe Hub emphasizes keeping track of small screws or clips to avoid losing pieces.
Cleaning Aluminum vs Cast Iron Burners
Burner caps and grates are commonly made from aluminum or cast iron. Aluminum parts usually respond well to a warm soapy bath and light brushing, but avoid aggressive scrubbing that can dull the finish. Cast iron parts tolerate more scrubbing but require thorough drying to prevent rust. If a piece shows serious rust, consider replacement rather than aggressive scrubbing to avoid pitting. Always dry completely and apply a light coat of cooking oil to cast iron parts to maintain seasoning. For aluminum components, avoid acidic cleaners that can corrode the metal and degrade markings or enamel.
Step-By-Step Cleaning Process
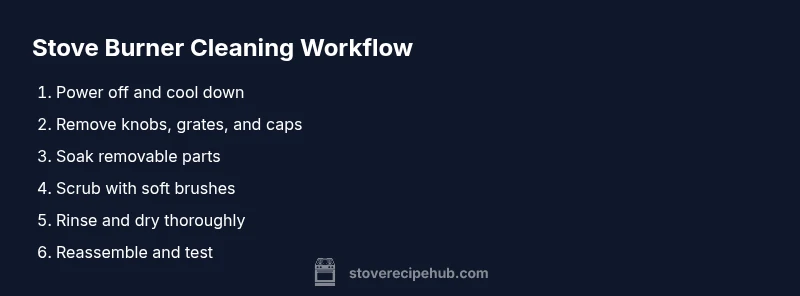
This section provides a concise workflow you can follow end-to-end to wash your stove burners safely. Begin with power off and cooling; then remove all removable components; soak, scrub, rinse, dry, and reassemble. Each action reduces risk and increases cleanliness. Start by assembling your cleaning station with warm water, mild soap, and soft brushes. Work one component at a time, moving from the top burner caps to the grates and finally the burner heads. After cleaning, rinse well to remove soap residue and dry thoroughly before putting parts back in place.
Cleaning Tips for Sticky Residue
For stubborn grease and baked-on grime, a baking soda paste can help without scratching metal surfaces. Mix baking soda with a few drops of water to form a thick paste, apply to problem areas, and let sit for 5–10 minutes before scrubbing with a soft brush. A vinegar spray can assist with mineral deposits, but avoid mixing vinegar with bleach. Always rinse completely to prevent soap or cleaner residues from interfering with flame or ignition after reassembly. Patience and gentle scrubbing yield the best results.
Dealing with Gas Stoves vs Electric Stoves
Gas stoves require extra care around igniters and gas valves. Never soak parts that contain electrical connections or wiring; use a damp cloth for the knobs and control panels instead. Electric stoves pose fewer ignition risks but still rely on dry components to avoid short circuits. In both cases, ensure you unplug or switch off power, and never rush drying. Cleaning cycles should be slower around any electronics to minimize moisture exposure.
Drying and Reassembly
Drying is as important as cleaning. After washing, lay parts on a clean towel and air-dry for at least 15–20 minutes, then finish with a towel to remove excess moisture. Reassemble components in the reverse order of disassembly, ensuring knobs click into place and caps are oriented correctly for proper flame distribution. A final wipe down around the cooktop helps remove any residual moisture that could cause rust or electrical issues in the future. This careful reassembly preserves performance and reduces future buildup.
Common Mistakes and Quick Fixes
Common mistakes include soaking igniters, using abrasive tools, and skipping the drying step. If a burner head sticks or won’t light after cleaning, recheck alignment, ensure all parts are fully dry, and test using a small flame at the lowest setting. If the ignition still fails, consult a professional rather than forcing a reset. The Stove Recipe Hub team reminds home cooks that prevention—regular light cleaning after cooking—avoids heavy buildup and keeps your stove functioning smoothly.
Maintenance Schedule to Keep Burners Clean
To maintain performance, incorporate a light cleaning after heavy cooking days and a deeper clean monthly, depending on usage. Wipe down the cooktop surface after each meal to minimize residue that can bake on. Periodically inspect burner caps for corrosion and ensure there are no dents that could affect flame distribution. Keeping a simple routine reduces the need for intensive scrubs and preserves efficiency over time.
Tools & Materials
- Dish soap (mild)(Gentle detergent not a heavy degreaser)
- Warm water(For soaking and rinsing)
- Soft-bristle brush(Non-scratch bristles)
- Old toothbrush(For tight spots and crevices)
- Baking soda(Gentle abrasive paste for tough grime)
- Microfiber cloth(Drying and buffing)
- Towel or drying rack(Drying area after wash)
- Small basin or sink(Soaking removable parts)
- Screwdriver or small tool (optional)(For detaching stubborn screws)
- Gloves (optional)(Protect hands from hot surfaces)
Steps
Estimated time: 60-90 minutes
- 1
Power off and cool down
Turn off the appliance, unplug if electric, and wait for surfaces to cool before handling any parts. This prevents burns and electrical hazards during disassembly.
Tip: If in doubt about power, flip the circuit breaker. - 2
Remove knobs
Carefully pull off control knobs and place them in a soapy bath to loosen oil and grease around the shaft.
Tip: Note the orientation of each knob for easy reattachment. - 3
Lift off grates and burner caps
Take off metal grates and any removable burner caps. These are usually dishwasher-safe or easy to wash by hand.
Tip: Keep track of which piece belongs to which burner. - 4
Detaching burner heads (if applicable)
If your model allows, remove burner heads for more thorough cleaning. Do not force parts that aren’t designed to detach.
Tip: Use a gentle twist rather than prying. - 5
Soak removable parts
Place caps, grates, and heads in warm, soapy water for 10–15 minutes to loosen baked-on grime.
Tip: Avoid soaking non-removable parts. - 6
Prepare cleaning solution
Mix a mild detergent with warm water or create a baking soda paste for stubborn spots.
Tip: Test a small area first if unsure about the cleaner. - 7
Scrub with brush
Use a soft brush to scrub away grime, then switch to a toothbrush for tight corners and grooves.
Tip: Let the paste sit on tough grime before scrubbing. - 8
Rinse thoroughly
Rinse all parts well with warm water to remove soap and residue that could affect ignition.
Tip: Check for leftover soap bubbles after final rinse. - 9
Dry completely
Pat parts dry with a microfiber cloth and air-dry any crevices before reassembly.
Tip: Moisture left on metal can lead to rust. - 10
Reassemble parts
Place burner caps and grates back in their correct positions, ensuring proper alignment.
Tip: Misaligned parts can affect flame distribution. - 11
Powder and test ignition
Wipe the surface to remove dust, reattach knobs, and test ignition at a low setting before full use.
Tip: Listen for a clean, steady flame. - 12
Final wipe-down
Wipe down the cooktop and surrounding area to remove any splashes or grease.
Tip: Keep your cleaning routine light to avoid buildup.
Common Questions
Can I wash burners with boiling water?
Boiling water can help loosen grime, but avoid extreme heat on delicate parts. Do not expose ignition components to boiling temperatures. Always allow parts to cool before submersion, and use warm water for most cleaning needs.
Boiling water can loosen grime, but avoid exposing ignition components. Allow parts to cool and use warm water for most cleaning.
Should I soak burners overnight?
Soaking overnight is generally unnecessary and can lead to rust on certain metals. A 10-15 minute soak is usually sufficient for light grime; for heavy buildup, repeat with fresh cleaning solution rather than leaving parts submerged overnight.
No need to soak overnight; a short soak often suffices, repeat if needed.
Is it safe to submerge gas burners?
Do not submerge gas burners or ignition components. Submersion can damage connections and ignite electrical issues. Clean removable caps and grates with warm soapy water, and keep electrical parts dry.
Do not submerge gas burners or ignition parts. Use warm soapy water for removable caps and grates.
What if burners won't light after cleaning?
If ignition fails after cleaning, recheck alignment and ensure all parts are fully dry. If issues persist, consult the manual or a professional to avoid unsafe conditions.
If they won’t light, recheck alignment and dryness; consult a pro if needed.
Can I use a dishwasher for burner parts?
Many burner caps and grates are dishwasher-safe, but verify your model’s guidance first. If in doubt, washing by hand with warm soapy water is safer and prevents discoloration.
Dishwasher safety depends on the model; when in doubt, wash by hand.
How often should I clean stove burners?
A light post-cook wipe after use keeps buildup minimal. Do a deeper clean monthly or when you notice visible grime or uneven flames.
Do a light wipe after cooking and a deeper clean monthly or when needed.
Watch Video
Top Takeaways
- Wash only removable parts when safe
- Dry thoroughly to prevent rust and corrosion
- Keep ignition components dry and intact
- Follow manufacturer guidance if uncertain
- Reassemble with care and test before regular use