Can You Wash Stove Coils? A Practical Guide
Learn if you can wash stove coils and how to clean them safely. This guide covers tools, step-by-step methods, safety tips, and common stove upkeep questions for home cooks.

Yes—you can wash stove coils with care. According to Stove Recipe Hub, start by unplugging the range and ensuring the coils are cool, then remove the coil to clean. Wash the coil in warm, soapy water, avoid soaking the electrical terminals, rinse, dry completely, and reassemble. Always consult your model’s manual for warnings about moisture and grounding.
Can You Wash Stove Coils? Understanding What They Are and When Cleaning Helps
Stove coils are the radiant heating elements found on many electric ranges. They sit under metal drip pans and may be removable or integrated into the burner assembly. Can you wash stove coils? In most cases, you can safely clean the coil surfaces with soap and water or a mild degreaser, but you must avoid soaking or submerging the electrical terminals, connectors, or receptacles. According to Stove Recipe Hub, safety first means turning off power, unplugging the unit, and allowing the coils to cool completely before handling. Different models vary in how easily you can detach a coil; if your coil is part of a sealed assembly, you may need to wipe only the visible surfaces without removing the piece. The overarching principle is to keep moisture away from electrical connections while still removing grease, crumbs, and burnt-on food. Regular cleaning not only improves appearance but can help maintain heating efficiency and prevent uneven cooking.
Safety First: What to Avoid and Why
Water and electricity are a risky mix around stove coils. The primary goal of cleaning is to remove grime without inviting damage to wiring, connectors, or the control switch. Never spray or dunk the coil area; never submerge a coil that is attached to the socket or receptacle; never use harsh solvents that could corrode seals. Start by turning off and unplugging the range; give coils at least 15-20 minutes to cool if recently used. If you see scorch marks, discoloration, or bent terminals, discontinue cleaning and consult the manual or a technician. According to Stove Recipe Hub, following model-specific guidance reduces risk and helps preserve warranty coverage. Keep a dry cloth handy to blot moisture, and never operate a partially wet coil with power applied. A cautious approach protects you and your appliance from electrical shock or short circuits.
Cleaning Options: Dry Wipe vs Wet Wash
Dry wipe: For light dust and crumbs, a dry microfiber cloth or soft brush may be enough. Wet wash: When grease and burnt-on residue accumulate, use a mild soap solution. Dampen a sponge or cloth, wipe coil surfaces, then wipe again with a clean damp cloth to remove soap. Avoid soaking the coil or any electrical connections. If your model allows coil removal, you can soak the coil in a bowl of warm soapy water for a few minutes, then rinse and dry completely. Always dry thoroughly before reinstalling. For stubborn grime near the terminals, gentle brushing is recommended, but do not apply pressure that could bend metal parts. Finally, let everything air-dry or thoroughly towel-dry; moisture left behind can lead to rust or electrical issues.
Step-by-Step Cleaning Overview
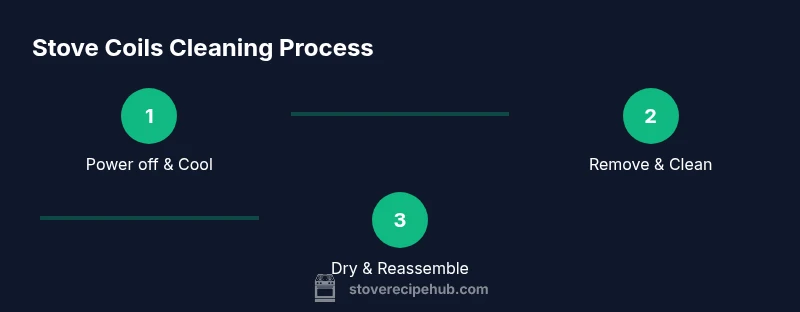
To ensure you do this safely, follow these general steps. 1) Power off and unplug the stove, then confirm the coils have cooled completely before touching them. 2) Remove coils carefully, noting their orientation. If removal isn’t possible, focus on the visible surfaces. 3) Create a mild cleaning solution with warm water and a small amount of dish soap. 4) Wipe coil surfaces with a damp sponge or microfiber cloth, using a soft brush for stubborn spots. 5) Rinse with a clean damp cloth to remove soap residue; avoid dripping water toward connectors. 6) Pat dry with a towel and allow to air-dry fully before reassembly. 7) Reinstall coils securely, plug in, and run a quick test on low heat to verify proper operation. Pro tip: taking a quick photo before disassembly helps with accurate reassembly. Warning: never force coils out of their housings; if resistance is high, consult the manual.
Troubleshooting Common Issues After Cleaning
If you notice a burnt odor after cleaning, ensure all soap is completely rinsed away and coils are fully dry. A lingering smell can indicate moisture trapped near electrical parts or residue that wasn’t fully removed. If the coil doesn’t heat evenly after cleaning, recheck that it is seated correctly in its socket and that the drip pan is properly positioned. For persistent issues, unplug the range again and inspect wiring and terminals for corrosion or damage. Remember: moisture and electricity don’t mix well, so handle with care and re-evaluate if you’re unsure about any step.
Aftercare and Reassembly Best Practices
Drying is as important as cleaning. After washing, air-dry the coils in a well-ventilated area for at least several hours, or use a dry microfiber cloth and a hair dryer set to low heat to speed up the process (being careful not to overheat components). When reinstalling, align coils with their respective terminals and ensure the drip pan is seated securely to prevent grease buildup beneath the elements. Once everything is reassembled, perform a low-heat test and listen for any unusual buzzing or sizzling. Consistent cleaning intervals—every few months for heavy cooks—will keep performance steady and minimize uneven heating. For ongoing safety, consult the manufacturer’s guidance for your exact model and consider a brief safety check if you notice any damage or degraded performance.
Tools & Materials
- Warm water(Safe for gently loosening grease)
- Mild dish soap(Gentle formula preferred)
- Non-abrasive sponge(Avoid scratches on enamel)
- Soft-bristle brush(For stubborn grime without abrasion)
- Lint-free cloth or microfiber towel(Pat dry thoroughly)
- Bucket or bowl(For soaking coils if model allows)
- Gloves (optional)(Protection from grime and heat)
- Screwdriver or pliers (optional)(Only if you need to detach covers)
- White vinegar or mild degreaser (optional)(Use sparingly for heavy grease)
Steps
Estimated time: 30-40 minutes
- 1
Power off and unplug
Ensure the range is unplugged and the coils are completely cool before touching them. This eliminates the risk of electric shock and accidental activation.
Tip: Label or photograph coil orientation before removal to aid reassembly. - 2
Remove the coils
Gently lift coils from their holders. If a coil is stubborn or fixed, do not force it; consult the manual. Detaching can vary by model.
Tip: Keep track of which coil belongs to which position. - 3
Prepare cleaning solution
Mix a small amount of mild dish soap with warm water in a basin. Avoid soaking devices with electrical connections or exposed terminals.
Tip: Use a dedicated bowl to submerge only the coil if the model permits. - 4
Clean coil surfaces
Dip a non-abrasive sponge into the solution and wipe the coil surfaces. Use a soft brush on stubborn grime, working gently to prevent damage.
Tip: Do not scrub hard at hinges or terminals. - 5
Rinse and dry
Wipe away soap with a clean damp cloth, then dry surfaces thoroughly with a towel. Allow extra time for air drying before reassembly.
Tip: Ensure all moisture is evaporated to prevent corrosion. - 6
Reinstall coils and test
Place coils back in their correct positions and secure. Plug in the range and run a low-heat test to confirm even heating.
Tip: If you smell burning, power off immediately and re-inspect for moisture. - 7
Document and maintenance plan
Record the date of cleaning and set a regular maintenance interval based on cooking frequency. Regular care helps prevent buildup and maintains performance.
Tip: Keep a small note for model-specific reminders.
Common Questions
Can I wash stove coils while they are still in the oven area?
Only if your model allows it and you can avoid getting water near electrical connections. In many cases, coils should be removed for safer cleaning. Always follow the manufacturer’s guidance.
Only clean coils in a safe, disassembled way per the manual. Avoid getting water near any electrical parts.
Is it safe to submerge stove coils in water?
No. Submerging coils can damage electrical components and pose a shock risk. Use soap and a damp cloth on the surfaces, and only submerge if the model explicitly allows it.
No—coils should not be submerged unless the manual says it’s safe.
What should I do if grease remains after cleaning?
Repeat the cleaning steps with a gentle approach. For stubborn spots, a soft brush and mild degreaser (sparingly) can help, but avoid harsh chemicals near terminals.
If grease sticks around, try a gentle repeat clean and avoid harsh cleaners near wires.
Does cleaning stove coils affect warranty?
Cleaning with mild soap and water is generally acceptable, but always verify terms in your manual. Improper cleaning or moisture intrusion could affect coverage.
Check your manual; improper cleaning can impact warranty coverage.
When should I call a professional?
If you see damaged terminals, persistent odor, or coils that won’t heat evenly after cleaning, consult a technician for safety and proper diagnosis.
If you notice damage or odd behavior after cleaning, get a professional involved.
Watch Video
Top Takeaways
- Unplug and cool before handling coils
- Use mild soap and non-abrasive tools
- Avoid moisture near electrical terminals
- Reinstall coils in correct orientation
- Consult model manual for safety and warranty