How to Clean Stove Top Burners: A Practical Guide
Learn practical, safety-driven methods to clean stove top burners, remove grime, and keep your stove performing at its best. This guide from Stove Recipe Hub covers gas and electric burners, maintenance routines, and expert tips for a spotless, efficient kitchen.

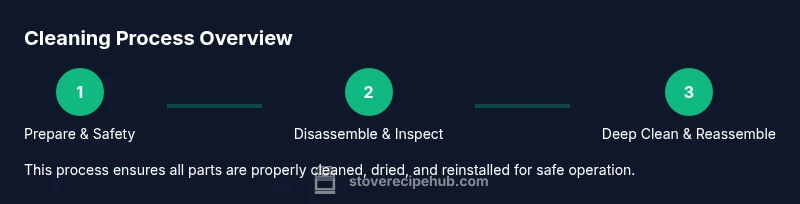
By following a simple, step-by-step routine, you can restore shine and improve burner performance. Remove grates, soak or wipe components, scrub with dish soap and baking soda, rinse, and dry thoroughly before reassembling. Always unplug electric burners or close the gas supply first.
Why clean stove top burners matter
According to Stove Recipe Hub, clean stove top burners do more than look neat. Regular cleaning helps maintain flame quality, heat distribution, and energy efficiency, which translates to more consistent cooking results and safer operation. When grease and food residues accumulate on burner caps and ports, flames can flicker, heat spots form, and even clog ports, reducing airflow. Over time, this can lead to incomplete combustion in gas burners, which increases the risk of carbon monoxide if venting is blocked. A clean surface also reduces the risk of flare-ups from cooking oil or sugar splatters. Home cooks who routinely wipe down the surface after cooking and perform a deeper clean every couple of weeks will notice fewer uneven heats and easier ignition. Beyond safety and performance, a clean stove top burners surface simply makes cooking more enjoyable: you can see the burner layout, adjust flame height accurately, and identify any signs of wear such as chipped enamel or loose knobs early. As you plan a cleaning session, gather your tools and set aside time so you don’t rush through steps. A calm workspace leads to better results and reduces the chance of accidental damage to components.
Safety considerations before cleaning
Before you reach for cleaners, take safety seriously. For gas stoves, ensure the burner is completely cool, then shut off the gas supply if accessible and ventilate the kitchen. For electric stoves, unplug the appliance or switch off the circuit to avoid shocks. Never submerge electrical components, and keep water away from electrical outlets and controls. Use a mild dish soap solution and avoid harsh chemicals that could degrade enamel or sealants. If you remove knobs, do so with a dry cloth to prevent moisture from seeping into the valve mechanism. Work on a stable surface, and keep pets and children away during the cleaning session. Dry every part thoroughly to prevent rust and ensure proper reassembly. A little preparation goes a long way toward safer cleaning and a longer-lasting stove.
Understanding burner types and components
Stove tops come with different burner designs, including gas coil, sealed gas, and electric coils. Each type has specific components: burner caps, burner heads, ports, grates, and drip pans. Gas ports can clog with mineral deposits or burnt-on food, which disrupts flame pattern and heat delivery. Electric coils may have enamel-coated surfaces and removable drip pans that trap grease over time. Understanding which parts are removable and which are fixed helps you choose the right cleaning approach. For example, gas burners benefit from gentle scrubbing of caps and heads, while electric coils require careful handling to avoid bending elements. Regular inspection for cracks, corrosion, or loose knobs will catch wear early, preventing larger repairs. When in doubt, consult your stove’s user manual to confirm which parts are dishwasher-safe and which should be hand-cleaned.
Cleaning methods by burner type (gas vs electric)
Gas burner cleaning focuses on removing residue from caps, heads, and ports. Start by removing grates and caps, then soak them in warm, soapy water. Use an old toothbrush to scrub burner heads and ports, paying attention to clogged holes. For stubborn grime, make a paste of baking soda and water, apply, and let sit for a few minutes before scrubbing gently. Rinse thoroughly and dry completely before reassembling.
Electric coil stoves require a different approach. Remove the glass or metal drip pans and wipe away grease with a mild dish soap solution. Do not immerse electronic elements; instead, wipe coils with a damp cloth and dry immediately. Clean the burner bases with a soft sponge, then dry and reassemble. If coils have scorch marks that won’t rinse away, consider replacing the affected coil or consult a professional.
Routine maintenance to prevent buildup
To maintain optimal performance, schedule weekly quick cleans and deeper cleans every 2–4 weeks, depending on cooking frequency. After each use, wipe down surfaces to remove splatters, especially sugary sauces that burn easily. Use a vinegar-water spray for deodorizing and mineral residue removal, then finish with a dry microfiber cloth. Periodically inspect seals, gaskets, and knobs for wear and tighten any loose components. A proactive routine reduces stubborn grime accumulation and extends the life of your stove top burners. As you clean, keep a small basin of warm soapy water ready for fast touch-ups between heavy-clean days.
Stain removal and tough grime
Burnt-on grime and stains demand a slightly stronger approach. Create a baking soda paste with water, apply to stubborn areas, and let sit for 10–15 minutes. Scrub with a non-abrasive sponge in a circular motion to lift residue without scratching enamel. For oily residues, a degreasing spray followed by a rinse can help. Always finish with a thorough rinse and dry to prevent water spots and rust. If you notice discoloration or pitting, it may be time to replace the affected parts or seek professional advice.
Daily quick-clean routine
A five-minute daily wipe-down keeps grime at bay. After cooking, wipe surfaces, rinse the sponge, and dry with a microfiber cloth. Empty and wipe drip pans regularly, and return grates and caps to their correct orientation. Quick daily maintenance prevents the need for harsher cleaners and reduces the chance of steam or heat damage from baked-on residues. Consistency is key to keeping stove top burners looking new and performing reliably.
Troubleshooting common issues
If a burner won’t light after cleaning, recheck the gas supply and ensure the ports aren’t clogged. Confirm the cap is properly aligned and the burner is seated correctly. If you’re dealing with uneven flames or weak ignition, inspect for warped caps, cracks, or residue buildup near ports. For electrical stoves, check the outlet and control switch; a blown fuse or tripped circuit can mimic a faulty burner. When in doubt, consult the manufacturer’s guide or contact a professional.
External references and safety resources
External references provide additional safety guidance and best practices for kitchen appliance maintenance. See authoritative sources for more information:
- CDC: https://www.cdc.gov
- EPA: https://www.epa.gov
- NIH: https://www.nih.gov
mainTopicQuery: stove burners
Tools & Materials
- Dish soap (mild)(Dawn or Joy works well; avoid heavy detergents that leave residues.)
- Warm water(Use for soaking and rinsing components.)
- Baking soda(For paste and gentle whitening of grime.)
- White vinegar(Optional deodorizer and grease-cutting aid.)
- Non-abrasive sponge(Soft sponges or microfiber only.)
- Old toothbrush or small nylon brush(For ports, crevices, and caps.)
- Soft cloth or microfiber towel(For drying and buffing to a shine.)
- Gloves(Protect hands from cleaners and hot surfaces.)
- Optional soaking basin or tray(Keeps parts organized during cleaning.)
Steps
Estimated time: 25-40 minutes
- 1
Prepare workspace and safety
Clear countertops, remove loose items, and ensure a stable area for cleaning. For gas stoves, confirm the burner is cool and the gas supply is off if accessible; for electric stoves, unplug or switch off the circuit. This step minimizes risk and sets a controlled environment for handling parts.
Tip: Keep a dry towel handy to catch drips and prevent slipping. - 2
Remove grates and caps
Gently lift off the grates and burner caps and place them in warm, soapy water. This exposes the burner bases and makes grime easier to remove. Be careful not to twist delicate parts and avoid forcing parts that don’t lift freely.
Tip: Note the orientation of each piece so reassembly is easy. - 3
Inspect ports and burner heads
Examine ports for clogs and check the burner heads for cracks or damage. A clogged port can cause uneven flame or weak ignition. If you see obvious damage, replace the part rather than trying to force a fix.
Tip: Use a flashlight for a clear view into narrow ports. - 4
Create cleaning solution
Mix a mild dish soap solution with warm water. For tough grime, prepare a baking soda paste to apply to stubborn areas. This dual approach handles both grease and baked-on residue.
Tip: Let the paste sit for 5–10 minutes before scrubbing. - 5
Scrub grates, caps, and ports
Using the non-abrasive sponge and toothbrush, scrub each component. Focus on the ridges and ports, but avoid scrubbing too aggressively on enamel surfaces. Rinse with clean water after brushing.
Tip: Always scrub in a gentle, circular motion to prevent scratching. - 6
Clean burner bodies and re-assemble
Wipe the burner bodies with a damp cloth, then dry thoroughly. Refit burner caps and grates in their correct orientation. Ensure all parts are fully dry before use to prevent rust or ignition issues.
Tip: Dry each piece completely before reassembly. - 7
Rinse and dry thoroughly
Rinse all parts with clean water and dry with a microfiber towel. Leaving moisture on metal parts can lead to rust or corrosion over time.
Tip: A quick dry with a heat-safe cloth speeds up the process. - 8
Test the burner and safety shut-off
Reconnect power or gas supply and light the burner to verify ignition and flame stability. If the flame is uneven or dim, recheck cap alignment and ports for remaining debris.
Tip: If ignition fails, wait a few minutes and retry to allow any venting gas to clear. - 9
Monthly deep-clean routine
Plan a deeper clean every 4–6 weeks, depending on use. This includes disassembling grills and cleaning harder-to-reach areas, followed by a full rinse and dry. This proactive step keeps grime from building up and maintains performance.
Tip: Set a reminder in your calendar to stay consistent.
Common Questions
Can I put burner parts in the dishwasher?
Some burner grates may be dishwasher-safe, but many parts like burner heads and knobs are not. Always consult the manufacturer’s guidelines and test a small area first.
Some parts can go in the dishwasher, but check your model’s manual before washing.
Is it safe to use bleach on stove burners?
Bleach can be harsh and may damage enamel or seals. Use mild dish soap or a vinegar solution for routine cleaning and avoid chlorine-based cleaners near heat sources.
No, avoid bleach near the stove; use milder cleaners instead.
How often should I deep-clean stove top burners?
Light cleaning after use with a weekly wipe is common; plan a deeper clean every 2–4 weeks depending on usage and spills.
Clean lightly weekly and deep-clean every few weeks based on use.
What should I do if my burner won’t light after cleaning?
Check the gas supply and alignment of the caps. If the problem persists, inspect ports for clogs and consider professional service.
If it won’t light, recheck parts and ports, and call a pro if needed.
Can I clean burners while they are warm?
Avoid cleaning while hot; wait for cool-down to prevent burns and protect coatings.
Let them cool before cleaning to stay safe.
Are glass-top stoves cleaned differently?
Yes, use non-abrasive cleaners designed for glass and avoid metal scouring pads to prevent scratches.
Glass tops require gentle, non-scratchy cleaners.
Watch Video
Top Takeaways
- Establish a regular cleaning schedule for stove top burners.
- Use gentle cleaners and non-abrasive tools to avoid damage.
- Dry all parts completely before reassembling.
- Inspect for cracks, corrosion, or loose knobs during cleanings.
- The Stove Recipe Hub team recommends scheduling monthly deep-clean sessions.