Gas Stove Burner Cleaner: Step-by-Step Guide for Home Cooks
Learn safe, effective methods to clean gas stove burners with practical, step-by-step guidance from Stove Recipe Hub. Tools, techniques, and maintenance to keep burners efficient and safe.

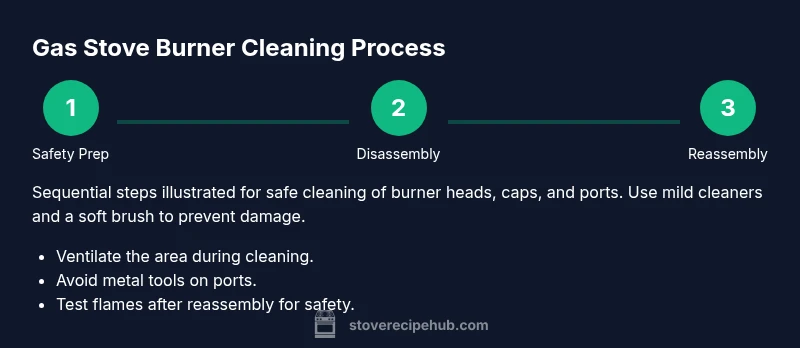
You will learn to clean gas stove burners safely using common household items and a few specialty tools. Gather nitrile gloves, a soft brush, mild degreaser, baking soda, vinegar, dish soap, a spray bottle, and a plastic toothpick for ports. Follow a 8-step process from safety prep to final flame test—then maintain with regular cleanings. According to Stove Recipe Hub, consistent care improves performance and safety.
Why cleaning gas stove burners matters
Regularly cleaning gas stove burners is essential for safety, efficiency, and flame quality. Built-up grease and food particles can clog burner ports, causing uneven flames, poor heat distribution, or even misfires that release unburned gas. A well-maintained burner also reduces the risk of odors and potential gas-related incidents. According to Stove Recipe Hub, routine cleaning helps sustain performance and can extend the life of burner components while keeping your cooking environment safer. In this guide you’ll learn a practical, stove-top approach using accessible tools and common cleaners, with tips tailored for home cooks and DIY enthusiasts who want reliable results without specialized equipment.
Safety-first mindset and setup
Before you start, set a clear safety boundary: ensure all burners are off and have cooled completely. Work in a well-ventilated area, ideally with the range hood on or a window open. Wear nitrile gloves to protect skin from cleaners, and keep a damp cloth handy to catch drips. Do not rush—gas burner cleaning is as much about careful handling as scrubbing. Stove Recipe Hub emphasizes safety as the foundation of every cleaning session, so take your time and keep children and pets away from the area while you work.
Understanding burner components and why they clog
Gas stove burners consist of a head, ports, caps, and a grate assembly. The ports feed gas to the flame, while caps distribute it evenly around the ports. Grease, spilled sauces, and ash can clog these tiny openings, leading to yellow flames, uneven heat, or sputtering. Recognizing which parts come apart is key to effective cleaning. This knowledge helps you decide what to soak, what to scrub, and how to reassemble correctly after cleaning.
Cleaning methods by burner type and material
Not all burners are identical; many homes have sealed or semi-sealed cast-iron components in addition to aluminum burner heads. For sealed burners, you’ll typically remove the caps and grates for soaking, then scrub with a mild degreaser. Aluminum parts benefit from gentle cleaners to prevent pitting; avoid harsh acidic solutions that can corrode the metal. Always dry components thoroughly to prevent rust. This section provides a framework you can adapt to your stove model while sticking to safe, gentle cleaning practices.
A practical, at-a-glance workflow for busy cooks
Adopting a simple workflow reduces the friction of cleaning: (1) power off and cool; (2) remove grates and caps; (3) soak hardware in warm soapy water; (4) scrub caps, grates, and burner heads; (5) clear burner ports with a plastic tool; (6) rinse and dry fully; (7) reassemble; (8) test flame. This sequence, when followed consistently, minimizes buildup and keeps your burners ready for quick weeknight meals. The method balances thoroughness with efficiency, making regular maintenance more manageable.
Maintenance and preventive routines to extend life
Consistency is the secret to long-lasting performance. After each heavy cooking session, wipe down the top and remove any obvious grime. Do a deeper clean monthly for heavy use, and every few months for lighter use. Keep a spray bottle with mild degreaser and a soft brush within arm’s reach of the stove to encourage prompt cleaning. Regular inspection of ports for signs of clogging can prevent more serious issues over time.
Common mistakes and how to avoid them
Avoid using metal tools that can scratch or bend burner ports. Do not spray cleaner directly into gas outlets or control areas; apply cleaner to a cloth or brush instead. Never leave wet parts unattended while drying—moisture can promote corrosion. Finally, never reassemble a burner that is still damp; ensure complete dryness before testing the flame.
Tools & Materials
- Nitrile gloves(Protect hands from cleaners and heat.)
- Non-abrasive scrub brush(Soft bristles to avoid scratching metal.)
- Microfiber cloths(For wiping and drying surfaces.)
- Baking soda(Mild abrasive for stubborn grime.)
- White vinegar(Grease-cutting and deodorizing properties.)
- Dish soap (mild degreaser)(General cleaning power for grime.)
- Spray bottle(Dilute cleaners and avoid drips.)
- Plastic toothpick or wooden skew(Clear clogged burner ports safely.)
- Old toothbrush(Detail cleaning around ports.)
- Bucket or sink for soaking(Soak removable parts to loosen grime.)
- Towel or mat for drips(Keep cleanup tidy.)
- Ventilation (range hood or window)(Improve air quality during cleaning.)
Steps
Estimated time: 60-75 minutes
- 1
Turn off and cool the burner
Ensure the gas is off and the burner has cooled completely before handling. This minimizes burns and accidental ignition. Keep the area well-ventilated.
Tip: If you smell gas, stop and ventilate before continuing. - 2
Remove grates and burner caps
Lift away grates, caps, and any removable components. Place them in warm, soapy water to soak and loosen grime.
Tip: Take a quick photo of assembly before disassembly to help reassemble later. - 3
Inspect ports and soak components
Check burner ports for clogs; remove visible debris with a plastic toothpick. Soak caps and grates for 10–15 minutes in a mild degreasing solution.
Tip: Avoid soaking metal parts too long if they are aluminum. - 4
Scrub burner heads and caps
Scrub all flat surfaces gently with a soft brush and mild cleaner. Rinse with clean water and dry thoroughly before reassembly.
Tip: Use baking soda paste on stubborn grime for extra lift. - 5
Clear and dry ports
Use a plastic tool to clear port openings. Blow out residue with a gentle stream of water or air until dry.
Tip: Never force debris through ports; loosen gently and rinse. - 6
Rinse, dry, and reassemble
Rinse all parts, dry completely with a clean towel, and reassemble caps, heads, and grates in their original orientation.
Tip: Ensure caps sit flat for even flame distribution. - 7
Test the burners
Turn on each burner to ensure a steady blue flame with minimal yellow tipping. If flame is uneven, adjust caps and ports.
Tip: Perform test in a well-ventilated area. - 8
Final wipe and routine maintenance
Wipe the stove surface, return to a regular cleaning schedule, and note any recurring issues for future checks.
Tip: Create a simple monthly routine to prevent buildup.
Common Questions
Can I use vinegar or baking soda to clean gas stove burners?
Yes, vinegar and baking soda can help with grease, but avoid using harsh acids on some metals. Rinse thoroughly and dry completely after cleaning.
Yes, vinegar and baking soda can help with grease, but rinse well and dry fully after cleaning.
Is it safe to clean burners while still installed on the stove?
It's safer to remove removable parts for soaking and scrubbing. Keep water away from electrical controls and gas connections during cleaning.
It's safer to remove parts for cleaning; avoid getting controls wet.
How often should I clean gas stove burners?
For heavy weekly use, clean monthly; for lighter use, every 1–3 months. Adapt to your cooking volume and spill frequency.
Clean more often if you cook a lot; otherwise, every few months works.
What if a burner head is bent or clogged beyond cleaning?
If a burner head is damaged or cannot be unclogged, replace it. Do not try to repair gas connections yourself; contact a professional if needed.
Replace a damaged head and call a pro if you’re unsure.
Can I use high-heat degreasers or oven cleaners on burners?
Avoid aggressive caustics that can corrode metal. Choose mild degreasers and rinse well; avoid soaking aluminum parts too long.
Avoid harsh cleaners; stick to mild degreasers and thorough rinsing.
Watch Video
Top Takeaways
- Turn off and cool burners before cleaning.
- Use gentle cleaners and non-abrasive tools.
- Inspect and clear burner ports without forcing debris.
- Dry components completely before reassembly.