Gas Stove Burner Repair: A Practical Guide
Learn practical, safe techniques for gas stove burner repair. Diagnose common issues, clean ports, test for leaks, and know when to call a professional. A Stove Recipe Hub guide.

This guide teaches you how to perform gas stove burner repair by diagnosing common issues, cleaning ports, and replacing parts when needed. You’ll learn safety checks, essential tools, and a practical step-by-step process you can safely follow at home if you have basic DIY skills and a gas shut-off nearby.
Why gas stove burner repair matters
Gas stove burners are a safety-critical component in any kitchen. When a burner misbehaves—weak flame, uneven heat, or yellow tips—cooking quality suffers and fuel efficiency drops. Regular, careful maintenance can prevent larger problems and help you cook more safely. According to Stove Recipe Hub, addressing ignition problems early and keeping ports clear reduces irregular flame patterns and improves overall burner performance. Understanding how burners work also demystifies why certain symptoms appear, which leads to smarter, safer repairs. This section lays the groundwork for diagnosing issues, cleaning ports, and selecting the right replacement parts if needed.
Safety prerequisites before you begin
Always start by turning off the gas supply and disconnecting any electrical power to the stove. Work in a well-ventilated area and keep a functioning carbon monoxide detector nearby. If you smell gas with a strong odor, hear hissing, or see diligent sweating around connections, evacuate immediately and call emergency services. Do not attempt repairs if you cannot safely shut off the gas. These precautions protect you, your family, and your home while you inspect valves, burners, and igniters.
Understanding burner components
A typical gas burner assembly includes the burner head, ports, cap, grate, igniter, and the control valve assembly. The ports are tiny holes that feed gas to the flame; blockages or gaps in the cap can cause uneven flames or ignition failures. The igniter creates a spark to light the gas. If any of these parts become dirty, misaligned, or worn, performance can degrade. Familiarize yourself with your model’s layout before disassembly to avoid misplacing components.
Diagnosing common burner problems
Common symptoms include a weak or inconsistent flame, yellow tipping, or a burner that won’t ignite. Start with simple checks: ensure the burner cap sits evenly, inspect for food debris blocking ports, and test the ignition by watching a visible spark and flame sequence. If the flame remains irregular after cleaning, the problem may involve the valve, an obstructed port, or a worn igniter. In such cases, proceed with caution and consider professional service for parts replacement.
Cleaning and restoring burner ports
Turn off all supplies and remove the burner cap and grate. Use a dry brush or a toothpick to gently clear debris from the ports—never poke aggressively or widen holes. Soak the burner head in warm soapy water, then scrub with a soft brush. Rinse with clean water, dry completely, and reassemble. Residual moisture can affect ignition, so ensure everything is thoroughly dry before testing. Regular cleaning prevents buildup that impairs flame quality.
Replacing faulty parts: when and how
If cleaning doesn’t restore consistent ignition, inspect the igniter for cracks or a worn electrode. Replacing the igniter or burner cap may be necessary. Only use replacement parts compatible with your model, and consult your user manual for part numbers. When replacing, disconnect power and gas, follow the manufacturer’s instructions, and verify the new part seats properly to ensure a reliable spark and flame.
Reassembling and testing safely
Reinstall the cap, grate, and burner head in the correct orientation. Turn on the gas supply and attempt a light. If the flame is stable and blue, you’ve likely resolved the issue. Use a soap-and-water solution to test around connections for leaks—any bubbles indicate a leak that requires tightening or resealing. If you detect a gas odor during testing, shut off the supply and call a professional. The goal is a clean, efficient burn with no leaks.
Maintenance routines to prevent future issues
Create a simple maintenance schedule: weekly quick cleanings of the burner head, monthly checks of igniters, and seasonal inspections of gas connections. Keep a brush or compressed air (gentle) on hand to clear ports after spills. A well-maintained burner uses fuel more efficiently and reduces the likelihood of ignition failures. Consistency is key to long-term performance.
Troubleshooting checklist you can print
Print this concise guide and tape it near your stove for quick reference: 1) Shut off gas before any work. 2) Remove and clean caps and ports. 3) Check ignition spark. 4) Test with soap solution for leaks. 5) Reassemble and test. 6) Call a pro if you smell gas or can’t locate the issue.
Tools & Materials
- Gas shut-off wrench or adjustable wrench(For turning off the gas supply if needed; use cautiously)
- Phillips head screwdriver(To remove burner screws or grate panels)
- Flat-head screwdriver(For prying covers or cleaning ports)
- Small wire brush(Clean ports and burner head without harsh scrubbing)
- Toothbrush or small cleaning brush(Clean crevices and ports with gentle brush strokes)
- Soft cloths or lint-free rags(For drying and wiping residues)
- Dish soap and water(Cleaning solution and leak testing; use sparingly)
- Safety gloves and goggles(Personal protective equipment for hands and eyes)
- Replacement parts kit (burner caps/igniter orifice) compatible with your model(Optional if worn or damaged; ensure compatibility)
- Gas leak detector solution or soap bubbles(Bubble test around connections to confirm leaks)
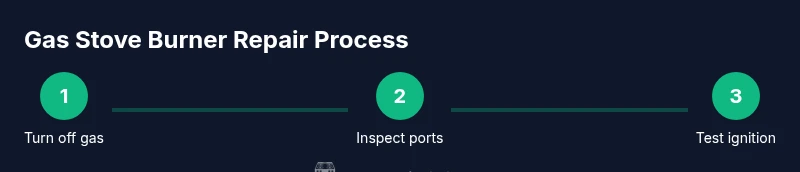
Steps
Estimated time: 45-90 minutes
- 1
Turn off gas and power
Shut off the gas supply at the valve and disconnect any electrical power to the stove if applicable. This prevents accidental ignition or electrical shock during inspection. Wait for any residual gas to dissipate before touching components, and keep a clear work space.
Tip: If you smell gas, evacuate and call emergency services immediately. - 2
Remove burner components
Carefully lift the burner grate and cap to expose the burner head and ports. Take a quick photo of how parts sit to help you reassemble correctly later.
Tip: Keep track of each part's orientation to avoid misassembly. - 3
Inspect and clear ports
Use a dry brush or a straight pin to clear clogged ports. Do not enlarge or reshape holes. Ensure ports are free of debris, then dry all parts completely before reassembly.
Tip: Avoid using metal tools that could scratch or widen the ports. - 4
Clean burner head and cap
Soak the burner head and cap in warm soapy water, then scrub with a soft brush. Rinse, dry thoroughly, and inspect for cracks or damage before reinstalling.
Tip: Moisture can affect ignition; ensure complete dryness. - 5
Check igniter and electrode
Look for cracks or corrosion on the igniter. If sparking is weak or inconsistent, consider replacing the igniter or electrode with a compatible part.
Tip: Handle with care to avoid breaking delicate ceramic components. - 6
Reassemble and test for leaks
Reattach all components in their correct positions. Turn on gas and ignite to confirm a clean, blue flame. Use a soap solution to check joints for bubbles indicating a leak.
Tip: If bubbles appear, tighten connections and retest; if unresolved, shut off gas and seek a professional.
Common Questions
Can I repair a gas stove burner myself?
Yes, for simple cleaning and port clearing with the gas off and safety precautions. For ignition issues, warped parts, or persistent leaks, professional service is recommended.
Yes, you can handle basic cleaning and port clearing safely, but call a pro for complex problems or gas leaks.
What tools do I need for gas stove burner repair?
Essential tools include a screwdriver set, adjustable wrench, brushes, and gloves. Replacement parts should be model-compatible and installed according to the manufacturer’s instructions.
You’ll need screwdrivers, a wrench, brushes, gloves, and model-specific replacement parts.
How do I test for gas leaks after repairs?
Mix soap and water or use a gas leak detector around joints and connections. If you see bubbles, tighten or reseal; if you smell gas or bubbles persist, shut off gas and call a professional.
Do a bubble test on all joints, and seek professional help if leaks remain.
When should I replace a burner cap or igniter?
Replace if cracked, corroded, or if the burner does not ignite reliably. Use compatible parts and follow the model’s replacement steps.
Replace worn parts when ignition is unreliable or visible damage is present.
Is it safe to test a flame by lighting it directly after cleaning?
Only test after confirming a proper ignition and a blue flame. Do not perform risky flame tests near cleaning residues or without proper ventilation.
Wait until the flame is steady and blue, then test further if needed.
Watch Video
Top Takeaways
- Turn off gas and power before any work
- Clear burner ports and clean thoroughly for optimal flame
- Test for leaks with soap solution and reassemble carefully
- Replace worn igniters or caps only with model-compatible parts
- Maintain a simple routine to prevent future failures