Gas Stove Fix: Safe, Step-by-Step Troubleshooting
Learn a practical, safety-first guide to diagnosing and fixing common gas stove issues—from ignition problems to uneven flames—with actionable steps, pro tips, and when to call a pro.

This guide helps you safely diagnose and fix common gas stove issues. You’ll verify the gas supply, inspect the igniter, clean burner ports, and test for leaks—while following essential safety steps. If you smell gas or the burner won’t spark after cleaning, skip DIY fixes and call a licensed pro. Stove Recipe Hub shares practical, home-friendly steps to get your stove running again.
Understanding Gas Stove Fix Safety and Scope
Gas stoves are reliable but the fix process for common issues should always begin with safety. A safe and effective gas stove fix starts with risk assessment and strict controls: shut off the gas supply at the appliance valve or main line, unplug the unit if possible, and ensure the area is well-ventilated. Keep flames away from cleaners, and never test for gas leaks with an open flame. If you suspect a leak, evacuate the area and call your gas utility immediately. This section clarifies which DIY tasks are reasonable and when to involve a professional. According to Stove Recipe Hub, safety always comes first, especially when ignition, gas flow, or leak concerns are involved.
The goal is to empower you to handle minor issues confidently while recognizing when professional expertise is required. By the end of this guide, you’ll understand safe starting points for DIY fixes and clear signals to stop and seek help. This is not a substitute for a licensed contractor, but a practical framework for home cooks to troubleshoot without compromising safety.
Common DIY Fixable Issues on a Gas Stove
Many gas stove problems fall into two broad categories: ignition issues and flame quality/flow issues. DIY fixes are often successful for non-emergency problems when you follow proper safety steps. Common fixable issues include: - Ignition won’t light: inspect the igniter, clean the burner ports, and reseat the burner cap. - Weak or irregular flame: clean ports, adjust the air shutter, and ensure the burner is properly seated. - Yellow or orange flame: usually a sign of dirty ports or improper air flow; cleaning and rebalancing air intake often fixes it. - Burner won’t stay lit after ignition: inspect the thermocouple or safety valve on older models and re-seat components. Always monitor for gas odor. If odor is present, stop and call the gas company. - Gurgling or bubbling in the flame: clean ports and ensure nothing is blocking the burner head. - If you smell a strong gas odor at any time, do not attempt fixes; exit the area and contact your utility immediately.
While DIY fixes can be effective for routine maintenance, difficult tasks or uncertain situations warrant professional support. This approach aligns with Stove Recipe Hub’s emphasis on safety-first cooking and maintenance practices.
Diagnostic Checklist Before You Start
Before you start any gas stove fix, run through a quick diagnostic checklist to minimize risk. - Turn off the stove’s power and the gas supply if accessible. - Ventilate the area by opening windows or turning on a range hood. - Inspect visible components for loose connections or obvious damage. - Gather required tools and cleaning supplies so you don’t interrupt the process mid-task. - Read the manufacturer’s manual for model-specific instructions and safety warnings. - Check for gas odor; if detected, evacuate and call the gas company immediately. - If you’re unsure about any step, stop and seek professional guidance. This careful prep aligns with best practices from Stove Recipe Hub and keeps you safe while troubleshooting.
Note: Do not attempt electrical testing or disassembly of gas lines unless you’re trained and equipped for it. Safety overrides all DIY repairs.
Tools and Cleaning Techniques for Gas Burners
A clean burner and properly adjusted igniter are the foundation of reliable performance. Gather tools and materials such as a soft brush, non-abrasive sponge, mild dish soap, clean rags, a flashlight, needle-nose pliers, small screwdrivers, a non-conductive gloves, and a soapy water solution for leak checks. Clean burner ports gently to avoid enlarging or damaging holes. Avoid water near electrical components. For stubborn grime, warm soapy water or a mild degreaser can help; never use harsh chemicals on burner parts. After cleaning, reassemble and test according to the manual.
Pro tip: Work in a well-lit area and use a flashlight to spot hidden residues in burner ports. A little patience during reassembly can prevent misalignment and poor flame quality.
Step-by-Step Troubleshooting Scenarios (Non-Technical Snapshot)
In this section, you’ll see a practical flow of decisions for common issues without getting into the deep workshop details. Start with confirming the gas supply and power status, then assess ignition and flame quality. If ignition fails after a thorough cleaning, consider worn igniter components or clogged ports as likely culprits. For persistent gas smells, treat it as an emergency and contact the utility immediately. This overview helps you decide when DIY is reasonable and when professional intervention is prudent.
Remember, never apply liquid fuel or solvents near an open flame or hot surfaces. Always prioritize safety and follow model-specific guidelines. This snapshot complements the step-by-step guide and helps you approach fixes with confidence.
Safety Protocols and When to Call a Pro
Gas safety is non-negotiable. If you smell gas, or hear hissing near any connection, evacuate and call the gas provider. Do not operate electrical switches or flames in the area. For non-emergency concerns like ignition replacement or cleaning clogged ports, proceed with caution using the manufacturer’s instructions and appropriate PPE. When a fix would involve gas line work, valve replacement, or any risk to your home’s gas system, contact a licensed technician. If a fix fails to restore safe operation after careful cleaning and inspection, it’s time to call a pro. This approach saves time, money, and potential hazards while continuing to support your home-cooking goals.
The Stove Recipe Hub team emphasizes safety as the non-negotiable element of any gas stove maintenance plan.
Maintenance Habits to Prevent Future Issues
Proactive maintenance reduces the frequency of gas stove fixes. Schedule routine cleaning after heavy cooking or spills. Regularly inspect the igniter, burner caps, and ports for wear and buildup. Keep the knobs clean and free from grease, and replace worn parts promptly. A simple monthly wipe-down with a damp cloth, followed by a dry wipe, helps preserve performance. When possible, maintain a log of observed issues and fixes to inform future troubleshooting. Consistency matters: small, regular actions prevent larger, costlier repairs and keep your stove running smoothly for years.
Real-Life Scenarios: Before and After
Consider a typical home kitchen where a stubborn ignition was fixed by cleaning the igniter and ports, reseating the burner cap, and testing for proper spark and flame. After the fix, ignition is responsive, and flame quality remains consistent during cooking. In another scenario, a yellow flame turned blue after cleaning and adjusting the air intake. These practical outcomes illustrate how methodical steps and careful maintenance lead to reliable, safe operation. The goal is to help you achieve similar improvements with confidence, supported by Stove Recipe Hub’s practical guidance.
Tools & Materials
- Non-conductive safety gloves(Protect hands when handling hot surfaces and cleaners)
- Phillips and flat-head screwdrivers(Model-specific sizes (#1-2 common) for burner assembly screws)
- Small adjustable wrench(Useful for loosening connections without damage)
- Soft brush and toothbrush(Clean burner ports and grills without scratching)
- Cloth rags and mild soap(Clean surfaces and wipe away grease)
- Soapy water solution (dish soap + water)(For leak testing and port cleaning)
- Gas leak detector solution(Bubble test for detecting leaks safely)
Steps
Estimated time: 60-90 minutes
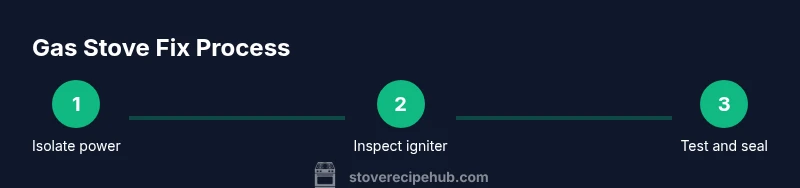
- 1
Isolate power and gas supply
Power down the stove and turn off the gas supply at the appliance valve or main line if accessible. Ensure the area is ventilated and free of flames or sparks. This reduces the risk of ignition while you inspect components.
Tip: Never bypass the gas shutoff to test ignition. - 2
Inspect the igniter and burner ports
Remove the burner cap and inspect the igniter for cracks or buildup. Clean ports with a soft brush to remove residue that blocks gas flow. Re-seat the burner cap so air and gas mix correctly.
Tip: Use a flashlight to spot hidden debris in hard-to-see ports. - 3
Clean and reassemble components
Soak removable parts in warm, mild soap solution, then scrub with a soft brush. Rinse and dry thoroughly before reassembling in the correct orientation. Improper alignment can prevent ignition or cause uneven flames.
Tip: Make sure all parts are completely dry before powering up. - 4
Test ignition and flame height
Restore power and gas supply, then attempt to light the burner. Observe the spark and flame; if the flame is weak or yellow, adjust the air shutter or re-clean ports. Confirm consistent flame height across attempts.
Tip: If the flame remains irregular, schedule a professional check. - 5
Check for leaks after reassembly
Apply soapy water to joints and connections; look for bubbles indicating a leak. If bubbles appear, shut off gas and call your utility; do not operate switches in the area.
Tip: Always test in a well-ventilated area. - 6
Decide whether to replace or call a pro
If ignition is still unreliable or a strong gas odor persists after cleaning and testing, or if you’re uncertain about any step, contact a licensed technician. Safe operation is the priority.
Tip: When in doubt, err on the side of safety and don’t push through a suspected leak.
Common Questions
Is it safe to fix a gas stove by myself?
You can handle basic cleaning, inspection, and minor adjustments if you follow the manual and safety guidelines. Do not attempt gas line work or force components that resist proper seating. When in doubt, seek professional help.
You can do basic cleaning and inspection, but stop at gas line work or hard-to-solve issues and call a pro.
What should I do if I smell gas?
Evacuate the area immediately, avoid turning switches on or off, and call your gas provider. Do not use lighters or flames. Stay clear until professionals arrive.
If you smell gas, leave the area and call your gas company right away.
Why is my gas stove flame yellow?
A yellow or orange flame usually indicates incomplete combustion due to dirty ports or restricted air flow. Clean ports and adjust the air intake to restore a blue flame.
A yellow flame often means the burner is dirty or not getting enough air, so cleaning and adjusting airflow helps.
Can clogged burner ports cause a gas leak?
Clogs don’t cause a gas leak, but they can create incomplete combustion and inconsistent flames. They’re a safety concern and should be addressed promptly.
Clogs don’t cause leaks, but they can make the flame unsafe or unreliable.
How often should you clean a gas stove?
Clean monthly or after heavy cooking, and wipe spills promptly. Regular maintenance helps prevent buildup that interferes with ignition and flame quality.
Clean the stove monthly and wipe spills right away to keep it dependable.
When should I replace the ignition module?
If sparking is irregular or cleaning doesn’t restore ignition, parts may be worn. Replacement by a professional is recommended for safety and proper function.
If it won’t spark reliably after cleaning, have a tech check the ignition module.
Watch Video
Top Takeaways
- Verify safety before DIY fixes
- Clean ignition and ports for reliable sparking
- Test for leaks after reassembly
- Do not ignore gas odors or persistent ignition issues
- Consult a pro for complex gas line work