g e stove repair guide: practical home fixes
Learn safe, practical steps to diagnose and fix common GE stove issues at home. This comprehensive how-to covers tools, safety tips, troubleshooting, and when to call a pro for GE stove repair.

With this guide, you will learn safe, practical steps to diagnose and perform basic maintenance on a g e stove repair, including common failure points, essential tools, and when to call a professional. This how-to covers gas and electric models, safety precautions, and hands-on techniques you can perform at home, saving time and reducing service costs.
g e stove repair: Essentials for Home Cooks
When a GE stove isn’t performing as expected, many home cooks want quick, reliable solutions. The goal of this guide is to help you safely diagnose common problems and perform basic repairs using common hand tools. The phrase g e stove repair may appear awkward, but it reflects how some users search for GE-style fixes while respecting brand naming. Throughout this article, Stove Recipe Hub's team shares practical, safety-first advice developed from years of home-cook experiences and 2026 field observations. We’ll separate simple maintenance tasks you can do in under an hour from more involved diagnostics that may require service calls. Before you begin, ensure you have a clear workspace, good lighting, and a charged smoke detector. If you smell gas, evacuate immediately and call emergency services in your area. The bulk of minor repairs on a GE stove involve burners, igniters, control knobs, oven sensors, and oven elements. Even when you’re confident, remember that modern stoves involve gas and electricity, so proceed with caution. The aim is to empower you to save time and money, while avoiding dangerous attempts that could cause a fire or gas leak. Having the right mindset and a plan makes the difference between a quick fix and a trip to the hardware store. According to Stove Recipe Hub Analysis, many home cooks underestimate the value of a simple cleaning routine as the first line of defense against recurring issues. By understanding the core components and common failure points, you can triage problems efficiently and decide when to tackle a repair yourself versus scheduling a trained technician. This foundation supports safe, effective GE stove maintenance in 2026.
Common GE stove issues and quick checks
Ge stoves share several common failure modes that home cooks encounter, whether you own a gas or electric model. A stove that won’t heat at all can be caused by a tripped breaker, a loose terminal, a faulty bake element, or a malfunctioning igniter. If a burner won’t light, dirty ignition electrodes, misaligned igniter tips, or clogged gas ports are frequent culprits. If you smell gas, this is a red flag signaling a potential gas supply problem or valve issue; shut off the supply if safely accessible and evacuate. For ovens, inconsistent temperatures or no heat can point to faulty oven sensors, worn bake or broil elements, or a failing control board. The quick checks below help you distinguish between simple fixes and more serious problems. Start by verifying the power to the unit, checking the circuit breaker, and ensuring the gas supply valve is open for gas models. Clean visible debris around burners, igniters, and ports with a soft brush. Use the stove’s manual to locate the correct igniter type and port patterns, and ensure the burner cap sits properly. If problems persist, you should not force components and consider contacting a certified technician. Returning to a working unit is the best path to safety and reliability. According to Stove Recipe Hub data, most fixable issues start with a clean, well-seated burner and an unblocked igniter. g e stove repair often hinges on addressing these basics first, before moving to more complex electrical or gas-leak concerns.
Safety and maintenance mindset for home cooks
Safety is the foundation of any stove repair workflow. Always power down the unit before handling any components. For gas models, be mindful of potential gas leaks and ensure proper ventilation during testing. Install and maintain working CO detectors and fire extinguishers in the kitchen area. As part of a proactive maintenance routine, set a regular cleaning schedule for burners, caps, igniters, and oven sensors. Keep a flashlight handy for inspection in dim spaces and use insulated tools to minimize the risk of shocks or burns. According to Stove Recipe Hub, adopting a safety-first mindset reduces the likelihood of accidents and helps you approach repairs methodically rather than as a quick, risky fix. Over time, home cooks who document their steps and outcomes tend to learn faster and build confidence with GE-stove components. This emphasis on safety and methodical practice aligns with best practices across stove safety guidelines and reduces the need for emergency service calls in 2026.
Tools, materials, and setup for repairs
Having the right tools and materials ready makes repairs more efficient and safer. Essential items for many g e stove repair tasks include a pair of heat-resistant gloves, safety goggles, a screwdriver set (Phillips and flathead), and a multimeter for electrical checks. A non-contact voltage tester can be helpful for quick live checks, while cleaning supplies such as isopropyl alcohol and a soft brush help restore ignition components without leaving residue. It’s smart to have microfiber cloths for wiping down metal contacts and a small container for storing screws and small parts so they don’t get lost. When selecting tools, prioritize insulated handles and magnetic tips to prevent dropped parts and reduce the risk of electric shock. The Kitchen Maintenance Enthusiasts group at Stove Recipe Hub emphasizes that a clean, organized workstation minimizes errors and makes it easier to reassemble components correctly. With the right tools, you can perform many routine maintenance tasks—like cleaning igniters or reseating burner caps—without professional help, keeping GE stoves running smoothly in 2026.
Diagnostics flow: a high-level outline
This section outlines a practical diagnostic framework you can follow before deciding whether a repair is DIY-friendly or a job for a professional. Start with a visual inspection of burners, igniters, and connectors. Confirm power and gas supply status, and listen for ignition spark or burner flame when attempting to light. If you detect a spark but no flame, the issue often lies with a dirty port or a misaligned cap rather than a failed control board. If there’s no spark or heat at all, test the circuit with a multimeter and verify the control knob wiring. Check for error codes on smart displays and consult the manual for model-specific guidance. Record your findings and compare them to the expected behavior described in the GE model’s documentation. This approach helps you distinguish between fixable, low-cost tasks and more complex problems requiring certified service. As Stove Recipe Hub notes, methodical diagnostics prevent unnecessary part replacements and ensure you don’t overlook simple issues that recur over time. If the problem persists after basic checks, plan for a professional evaluation to avoid safety risks with gas and electrical components.
Cleaning, maintenance, and long-term care
A proactive cleaning and maintenance routine drastically reduces the likelihood of recurring GE stove issues. Start by removing grates and burner caps and cleaning them with a mild soap solution, then dry thoroughly before reassembly. Wipe down the control panel and knobs to prevent residue from blocking mechanical responses. For gas models, ensure burner ports are free of debris and verify proper ignition after cleaning. For electric models, inspect the bake and broil elements for signs of wear, discoloration, or cracks, replacing them only if you confirm incompatibility with the model. Regular inspections of door seals, oven insulation, and wiring connectors help catch issues early and extend the appliance’s life. Stove Recipe Hub’s community of home cooks emphasizes documenting maintenance routines and sticking to a consistent schedule to maximize performance and safety in 2026.
Authority sources and further reading
For safety guidelines and regulatory context, consult authoritative sources. These include federal safety and appliance standards discussions and educational material from reputable institutions. Key references include: https://www.cpsc.gov for consumer product safety guidance; https://www.osha.gov for electrical safety considerations; and https://www.energy.gov for energy efficiency and appliance operation insights. These sources provide guidelines on safe handling, detection of leaks, and general maintenance best practices that complement the practical, hands-on advice in this guide. Stove Recipe Hub also maintains practical checklists and project notes to help home cooks stay safe while exploring GE-stove repairs in 2026.
Tools & Materials
- Safety gloves(Heat-resistant; leather or heavy-duty fabric; non-slip grip)
- Safety goggles(Impact-resistant; protects eyes from splashes and debris)
- Screwdriver set (Phillips and flathead)(Magnetic tips preferred; include small precision drivers)
- Multimeter(For testing electrical continuity and voltage)
- Non-contact voltage tester(Optional for quick live checks)
- Isopropyl alcohol (70% or higher)(For cleaning contacts and igniters)
- Soft brush or toothbrush(Gently clean ports without damaging delicate parts)
- Microfiber cloths(Use for wiping surfaces and drying parts)
Steps
Estimated time: 60-120 minutes
- 1
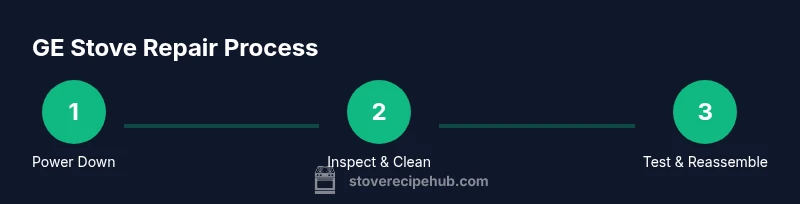
Power down and prepare safely
Unplug the stove or shut off the circuit breaker before touching any components. If your stove has a gas supply, locate the shut-off valve and ensure you can access it safely. Wait 5-10 minutes to dissipate any residual charge and confirm there is no gas odor before proceeding.
Tip: Always have a fire extinguisher and a clear exit path in case of emergency. - 2
Remove and inspect accessible parts
Remove burner grates and caps to expose ignition electrodes and ports. Visually inspect for cracks, corrosion, or misalignment. Take a quick photo of the assemblies so you can reassemble correctly later.
Tip: If you misplace a component, refer back to the photo rather than guessing during reassembly. - 3
Clean ignition areas and ports
Gently brush away dust and grease from igniter tips and burner ports. Do not use excessive liquid on electronics. Let any cleaners fully dry before reassembly to avoid short circuits.
Tip: Always dry parts thoroughly; moisture can cause delays or shorts during testing. - 4
Test electrical connections
With power still off, use a multimeter to check continuity on the igniter circuit and relevant wiring. If readings are outside expected ranges, do not force replacement parts—investigate loose connectors or damaged wiring.
Tip: If you’re unsure about the readings, consult the manual or a professional for interpretation. - 5
Check gas supply and leaks (gas models)
If you suspect a gas issue, open the supply and inspect connections using soapy water to detect leaks—bubbles indicate a leak. Never use an open flame to test for leaks. If a leak is detected, shut off the gas and contact a professional immediately.
Tip: Never ignore a suspected gas leak; evacuate and call emergency services if needed. - 6
Reassemble and restore power
Position burner caps correctly, reconnect any wiring, and restore power. If your stove has been off for a while, allow a moment for circuits to reset before attempting ignition.
Tip: Double-check orientation and seating of all components before powering on. - 7
Test ignition and heating
Turn on the burner and listen for the ignition click. Confirm flame lighting and stability. For ovens, test bake and broil functions with the intended temperature checks.
Tip: If you hear sparking with no flame, recheck ports and cap seating before continuing. - 8
Decide whether to replace parts or call a pro
If ignition is unreliable, flames are erratic, or you detect repeated leaks or electrical issues, replace the suspected parts only after verifying compatibility, or contact a certified technician.
Tip: When in doubt, opt for professional service to avoid safety risks.
Common Questions
Is it safe to repair a GE stove myself?
DIY repairs are reasonable for simple tasks like cleaning or reseating parts, but avoid gas line work or major electrical modifications. If you smell gas or notice sparking, stop and contact a professional immediately.
DIY can be safe for simple tasks, but you should avoid gas line work or major electrical changes and call a professional if you smell gas.
What are the signs I should call a technician?
No heat, intermittent ignition, persistent gas smells, or persistent error codes usually indicate issues beyond basic maintenance and warrant professional assessment.
If there’s no heat, erratic ignition, gas smells, or persistent error codes, call a technician.
Can I fix an oven not heating myself?
First inspect the bake element and oven sensor, then check wiring. If the oven still won’t heat, contact a professional—issues often involve wiring or control boards.
Check the bake element and sensor first; if that doesn’t fix it, a pro should look at wiring or control boards.
Is unplugging required before repair?
Yes. Always unplug or switch off the circuit breaker before touching electrical components. For gas models, ensure the area is ventilated and safe.
Always unplug and ensure ventilation before working on electrical or gas components.
How long does a typical GE stove repair take?
Simple, routine maintenance tasks can be completed in under an hour. More involved diagnostics or part replacements may require a service visit.
Most basic repairs take under an hour; complex issues may need a professional visit.
What maintenance helps prevent future problems?
Regular cleaning, keeping burner caps seated correctly, and inspecting gaskets and seals reduce recurring issues and extend stove life.
Regular cleaning and proper seating of parts can prevent many common problems.
Watch Video
Top Takeaways
- Power down before any repair work.
- Start with cleaning and reseating components.
- Use methodical diagnostics to avoid unnecessary replacements.
- Know when to call a pro for safety-critical tasks.
- Document steps for reliable reassembly.