How to Clean Under the Stove Without Moving It
Learn a safe, step-by-step method to clean beneath your stove without moving it. Practical tools, reach techniques, and maintenance tips for a healthier, pest-free kitchen.

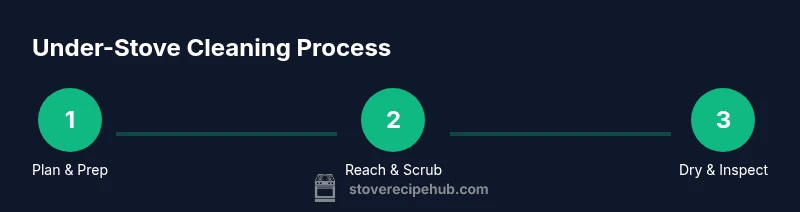
You can clean under the stove without moving it by using long-handled tools, a lightweight vacuum with a crevice attachment, and a gentle cleaning routine. Start with a dry sweep, then reach behind drip trays and along the cabinet base, using a combination of brushes and microfiber cloths. Finish with a quick dry wipe and a maintenance plan to prevent buildup.
Why cleaning under the stove matters
A clean space under the stove reduces the risk of grease buildup, spills leaking into cabinet gaps, and pest intrusion. Over time, crumbs and moisture can create odors and support mold growth in damp corners. Regular attention also helps you spot gas leaks or loose burner seals earlier, which is especially important for gas stoves. According to Stove Recipe Hub, maintaining a clean under-stove area saves you time and hassle by preventing big messes later and keeping your kitchen healthier overall.
To tackle under-stove cleaning without moving the appliance, you’ll rely on reach, leverage, and safe tools rather than brute force. Start by evaluating the space: check for loose items, cords, gas lines, and nearby outlets. Knowing your stove type—gas with exposed burners, electric coil, or smooth-top—helps tailor the approach, because some models have delicate drip pans or crumb trays that can be damaged by moisture or abrasive brushes. In this guide we cover safe methods for the most common configurations and offer a practical, repeatable routine you can adopt.
A tidy under-stove area also supports pest prevention. Crumbs, cooking splatters, and moisture create inviting conditions for ants, cockroaches, and even rodents if gaps exist. If you notice obvious signs of infestation, start with a thorough dry sweep with a vacuum, then follow with a gentle cleaning routine and seal gaps to limit entry points. Finish by drying all surfaces completely before you close up, so no moisture lingers to attract mold.
Safety first: assess your stove type and surroundings
Before you reach for tools, take a moment to identify your stove’s configuration and power sources. Gas stoves require shutting off the supply or turning off the burner valves before you reach beneath the unit. Electric stoves should be unplugged if accessible, especially when you plan to wipe near electrical cables or outlets. If you rent, check your lease for permission to move the appliance or arrange access with the landlord. Never attempt work around gas lines while the stove is lit or hot.
Inspect the area for potential hazards. Look for exposed wiring, cracked drip pans, or signs of water leakage from pipes behind the range. If you see suspect components, postpone a deep clean until a professional checks the system. Keep children and pets away from the working area, and work in a well-ventilated space. This safety mindset protects you and preserves the appliance’s integrity while you work in tight spaces.
Tools and setup: preparing for a cleaner reach
As you prep, lay down dropped cloths or old towels to catch drips and prevent mess on the floor. Gather a long-handled duster, a vacuum with a crevice attachment, soft microfiber cloths, a non-scratch scraper, a spray bottle, baking soda, mild dish detergent, and a flashlight for visibility in narrow gaps. Ensure the area is cool to the touch and free of standing heat sources. Place a small mirror or portable light behind the stove to illuminate shadowy corners so you don’t miss grime behind crumb trays or along the base of the kickboard.
Set the vacuum to a gentle setting and test in a small, inconspicuous area first to avoid scattering dust. Keep a trash bag handy for debris, and plan your route so you won’t have to twist or yank cords or gas lines. By organizing your tools ahead of time, you’ll move through the job with steady, controlled motions and minimize the risk of accidental damage.
Reach and positioning: accessing hard-to-reach areas
Position yourself with a stable stance and use an extendable tool set to maximize reach. Start from one side, slowly angling tools toward the back, using a dry brush to sweep loose crumbs away from crevices. When you encounter stubborn grime, switch to a slightly damp microfiber cloth or a baking soda paste applied with a small applicator. Keep your wrists straight to avoid strain, and take short breaks if you feel seated in a difficult position. If the space behind the drip tray is especially tight, use a flexible grabber tool to pull debris toward the front where you can vacuum it.
Always work in small sections, and wipe surfaces as you go to prevent smearing. The goal is to create a clean path that you can re-create weekly with minimal effort. A well-planned reach not only cleans effectively but also reduces the chance of accidentally nudging the stove or bending cabinet hardware.
Deep-clean techniques for different stove types
Gas stoves benefit from a focus on drip pans, burner bases, and the framework that sits just under the burners. Use a non-scratch scraper to lift caked grease, followed by a microfiber wipe with a mild detergent solution. Electric coil and smooth-top stoves require avoiding excessive moisture around coils and electronics. For these, a damp cloth with a mild cleaner is sufficient, and a baking soda paste can address stubborn stains on the exterior panels without scratching the finish. Never spray directly onto electrical components; apply cleaner to the cloth first and test a small area before broader use.
If you encounter rust or mineral deposits on metal surfaces, use a gentle paste and let it sit for a few minutes before scrubbing softly. Rinse with a clean cloth and dry completely. For hard-to-reach gaps, a tiny brush or q-tip can remove debris that a larger rag misses. These targeted techniques help you tailor cleaning to your specific model and prevent damage from aggressive scrubbing.
Quick-clean routines for weekly maintenance
A weekly 10-minute wipe can dramatically reduce buildup. Start by brushing away loose crumbs with a long-handled tool, then dampen a microfiber cloth with a mild solution and run it along the cabinet base and back panel. Finish with a dry cloth to remove any remaining moisture. Quick maintenance also includes a quick check for signs of moisture accumulation, small leaks, or pest activity. By establishing a routine, you build muscle memory for safe techniques and keep the area consistently clean.
Seasonal checks are also helpful: twice a year, wipe behind the drip pans and examine gaskets or seals for wear. Keeping a simple cleaning calendar or reminder on your phone can help you stay on track and avoid letting grime accumulate.
Dealing with stubborn grime and spills
Stubborn grime may require a combination approach. Prepare a baking soda paste by mixing baking soda with a small amount of water until it forms a thick paste. Apply the paste to stubborn spots and let it sit for 5–10 minutes before scrubbing with a non-scratch tool. For tougher stains, a vinegar solution can help break down grease, but avoid using it on unsealed wood or certain finishes. Wipe away residue with a damp cloth, then dry thoroughly.
Always test cleaners in an inconspicuous spot first to ensure you don’t damage finishes. If you encounter warped paint, peeling seals, or rust, consult the appliance manufacturer’s guidance or a professional technician before continuing.
Aftercare, sanitization, and prevention
Drying completely is essential to prevent mold and musty odors. Open the cabinet doors for a few minutes or use a fan to speed up drying after cleaning. Sanitize high-touch surfaces with a mild, non-irritating cleaner and wipe dry. Consider placing corrosion-resistant drip pans or protective liners to simplify future cleans. Finally, keep your under-stove area dry by wiping up spills promptly and addressing any moisture sources, such as leaks or condensation, to prevent future buildup. Regular maintenance reinforces a healthier kitchen environment and extends appliance life.
Tools & Materials
- Long-handled duster/brush(Extends reach to behind the stove's base)
- Vacuum with crevice attachment(Low suction near the stove to avoid dispersing dust)
- Soft microfiber cloths(Use dry first, then damp with cleaner)
- Non-scratch scraper or spatula(Lift grime without scratching enamel)
- Spray bottle with mild cleaner(Diluted dish soap or vinegar solution)
- Baking soda(Make a paste for stubborn grime)
- Mild dish detergent(Gentle cleaning for everyday grime)
- Flashlight or headlamp(Illuminate shadowy corners)
- Protective gloves(Keep hands clean and protected)
- Drop cloths or old towels(Contain spills and drips)
- Mirror or small hand-cleaning brush(Assist with tight corners)
- Isopropyl alcohol (sanitizing)(Fine for small areas if appropriate)
Steps
Estimated time: 30-45 minutes
- 1
Power down and prepare
Turn off gas or unplug the stove as appropriate. Place towels to catch spills and ensure the area is cool to touch before you start. This prevents accidental ignition or electrical hazards while you clean.
Tip: Test a small area with a dry cloth first to ensure no finishes react to cleaners. - 2
Survey and plan your reach
Assess the space, identify the back corners, and map a path so you don’t miss hidden grime. Decide which tools will reach behind the drip pans and along the cabinet base.
Tip: Work in sections to avoid losing track of dirty and clean areas. - 3
Clear debris with a dry sweep
Use a long-handled brush or dry microfiber to sweep crumbs toward the front. A vacuum with a crevice attachment helps remove fine dust from tight seams.
Tip: Do not use excessive force; let the tool do the work. - 4
Apply a gentle cleaner
Dampen a microfiber cloth with a mild cleaner and wipe along the base of the stove, focusing on grease-prone spots. Avoid soaking electrical components or gas lines.
Tip: Never spray cleaner directly onto the stove or electrical parts. - 5
Tackle stubborn grime with paste
For stubborn stains, apply a baking soda paste to the area and let sit for a few minutes. Gently scrub with a non-scratch scraper until the grime yields.
Tip: Rinse the cloth frequently to prevent re-depositing grime. - 6
Rinse and wipe dry
Wipe away cleaner and grime with a damp cloth, then dry thoroughly with a clean towel. This prevents moisture buildup and mold formation.
Tip: Keep surfaces dry before reactivating burners or gas lines. - 7
Inspect hidden areas
Peek behind drip pans, undersides of shelves, and along the cabinet base for any remaining debris. Remove and clean removable components if present.
Tip: If removal seems risky, seek professional help rather than forcing components. - 8
Final check and safety revalidation
Ensure all cleaned surfaces are completely dry and there are no loose parts or cracks around the stove. Reconnect power and restore gas supply if applicable, and test basic functionality.
Tip: Keep a log of your cleaning date for future maintenance. - 9
Schedule ongoing maintenance
Set a regular cleaning cadence—a quick weekly wipe and a deeper monthly session helps maintain cleanliness and prevent buildup.
Tip: A calendar reminder can help you stay on track.
Common Questions
Is it safe to clean under the stove without moving it?
Yes, it’s safe if you first shut off the gas and/or unplug the stove, avoid moisture near electrical components, and use extendable tools. Follow manufacturer guidelines for your model.
Yes, it is safe provided you turn off power or gas, avoid soaking electrical parts, and use extendable tools to reach tight spaces.
What if I can't reach the space under my stove?
Use a combination of long-handled tools, a flexible grabber, and a crevice vacuum attachment. Take breaks and work in small sections to avoid strain and ensure complete coverage.
If you can't reach, switch to extendable tools and work slowly in sections.
Can I use water near electrical outlets?
Yes, but only with damp cloths—never spray water directly on outlets or cords. Wipe and dry thoroughly to prevent moisture damage.
Yes, but only dampen cloths; avoid spraying water on outlets and dry completely.
How often should I clean under the stove?
Do a quick wipe weekly and a deeper clean monthly, increasing frequency if you cook heavily or notice buildup sooner.
Clean weekly with a quick wipe and do a deeper clean monthly.
What should I do if I see mold or pests?
Don’t ignore signs of mold or pests. Clean thoroughly, seal entry points, and consult a professional if the problem persists.
If you see mold or pests, address quickly and consider professional help.
Watch Video
Top Takeaways
- Develop a weekly quick-clean ritual.
- Use extendable tools to reach tight spaces safely.
- Avoid moisture near electrical components.
- Tackle stubborn grime with baking soda paste as needed.
- Inspect behind removable parts for hidden dirt and pests.