How to Move a Stove Without Scratching the Floor
Learn safe, floor-protective methods to move a stove without leaving scratches. This comprehensive guide covers floor assessment, protective gear, step-by-step movement, and post-move checks for scratch-free repositioning.

Moving a stove without scratching the floor requires preparation, protective mats or sliders, and careful lifting or sliding. Start by assessing floor type and stove weight, then plan the route, guard corners, and use a dolly or sliders to minimize friction. This guide covers essential steps, safety checks, and practical tips for scratch-free repositioning.
Why This Task Demands Careful Prep
Moving a stove is not a routine task like rearranging lightweight furniture. The risk of scratching, denting, or loosening floor coatings increases with weight, friction, and misalignment. Before you touch the appliance, plan thoroughly: measure clearance, inspect the floor condition, and check for obstacles. Floors vary—bare wood, laminate, vinyl, tile, or sealed concrete—each requiring different protective strategies. The goal is a smooth, low-friction pathway that distributes weight and minimizes resistance.
Friction management is central. A stove dragged across a floor can gouge or wear away finish, especially where casters or feet contact the surface. Sliders or protective mats reduce abrasion by spreading load over a larger area and by providing a low-resistance glide. If mats aren’t available, a thick sheet of plywood or masonite can serve as a temporary transfer surface. Alignment matters: ensure the stove is square to the path and that doors, handles, and burners have ample clearance. Tight turns may necessitate temporary corridor widening by moving chairs or small furniture. Never rush. A deliberate pace reduces injury risk and makes final positioning easier.
According to Stove Recipe Hub, floor protection begins long before the first inch is moved: plan, protect, and practice. The more you prep, the lower the risk. The following sections outline a practical, step-by-step method that balances safety with efficiency, whether you’re moving a gas stove, electric range, or compact apartment unit. Adapt to your floor type and appliance weight, and consider a helper for stability and leverage.
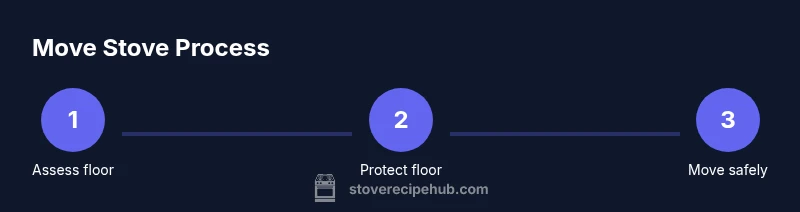
Assessing Floor Type and Stove Weight
Before any movement, identify the floor type and estimate the stove’s weight. Hardwood and laminate floors can scratch if misaligned; ceramic tile tolerates sliding better but can crack if edges bite into the grout. If you’ve got vinyl or linoleum, protection is paramount to prevent gouges and punctures. Weigh the stove mentally or consult the manufacturer’s specs; extra-heavy ranges may require a dolly with a higher weight rating. If you’re unsure about the stove’s weight, err on the side of caution and use equipment rated for the maximum expected load.
Next, inspect the route: clear a wide, obstacle-free path with a smooth surface. Check thresholds, rug transitions, and the creep of door sills. If you anticipate difficulty at corners, plan the route to minimize turning radius. Finally, decide on a protection system—sliders, a transfer board, or a dolly—that suits the floor and stove type. These choices will guide your next steps and influence safety checks during the move.
Based on Stove Recipe Hub research, pre-move analysis saves time and reduces floor damage. A precise assessment helps you select the right protection and the appropriate number of helpers. This block sets the stage for a safer, scratch-free relocation.
Protective Gear, Sliders, and Transfer Surfaces
Protective gear is your first line of defense against floor damage. Use non-slip mats, felt sliders, or disk sliders designed for heavy loads. For flat, hard floors, place a plywood or masonite transfer surface under the stove to create a stable glide plane and to reduce friction on vulnerable finishes. If using sliders, ensure they’re rated for the stove’s weight and sized to cover the entire base. Position sliders or transfer boards at the center of gravity to prevent tipping during movement.
Sturdy, height-appropriate equipment matters. A dedicated appliance dolly with secure straps is ideal for long moves or when turning corners. If you don’t have a dolly, consider a heavy-duty furniture moving strap and multiple helpers to lift and guide the stove while a transfer surface remains in place. Always test the setup by gently pushing a corner first, listening for drag and feeling for resistance. The goal is a controlled glide with minimal resistance and no sudden shifts that could nick the floor.
When you’re done positioning, secure the equipment and wipe away any dust or debris that could catch on the floor during the final slide. This block emphasizes the protective layer between the stove and the floor, reducing scratches and wear during repositioning.
Space Preparation and Safety Protocols
Clear the entire work area. Remove rugs, small furniture, and fragile items from the path. Ensure there’s ample headroom to prevent accidental contact with cabinets or door frames. Turn off gas at the valve (if you’re moving a gas stove) and unplug the stove if it’s corded. If gas is involved, ventilate the area and keep a clear space for any emergency access. Check for loose floor patches or raised grout that might snag sliders.
Position a helper on either side of the stove to guide and steady it, particularly around corners. Use a soft landing zone—old blankets or floor runners—adjacent to the path to catch the stove if a slip occurs. Keep sleeves rolled up and wear non-slip shoes; maintain a straight back and bend at the knees when lifting. Finally, preview the route with the companions to confirm a shared understanding of roles and signals. A well-prepared space significantly lowers risk and helps avoid last-minute scrapes.
Movement Principles: Glide, Tilt, or Lift—Which Is Right
There are three core approaches to moving a stove: glide on protective sliders, slide on a transfer board, or a cautious tilt-and-pivot with helpers. Gliding preserves floor finish by distributing weight. A transfer board (plywood or masonite) creates an even, rigid surface so the stove doesn’t snag on small debris. Lifting is only viable if the stove’s weight is manageable and you have enough strength plus assistance from others. When in doubt, use a dolly with straps; secure the stove to prevent shifting during movement. Always keep the load close to your body to protect your back and maintain balance.
Work slowly, communicating clearly with your team. Move short distances, pausing to check for resistance and floor temperature (feels warm where there’s friction). Avoid sudden jerks and keep wheels centered over the floor to prevent gouging. If you encounter a rough patch, stop, adjust the protection, and test again. This method prioritizes floor safety while maintaining control over the stove’s movement.
In all cases, keep hands away from hot surfaces and ensure no gas or electrical lines are accidentally touched. The aim is a smooth, predictable progression that minimizes friction and protects both the floor and the appliance.
Final Positioning, Releveling, and Post-Move Checks
Once the stove has reached its new location, slowly disengage the protective gear, then recheck and relevel the appliance. Confirm that gas or electrical connections are properly reconnected (if you disconnected them) and that the stove sits level for safe operation. Inspect the floor for scratches or discoloration; if any damage is found, document it and address it promptly—early detection minimizes long-term wear. Replace all floor protections and test the stove’s range settings to ensure no interference from its new position.
Take a final walk around the area to ensure nothing is left in the walkway and that there are no tripping hazards. If you used a transfer surface, remove it gradually and store it away from heavy traffic areas. This final step solidifies the move and completes the scratch-free relocation.
Common Pitfalls and Troubleshooting
Even seasoned DIYers can slip into common mistakes. Overloading sliders beyond their rated weight causes sudden friction and scratches. Underestimating clearance around doorways leads to dinged trim or bent handles. Not testing the route before full movement can cause surprises mid-slide. If you encounter resistance, pause, reassess floor protection, and expand the path if needed. If you hear grinding or see floor fibers elevating, stop and re-protect before continuing. If you must reposition the stove again, proceed with one small adjustment at a time to maintain control and prevent damage.
Tools & Materials
- Stove dolly with broad base(Choose a dolly rated for the stove’s weight; use straps to secure.)
- Furniture sliders or protective floor sliders(Felt or teflon sliders, sized to base dimensions.)
- Plywood or masonite transfer board(At least 1/2 inch thick; large enough to cover the base area.)
- Non-slip floor mats or thick blankets(Place as landing zones and for added protection.)
- Utility knife or scissors(To cut protective coverings if needed.)
- Protective gloves and closed-toe shoes(Wear sturdy footwear; protect hands during handling.)
- Helper(s) for stability(Two or more people recommended for balance.)
- Ratcheting straps or bungee cords(To secure the stove to the dolly if moving longer distances.)
- Masking tape or chalk(Mark the starting/ending positions and path.)
Steps
Estimated time: 30-60 minutes
- 1
Clear area & shut off utilities
Remove obstacles and create a wide path. If moving a gas stove, shut off the gas at the valve and ventilate the area. Unplug if applicable and disconnect any removable wiring or cords. Confirm helpers are ready and aligned with the planned route.
Tip: Communicate clearly using simple signals; assign a lead helper for coordination. - 2
Position protection & transfer surface
Lay down protective mats along the path and place a transfer board under the stove’s base. Ensure the board sits flat and that its edges won’t snag during movement. If using sliders, test their glide in a small starting movement.
Tip: Test the surface with a light push before full movement to avoid surprises. - 3
Attach dolly or sliders and secure
If using a dolly, center the stove and secure with straps. If using sliders, align them evenly with the stove feet. Make sure the load is balanced and the center of gravity remains over the protective surface.
Tip: Avoid placing fingers under the stove; keep hands clear of pinch zones. - 4
Move in small increments
Push the stove slowly a few inches at a time, pausing to check alignment and surface protection. Pivot carefully around corners, maintaining a steady pace. Communicate any needed adjustments before proceeding.
Tip: If resistance increases, stop and re-assess the path rather than forcing the move. - 5
Rotate into final position
With the route clear, bring the stove to its final location. Re-check spacing around cabinets and edges. Remove protection only after the stove sits fully in place.
Tip: Keep everyone ready to react if the stove shifts unexpectedly. - 6
Reconnect utilities & level
Reconnect gas or electricity as required, then relevel the stove if needed. Verify gas pressure (for gas stoves) and ensure the appliance sits flat. Do a final visual inspection for scratches or trapped debris.
Tip: Double-check level and door clearances to avoid future issues.
Common Questions
Is it safe to move a stove by myself?
Moving a stove solo is not advised for heavier models or gas stoves. Always have at least one helper and use protective equipment. If you’re unsure, pause and seek assistance to prevent injuries or floor damage.
Moving a stove alone isn’t recommended, especially for heavy or gas models. Get help and protective gear to stay safe and protect your floor.
What if the floor is carpeted?
Carpet adds friction and can snag sliders. Use a rigid transfer board over a wide path and consider a dolly with wider wheels to distribute weight more evenly.
If you have carpet, use a transfer board and a dolly with wide wheels to spread out the load.
Can I use a regular furniture dolly for a stove?
A regular dolly can work if it’s rated for the stove’s weight and size. Otherwise, use a stove-specific dolly or multiple helpers with a transfer board for stability.
A regular dolly can be ok if it’s rated for the stove; otherwise, use a heavier-duty solution and have help.
What should I do if a scratch occurs?
If a scratch happens, stop the move, document the damage, and assess whether it’s cosmetic or structural. Clean the area gently and consider refinishing or patching as needed before using the stove again.
If you scratch the floor, stop, check the damage, and handle it promptly to prevent further issues.
Should I disconnect gas lines during movement?
If you have a gas stove, shut off the gas at the valve before moving. If you’re unsure about disconnecting gas lines, stop and contact a licensed professional.
Shut off the gas valve before moving. If unsure, call a pro.
How do I re-level after moving?
Place a level on the stove top and adjust feet or rollers until the bubble sits centered. Check door alignment and oven seals for proper operation.
Use a level to re-check the stove after moving and adjust as needed.
Watch Video
Top Takeaways
- Protect the floor with mats and boards.
- Check floor type and stove weight before moving.
- Use a helper team and proper equipment.
- Move slowly and test the path regularly.
- Re-check for scratches after repositioning.