How to Move Out a Stove: Safe Step-by-Step Guide at Home
A practical, safety-first guide to moving out a stove, covering disconnection, protective prep, transport with a dolly, and reinstallation for gas or electric models.

Moving out a stove safely requires planning, proper equipment, and careful disconnection of utilities. Start by confirming your stove type (gas or electric), measuring doorways and hallways, and gathering a helper. You should unplug or shut off power, and arrange for a licensed professional to handle any gas lines. With a clear plan, you can move the appliance without damage or leaks.
Planning the Move: Assessing Your Setup
Moving out a stove is more than hauling an appliance; it requires careful planning to avoid damage to the stove, the home, and potentially dangerous gas or electrical hazards. Before you pick up tools, survey the space in your current kitchen and the destination. Measure doorways, hallways, and stair landings to confirm the stove will fit through without tilting. Check the weight and dimensions of your stove model; if you can't find the exact specs, estimate based on typical freestanding ranges.
According to Stove Recipe Hub, the planning phase is the single most important step of any stove relocation. A clear plan reduces surprises and sets you up for a safe move. Create a simple floor plan: mark the starting position, map the doorway widths, and identify obstacles such as an offset pantry or cabinet doors that swing inward. If your home has tight corners, you may need to remove a wall or door trim or temporarily relocate a nearby appliance to create a wider path. Finally, decide whether you will perform the move yourself with helper(s) or hire a professional for the disconnection or transport segments.
Tools, Materials, and Safety Gear
Before you touch the stove, assemble a toolkit and safety gear so you are prepared for every task. A moving dolly, heavy-duty blankets, ratchet straps, a tape measure, screwdrivers, and gloves are essential. For electric stoves, ensure the circuit is switched off at the breaker; for gas stoves, do not attempt to disconnect gas lines yourself unless you are a licensed plumber. Keep a flashlight, a phone for emergencies, and a friend to assist. Label detachable parts to reassemble later. Safety basics: wear closed-toe shoes, avoid loose clothing, and keep pets away from the moving path. If you smell gas, evacuate and call emergency services. This plan is strengthened by your separate tools/materials list that confirms all essential items in advance.
Gas vs Electric: Disconnection Rules and Permits
Gas stoves require a professional to shut off and disconnect the line. Do not try to cap or disconnect a gas line yourself unless you are licensed. Electric stoves can be unplugged if they are corded, or the circuit breaker should be flipped off for hardwired models. In many places, a permit is not required for a simple home relocation, but always check local codes. Documentation or confirmation from your utility or landlord can prevent compliance issues during the move. The key is safety first: if anything feels uncertain, pause and contact a professional.
Preparing the Path: Clearance and Protection
Clear the route from the kitchen to the destination, removing small obstacles and protecting floors and walls. Remove doors from the frame if needed to gain extra clearance; slide rugs or runners to minimize floor wear. Use painter’s tape to mark the path and designate a staging area for moving supplies. Lay down moving blankets on all floors the stove will touch, and keep a trash bag handy for packaging scraps. By ensuring the path is obstacle-free, you reduce the risk of scratches, dents, or trips during the move.
Disassembly and Prep of the Appliance
Begin with simplest components and work toward larger parts. Remove knobs, grates, and burner caps and keep them in labeled bags. If your range is a stand-alone unit, you may also remove a back panel to access the power cord more easily. For gas stoves, leaving detachable components intact while awaiting professional service helps minimize risk, but never bypass safety steps. Keep screws and small parts organized to ease reassembly later, and take photos of connections to reference during setup.
Moving Strategy: Lifting Techniques and Equipment
Two people are typically required to move a stove safely, with one guiding and the other lifting. Position the appliance so the heaviest side faces the direction of travel, and use a dolly rated for appliance weight. Secure the stove with ratchet straps to prevent shifting, and wrap it with moving blankets for surface protection. Maintain a stable stance, bend at the knees, and avoid twisting your back. Take slow, deliberate steps through the doorway, pausing to adjust if needed.
Transport, Arrival, and Reinstallation
Set the stove in the final location before making any final connections. If the outlet or gas line location differs from the original installation, adjust as needed and consult a professional for any reconfiguration. Reinstall burners, knobs, and panels, then restore power and test basic function before final operation. For gas stoves, check for leaks with a soap-and-water solution around joints after reassembly. Finally, clean up the moving area, dispose of packaging responsibly, and wipe down surfaces to restore a fresh kitchen look.
Post-Move Care and Disposal
If you no longer need the stove, consider donating or recycling through local charities or appliance recyclers. Document any warranties or manuals to assist the new owner. Maintain a short checklist for safe operation: verify clear ventilation, ensure there is no gas odor, and confirm that the appliance functions as expected after reinstallation. A careful post-move review helps prevent future issues and supports a smooth transition to your new space.
Tools & Materials
- Moving dolly (appliance-rated)(Weight rating at least 600 lbs; wide base for stability)
- Protective moving blankets(2-3 blankets to cover top and sides)
- Ratchet straps(Secure stove to dolly; avoid slippage)
- Screwdriver set (Phillips & flathead)(For knob and panel removal)
- Gloves (padded)(Grip and hand protection)
- Measuring tape(Confirm doorway widths)
- Marker and labels(Label detachable parts)
- Helper(s) for two-person lift(At least one extra pair of hands)
- Flashlight(Extra visibility in dim areas)
- Level and wedge blocks(Stabilize stove in final position)
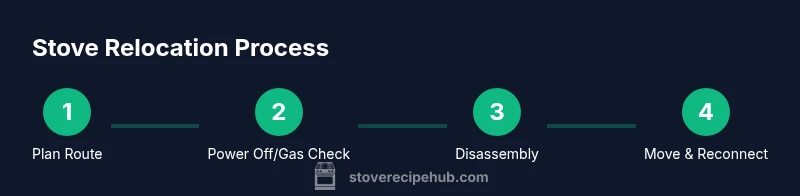
Steps
Estimated time: 60-120 minutes
- 1
Plan and prep the move area
Survey the route, measure widths, and confirm the doorway and hallway clearance. Create a simple floor plan showing start and end points, obstacles, and any temporary removals needed. Gather all tools and arrange a second person to assist.
Tip: Double-check measurements and walk the route with your helper before touching the stove. - 2
Power down and arrange gas disconnection if needed
Flip the circuit breaker for electric stoves or schedule a gas shut-off with your utility or licensed plumber for gas stoves. Do not attempt DIY gas line work. Keep keys and contact numbers handy in case you need to pause the move.
Tip: If you smell gas, evacuate immediately and call emergency services. - 3
Remove knobs and detachable components
Carefully remove knobs, grates, and burner caps and place them in labeled bags. Photograph connections if needed for reference. Store small parts in a labeled container.
Tip: Keep all removed parts in a single labeled bag so you don’t lose anything. - 4
Protect floors and clear a path
Lay moving blankets on floors along the entire path. Remove any doors or trim if necessary to widen the passage. Maintain a clean, dry surface to prevent slips during the move.
Tip: Use tape to secure blankets so they don’t shift during movement. - 5
Lift stove onto dolly and move through doorway
With a helper, position the dolly and roll the stove onto it. Keep the load centered and use straps to minimize bounce. Guide the appliance through doors with steady, synchronized moves.
Tip: Keep your back straight and bend at the knees when lifting to protect your spine. - 6
Position in new location and reassemble safely
Move to the new site, lower the stove, and reattach knobs and panels. Restore power or arrange gas connection through a professional. Test basic functions and check for gas leaks after reconnection.
Tip: Perform a slow power-on test and inspect for any unusual noises or smells.
Common Questions
Can I move out a stove by myself?
Moving a stove solo is not recommended due to its weight and balance. If you must, only do so with professional guidance and proper equipment, and ensure you can safely manage the lift with a clear path.
Moving a stove by yourself is risky; get help and use proper equipment for safety.
Is it safe to disconnect gas lines yourself?
Gas line work should never be attempted by non-professionals. Schedule a licensed plumber or the gas utility to shut off and disconnect the line to prevent leaks or explosions.
Gas lines require a professional to avoid leaks and hazards.
Do I need permits to move a stove?
For most residential moves, a permit is not required. Local codes vary, so check with your city or county building department to confirm any exceptions.
Usually no permit is needed, but verify local rules before you begin.
What if the stove won't fit through a doorway?
If the appliance won’t pass, you may need to remove a door frame or alter the route. In worst cases, professional removal or appliance relocation services can help.
When it won’t fit, consider removing doors or seeking professional help.
How can I protect floors during moving?
Use moving blankets, non-slip mats, and tape to secure the blankets. Keep the path dry and free of debris to prevent slips and scratches.
Protect the floor with blankets and secure the path to prevent damage.
Watch Video
Top Takeaways
- Plan the route before you touch the stove
- Gas disconnection requires a pro
- Use a dolly and blankets for protection
- Label parts for easy reassembly
- Test after relocation and monitor for leaks