How to Use an Induction Stove for First Time: A Practical Guide
A comprehensive, beginner-friendly guide to using an induction stove for your first time, covering cookware, setup, heat control, cooking techniques, and cleanup.

Goal: Use induction stove for the first time confidently and safely. You’ll verify cookware compatibility, power on and set the heat, boil, simmer, and shut down correctly, then clean without damaging the surface. Requirements: induction-compatible cookware, dry hands, clean work area, and a basic understanding of temperature settings. Follow these steps to avoid overheating, scorching, or magnetism errors.
Understanding induction cooking: how this guide helps you
Induction stoves heat cookware through a magnetic field generated by a copper coil beneath a scratch-resistant glass surface. Only pots and pans made from ferromagnetic materials—such as cast iron or magnetic stainless steel—will heat up. If you’re wondering how to use induction stove for first time, the most important foundations are cookware compatibility, a clean cooktop, and a basic grasp of heat settings. This block explains the physics in simple terms and translates it into practical steps you apply every time you cook. You’ll learn why some vessels shimmer with heat and others stay cool, how to read the display, and how to avoid common missteps that lead to wasted time or scorched food.
Throughout, you’ll notice how induction responds almost instantaneously to control inputs, so you’ll practice patient, gradual adjustments rather than rapid changes that could scorch sauces or boil over.
Safety prerequisites and cookware compatibility
Before you turn on the induction stove, establish a safe workspace. Remove any metal foil, plastic wrap, or flammable objects from the area, and ensure the surface is dry and free of spills. Induction technology is efficient but requires proper cookware to work correctly. To determine compatibility, perform a simple magnet test: if a magnet sticks firmly to the bottom, the cookware is induction-ready. If not, consider replacement or a magnetic base adapter. Also check cookware bottom for a flat surface; any significant wobble can cause uneven heating or instability. By starting with a clean surface and compatible pots, you prevent damage to the glass surface and improve heat transfer efficiency.
The right cookware for induction: what to buy and how to test
Your induction stove will heat fastest with flat-bottom pots and pans that have a thick, smooth base. Stainless steel with a magnetic layer, cast iron, and certain nonstick pans designed for induction are reliable choices. Avoid aluminum pans that lack magnetic bottoms unless they have a magnetic disk attached. Always test new cookware with a magnet before first use. If you’re unsure about a pan’s compatibility, try the magnet test after removing any lids. Durable, well-fitting lids help trap heat for better simmering and speed up cooking times.
Setting up your stove and safety checks
Unbox and place the stove on a stable, level surface away from edge contact. Plug in if your model is wired for standard household current. Wipe the glass with a damp cloth to remove dust and fingerprints, then dry thoroughly. Power on using the control panel and select a low heat setting to perform a quick warm-up test. Always keep a dry towel nearby to wipe up spills quickly and never leave cooking food unattended, especially when you are learning the interface.
First-time heating: power-on, temperature, and response
Turn on the stove and choose a low to medium heat. Induction heats pots rapidly, so monitor closely to avoid scorching. A good first test is to fill a small pot with water and bring it to a gentle boil, which gives you a feel for how quickly the burner responds to adjustments. If the display shows an error, re-seat the pot, ensure it is properly centered, and try again. Remember: gradual increases beat abrupt jumps in heat, which can scorch delicate sauces.
Cooking techniques on induction: boiling, simmering, sautéing
Induction cooks with precise temperature control, so you can move quickly between tasks. For boiling, start with a covered pot on medium heat to trap steam and speed up boiling. For simmering, reduce heat and monitor the bubble rate, stirring occasionally to prevent scorching. When sautéing, use a bit of oil and keep the pan moving; induction's quick response makes it easy to control browning. Always use lids when appropriate to conserve energy and maintain even cooking temperatures.
Maintenance, cleaning, and care after cooking
Allow the surface to cool before cleaning to avoid thermal shock. Wipe up spills promptly with a damp, non-abrasive cloth, then dry. Use a mild dish soap for stubborn residues and avoid abrasive pads that could scratch the glass. Regularly check the cookware for warped or damaged bottoms, which can affect heating efficiency. Store induction-ready pots and pans with their lids off to prevent moisture buildup on the surface.
Troubleshooting common induction issues
If the burner doesn’t heat, verify the cookware is compatible and properly centered. If the display shows an error, consult the user manual for codes—often, it’s a misalignment, an empty pot, or insufficient contact with the cooktop. A clicking or buzzing sound can indicate a loose or poor contact between pan and surface; re-center or switch cookware. If heat is inconsistent, inspect the bottom for scratches or warping and consider replacing older pans that don’t distribute heat evenly.
Quick-start test recipe: a simple water boil to test your setup
A practical way to validate your first-time induction use is a water boil test. Fill a small pot with two cups of water, place it on a burner, and set to medium heat. When it boils, reduce to a gentle simmer and note how quickly you can adjust to maintain the simmer. This test confirms your cookware compatibility, control accuracy, and the stove’s responsiveness before tackling real recipes.
Tools & Materials
- Induction-compatible cookware (flat-bottom preferred)(Ferromagnetic material; test with a magnet; bottom diameter should fit burner.)
- Magnet for compatibility test(Sticks to bottom means induction-ready.)
- Soft cloth or sponge(For cleaning the glass surface before and after cooking.)
- Dish soap(Mild soap for cleaning; avoid abrasive cleaners.)
- Dry towel or oven mitts(Handle hot pots safely; keep a dry surface for transfers.)
- Timer or smartphone timer(Helpful for precise simmer times.)
- User manual or appliance guide(Reference for model-specific features and safety notices.)
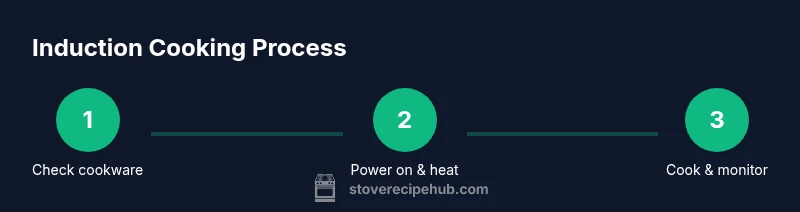
Steps
Estimated time: 25-40 minutes
- 1
Check cookware compatibility
Test your pots and pans with a magnet to confirm induction compatibility and flat-bottom contact. Ensure the base is clean and dry before testing. Use only compatible cookware on induction for best heat transfer.
Tip: If the magnet doesn’t cling, do not force heating—consider magnetic adapters or different cookware. - 2
Clear and clean the cooktop
Wipe the glass surface with a damp cloth to remove dust and spills. Dry thoroughly to prevent steam from creeping under cookware. A clean surface reduces impression marks and improves heat sensing.
Tip: Avoid abrasive cleaners that could scratch the glass. - 3
Center the cookware on the burner
Place the pot or pan centered over a burner with adequate bottom contact. Misalignment can cause uneven heating and trigger error messages. Ensure the pot size matches the burner diameter for efficient energy use.
Tip: Use a ring or guide if needed to keep cookware aligned during cooking. - 4
Power on and select initial heat
Turn on the stove and choose a low heat setting to test response. Induction stoves heat quickly, so starting low helps prevent overflows. If your model has a numeric scale, start around 2–4 and adjust as needed.
Tip: Keep the lid off during the initial test to monitor the boil rate. - 5
Test with water to gauge heating
Pour water into a small pot and observe how fast it heats to a rolling boil. Note the time from start to boil and practice gradual increases or decreases in heat for stable simmering.
Tip: If water sizzles unevenly, re-center pot and check bottom flatness. - 6
Cook with control: boiling and simmering
Use medium heat to bring liquids to a boil, then reduce to a gentle simmer. Induction’s precision helps maintain steady simmer without constant agitation. Avoid leaving unattended while simmering.
Tip: Use a lid to trap heat and reduce energy use during simmer. - 7
Turn off and cool down
When finished, switch to the off position and allow the cookware to cool on a heat-safe surface. Wipe the surface again to remove any residues or splashes before storage.
Tip: Don’t slide hot pots across the glass; lift them carefully. - 8
Clean up and inspect cookware
Clean pots, pans, and the cooktop with mild soap and a soft sponge. Inspect the cookware for warping or damage that could affect heating performance in future use.
Tip: Store cookware upright to prevent moisture accumulation on the surface. - 9
Test again with a simple recipe
Run a quick test with a small dish—perhaps a simple sauce or boiling water—to confirm stability after storage. Recheck alignment and heat response before more complex meals.
Tip: Document any changes in heating behavior to adjust future recipes.
Common Questions
Can I use any pot on an induction stove?
Not every pot will heat on induction. Use a magnet to test compatibility; if it sticks, the cookware is usually induction-ready. Some aluminum or copper pots with a magnetic base work too, but check the base for a solid, flat contact.
Not every pot will heat on induction. Use a magnet to test compatibility; if it sticks, the cookware is usually induction-ready.
Why won’t my induction stove turn on?
First, ensure cookware is centered and compatible. If the display remains off, check that the power source is connected and that you’ve selected a valid setting. If needed, consult the manual for model-specific reset steps.
First, ensure cookware is centered and compatible. If the display stays off, check the power and settings, then reset if needed.
Is it safe to boil water on induction for the first time?
Yes. Boiling water is a reliable first test to gauge heat response. Use a pot with a flat bottom and keep the lid slightly ajar if you want faster boiling, then monitor to avoid spills.
Yes. Boiling water is a good first test to gauge heat response; monitor to prevent spills.
How do I clean an induction stove without damaging it?
Wait for the surface to cool, then wipe with a damp cloth and mild soap. Dry thoroughly. Avoid abrasive pads, harsh chemicals, or metal scrubbers which can scratch the glass.
Let it cool, wipe with a damp cloth and mild soap, then dry. Avoid abrasives.
What should I do if cookware doesn’t heat evenly?
Check the cookware bottom for warping or unevenness and ensure it’s fully flat against the burner. If needed, replace older pans that don’t distribute heat well.
Check the bottom for warping and ensure flat contact; replace worn pans if needed.
Watch Video
Top Takeaways
- Induction requires ferromagnetic cookware for heating.
- Start with a clean surface and low heat to test control.
- Induction reacts quickly; adjust heat gradually.
- Regular cleaning extends cooktop lifespan and performance.