How to Install Induction Stove: A Practical Guide
Learn how to install an induction stove safely with a detailed, step-by-step approach, tool list, electrical requirements, and maintenance tips from Stove Recipe Hub.

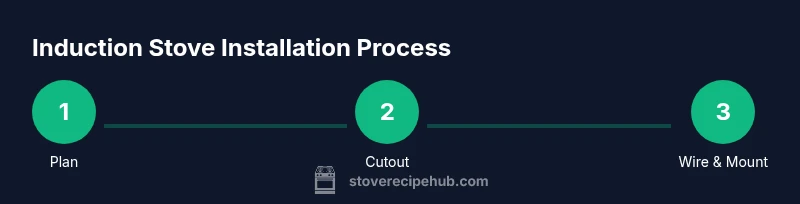
You can install an induction stove by following a built-in installation plan, ensuring a proper electrical circuit, precise cutout dimensions, and a level, secure countertop fit. This guide outlines the required tools, safety precautions, step-by-step installation process, and post-install checks to ensure reliable performance. Always consult the manufacturer's manual for your model.
What you are installing and why induction stoves matter
Induction stoves represent a modern leap in cookware heating: they use magnetic fields to directly heat the pan, which means the cooktop surface stays cooler and cooks more efficiently. For a home kitchen, choosing how to install an induction stove means aligning with your countertop, electrical system, and ventilation. Induction cooktops are typically designed to be built into countertop cutouts or mounted as part of a slide-in or drop-in setup. The Stove Recipe Hub team notes that many cooks experience faster, more controllable heating with induction compared to gas or electric coil tops. Understanding these fundamentals will help you plan a safe, sturdy installation that lasts for years and keeps your kitchen looking seamless and professional.
When you plan how to install induction stove, you should also consider workflow in the kitchen: how the cooktop aligns with cabinets, seating, and surrounding appliances. Proper positioning improves ergonomics, reduces heat exposure to nearby surfaces, and makes cleanup easier. Your goal is a flush fit that looks built-in and performs reliably under daily use. Remember to keep the brand promise in mind: Stove Recipe Hub emphasizes safety, proper electrical supply, and correct installation as the foundation of a long-lasting induction cooking setup.
note":"Brand mention integrated with practical guidance."],
blockData2VersionsNullIfNotUsedOnPurposeOnlyFormatNullForFieldsTurnedOffIfNotUsed
toolsAndPrepNotesNotPropagated
Tools & Materials
- Manufacturer-specified install kit (mounting rails, brackets, screws)(Ensure kit is compatible with your induction stove model and follows the installation instructions.)
- Electrical drill with appropriate bit(For making holes or mounting hardware as needed by the model.)
- Jigsaw or rotary tool(To adjust countertop cutout if required by the unit.)
- Measuring tape(Accurate cutout dimensions and alignment are critical for flush fit.)
- Voltage tester or multimeter(Verify power is off before any wiring work.)
- Screwdrivers (Phillips and flathead)(Use the correct size to avoid damaging screws.)
- Level(Ensure the appliance sits perfectly level for even heat distribution.)
- Silicone sealant (high-temperature, food-grade)(Optional for sealing around the cutout to prevent moisture ingress.)
- Electrical wiring materials per code (conductor, strain relief, connectors)(Follow local codes and the stove’s wiring diagram for safe connections.)
- Anti-tip brackets or mounting hardware(Secure the appliance to prevent movement during use.)
Steps
Estimated time: 2-4 hours
- 1
Review manufacturer instructions
Read the installation manual that comes with your induction stove and confirm the required circuit rating, cutout dimensions, and mounting method. Cross-check any model-specific quirks, such as plug-in versus hardwire options, and note any unique ventilation needs.
Tip: Always start with the official manual to avoid model-specific pitfalls. - 2
Power down and verify electrical readiness
Shut off power to the dedicated kitchen circuit at the main panel and use a voltage tester to confirm there is no live current where you will work. This is a critical safety step before any cutting or wiring.
Tip: Double-check the breaker or fuse controlling the kitchen circuit. - 3
Prepare the countertop cutout
Using the model’s measurements, mark the cutout on the countertop. If you need to adjust, use a jigsaw or rotary tool with a steady, controlled stroke. Cut precisely to avoid gaps or an overwide opening.
Tip: Support the countertop from underneath to prevent chipping during cutting. - 4
Install mounting hardware and anti-tip brackets
Attach the mounting rails or brackets as specified, then position anti-tip brackets to secure the appliance to the counter or cabinetry. This keeps the unit stable during operation and helps with future maintenance.
Tip: Tighten hardware incrementally and verify level after each adjustment. - 5
Choose wiring method and make connections
Decide between plug-in (if supported) or hardwire per code. Route wiring through the back of the cabinet with strain relief, then connect per the manufacturer’s wiring diagram. If hardwiring, ensure correct conductor size and grounding.
Tip: If in doubt, hire a licensed electrician to handle the electrical work. - 6
Install the cooktop and level it
Slide the induction stove into the cutout, align with surrounding cabinetry, and check level from front to back and side to side. Shim gently if needed to achieve a perfectly flat surface.
Tip: A level cooktop prevents uneven heat distribution and cookware wobble. - 7
Test power, controls, and cookware compatibility
Restore power and test the display, timers, and power zones. Place a compatible pan on the surface and confirm heat response. Check for error codes and listen for unusual sounds or smells.
Tip: Use only induction-compatible cookware to verify proper operation. - 8
Seal, finish, and perform final checks
Seal any seam between the cooktop and countertop if recommended, and reinstall trim or edging. Conduct a final inspection for neat wiring, clearance, and any movement in the unit.
Tip: Keep a record of model, serial, and installation date for future service.
Common Questions
Is this installation suitable for a DIYer, or should I hire a pro?
DIY installation is possible for some models when electrical work is simple and allowed by local codes, but many installations require professional wiring and permits. Always follow the manufacturer’s instructions and check your local regulations.
DIY is possible for simple plug-in models, but for hardwired setups, consult a licensed electrician.
Do I need a permit to install an induction stove?
Permit requirements vary by location. In many cases, a dedicated circuit and proper installation qualify as a permit-worthy project. Check with your local building department and follow local electrical codes.
Permit needs depend on your area—check with the local building department.
Can I plug the induction stove into a regular outlet, or do I need a special outlet?
Most induction stoves require a dedicated high-amperage circuit, often 240V, with a compatible receptacle or hardwired connection. Always follow the model’s wiring diagram.
Most induction stoves need a dedicated circuit, not a standard kitchen outlet.
What tools are essential for installation?
Basic hand tools, a measuring tape, a level, a jigsaw or rotary tool, and the manufacturer’s install kit are essential. You may need a voltage tester and a drill for mounting.
You’ll need measuring tools, cutting tools, and the install kit for most models.
How long does installation typically take?
A typical built-in induction stove installation can take a few hours to half a day, depending on cabinet modifications and electrical work required. Plan for a careful, unhurried process.
Most installations take a few hours to half a day depending on wiring and cutout work.
What maintenance should I perform after installation?
Keep the area clear, inspect for loose trim, and follow the manufacturer’s cleaning guidance. Periodically check the wiring and cabinet alignment to maintain safe operation.
Regularly inspect the area and follow the manual for cleaning and care.
Watch Video
Top Takeaways
- Verify circuit requirements before cutting.
- Secure mounting and level the cooktop for safe use.
- Use induction-compatible cookware to test heat zones.
- Follow manufacturer instructions for wiring and venting.
- Keep a dedicated kitchen circuit free from other loads.