How to Turn On an Induction Stove: A Practical Guide
A practical, safety-focused guide to turning on an induction stove. Learn power checks, cookware compatibility, control panel operation, and best startup practices from Stove Recipe Hub.

Turn on an induction stove safely by verifying power and cookware compatibility, unlocking the control panel if needed, and selecting a starter heat. This guide shows you how to turn induction stove on by walking you through the exact startup sequence and essential safety steps, so you can begin cooking with confidence. It covers common issues and quick fixes to ensure a smooth activation.
Why Turning On an Induction Stove Requires Preparation
According to Stove Recipe Hub, turning on an induction stove isn’t just about flipping a switch. Startup success depends on three things: electrical readiness, cookware compatibility, and a responsive control panel. Induction heats cookware through magnetic fields, so using the right pots and pans is non-negotiable for safe, efficient operation. The surface stays relatively cool until the first transfer of heat, which reduces burn risk and makes startup safer for families and kitchens with kids. In this section we’ll cover the why behind the startup sequence, plus practical checks you can perform before you press a single button. This approach minimizes surprises and speeds up your cooking when you need it most.
The Induction Control Panel: Layout and Common Indicators
Induction cooktops use glass-ceramic surfaces with touch controls, sensors, and sometimes a safety lock. The typical layout includes a power button, heat level controls, burner selectors, and sometimes a dedicated lock or child-safety feature. Indicators lights or beeps help confirm when the unit is ready or when there’s a fault. Some models group controls by zone; others rely on a central panel. Taking a minute to review your model’s manual and labeled icons saves time during startup and reduces mistakes in a busy kitchen.
Cookware Compatibility and Power Requirements
Induction generates heat in the cookware itself via magnetic fields. If the pot has weak or uneven contact, you’ll see little to no heat transfer. A simple magnet test—if a magnet sticks firmly to the bottom, the pan is induction-friendly—works for most cookware. Also check that your outlet and circuit can support the stove’s power draw; some models require dedicated circuits or higher voltage. Using the correct cookware maximizes responsiveness and safety from the moment you turn the stove on.
Safety Essentials Before Power-Up
Before you press the power button, clear the cooktop, keep flammable items away, and ensure cords aren’t in the way. Induction stoves can heat rapidly, so staying attentive during startup reduces the risk of spills and burns. If your model has safety features like a lock or auto shut-off, know how to enable or disable them. Lastly, confirm that the surface is cool enough to touch before cooking begins and never leave the unit unattended while heating.
Understanding the Startup Sequence (What Happens When You Power On)
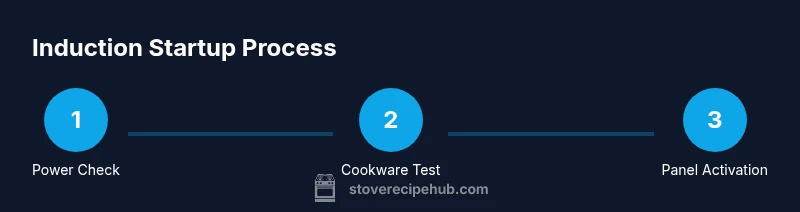
When you power on an induction stove, the system runs a quick self-check, confirms power delivery, and activates the display. The control panel will typically light up, lights indicate ready status, and a startup tone or message may appear. The sequence continues with selecting the burner, setting an initial heat, and initiating heat transfer through the cookware. This ordered flow helps prevent accidental heating or misfires and makes restarting after a pause predictable.
Turning On: Step-by-Step Practical Steps
To power on confidently, follow these practical actions in order: verify power at the outlet, ensure compatible cookware is clean and dry, place the pan centered on the chosen burner, press the power control to wake the panel, and select a starting heat. Allow the display to show the selected heat level before you begin cooking. If the panel is locked, hold the lock icon for a few seconds to unlock.
Troubleshooting Startup Issues
If the stove doesn’t respond, first verify the outlet is live by testing another device or using a tester. Check that cookware is correctly placed and compatible. Ensure the control surface is clean and free of debris and that no safety lock is engaged. If you see a fault code, consult the manual or reset the unit by powering off for about 10 seconds and powering back on.
Safety and Maintenance After Startup
After startup, wipe spills promptly and keep the surface clean to preserve sensor accuracy. Avoid placing metal utensils on the cooktop while it’s hot, and never leave the stove unattended on high heat. Periodically inspect cords and plugs for wear, and follow the manufacturer’s cleaning instructions to prevent scratches or residue buildup that could interfere with startup indicators.
Energy Efficiency and Startup Best Practices
Induction stoves are fast and efficient when you use properly sized cookware and correct heat settings. Center pots and pans on the burner to maximize energy transfer, and avoid oversized or warped bottoms. Start at a lower heat and gradually increase if needed, rather than blasting high power right away. This not only saves energy but also reduces the risk of splatter and spills during startup.
Quick-Start Checklist for Busy Cooks
A compact reference you can scan quickly: 1) verify power and circuit capacity, 2) confirm cookware compatibility with a magnet test, 3) center the pan on the burner, 4) press the power and select an initial heat, 5) monitor and adjust as cooking progresses. Keeping this list handy ensures you can activate the stove even in a hectic kitchen.
Common Startup Mistakes to Avoid
Avoid using cookware with warped bottoms or damaged cords, which can impede heat transfer or create safety hazards. Don’t reach over the surface while the burner is on, and never leave high heat unattended. Finally, always read your model’s safety instructions because some units require prerequisites like unlocking the panel or removing a protective safety key before startup.
Tools & Materials
- Induction-compatible cookware(Magnetic base; test with a magnet; suitable metals include magnetic stainless steel and cast iron)
- Dedicated grounded electrical outlet(Check voltage and circuit capacity as per your stove model; avoid extension cords)
- Dry, clean cookware and surface(Ensure cookware bottom is clean and dry to maximize heat transfer)
- Manual or quick-start guide for your model(Helpful for model-specific steps and safety features)
Steps
Estimated time: 5-10 minutes
- 1
Verify power and cookware
Confirm the stove is plugged in, the outlet has power, and the cookware is induction-compatible and dry. This prevents heat from failing to start or heating unpredictably.
Tip: Use a magnet test to verify cookware compatibility if unsure. - 2
Check control panel safety and unlock if needed
Inspect the panel for a lock indicator. If locked, press and hold the lock icon for 3-5 seconds until it unlocks. This ensures startup commands register correctly.
Tip: If the lock persists, consult the manual for the exact unlock sequence. - 3
Center the cookware on the burner
Place the pan directly over the selected burner and ensure full contact with the glass surface for efficient heat transfer.
Tip: Avoid tilting the pan; centered contact improves responsiveness. - 4
Power on and select the burner
Press the power button to wake the panel, then choose the burner you intend to use. Confirm the burner indicator lights up on the display.
Tip: If you have multiple zones, verify you’ve activated the correct one. - 5
Set an initial heat level
Set starting heat to low or medium to gently warm ingredients. You can increase gradually as the food begins to heat.
Tip: Avoid jumping to high heat right away to prevent splatter and energy waste. - 6
Monitor and finish
Keep an eye on the cooking and turn off the stove when you’re done. Some models auto-shut off after a set time; rely on manual power off for precise control.
Tip: Use timers or smart features if available to avoid overcooking.
Common Questions
Do I need cookware on the stove to turn it on?
Most induction stoves can power on without cookware, but you won’t heat until induction-compatible pots are placed on the burner. The display and panel will respond, signaling readiness but cooking won’t start without pots.
You can turn the panel on, but heating won’t occur until you place compatible cookware on the burner.
What cookware works best with induction?
Magnetic stainless steel or cast iron work best. A simple magnet test can confirm compatibility. Avoid pure aluminum or copper pots unless they have a magnetic lining.
Use magnetic pots like stainless steel or cast iron; test with a magnet to be sure.
Why won’t my induction stove turn on?
First check power at the outlet and the control panel lock. Ensure cookware is compatible and placed correctly. If the issue persists, consult the manual for device-specific reset steps or fault codes.
Check power, panel lock, and cookware placement. If it still won’t start, reset the unit per the manual.
Is induction startup safer than gas?
Induction startup is generally safer because there is no open flame and the surface remains cooler while heat transfers to the cookware. However, follow standard safety practices just as you would with any stove.
Induction is typically safer than gas due to no flame and cooler surfaces during startup.
How do I reset the stove after a fault?
Power cycle the unit: turn it off, unplug or switch off at the wall, wait about 10 seconds, then restore power. If faults persist, refer to the manual for fault codes and model-specific resets.
Power off, wait a moment, then power back on. If the fault stays, check the manual.
Watch Video
Top Takeaways
- Verify power and cookware before startup.
- Unlock and prep the control panel for reliable operation.
- Center cookware for efficient heat transfer.
- Begin with low heat and adjust as needed.