Over-the-Stove Microwave Installation: A Practical Guide for Home Cooks
Learn how to safely install an over-the-stove microwave with practical tips on clearance, venting, electrical needs, and mounting steps. This Stove Recipe Hub guide helps home cooks achieve a reliable, efficient setup.

By the end of this guide you will safely install an over-the-stove microwave, understanding required clearances, mounting options, and basic electrical and venting considerations. You’ll learn how to select the right model, verify wall support, prepare wiring, and complete the mounting steps with safety in mind for a reliable, high-performance installation.
Why this installation makes sense for home cooks
Over-the-stove microwave installation saves counter space and brings microwave access to eye level for easier use. According to Stove Recipe Hub, homeowners benefit from a tidy kitchen and improved workflow when the microwave is mounted above the range. This configuration supports quick reheats while cooking, reduces countertop clutter, and provides an integrated venting option in many models. However, it also introduces considerations like wall strength, ventilation, and electrical supply that must be planned before purchase. The guidance here emphasizes choosing a model that fits your cabinet height, ensuring the wall is strong enough to bear weight, and following the manufacturer’s mounting template. While the setup can be a DIY project for skilled homeowners, it typically benefits from professional help for wiring and structural mounting when local codes demand it.
Clearance, height, and ventilation basics
Ventilation is critical for over-the-stove units because cooking smoke and steam collect near the hood. The article notes that clearances from cabinets and walls create safe air paths and prevent heat damage. A typical OTMR installation uses a dedicated mounting surface and an integrated venting system, with ducting either to the outside or a recirculating kit. Lighting above the unit and easy access to the power outlet improve daily use. Always consult the installation manual and local codes; some regions require specific venting configurations or electrical provisions. Stove Recipe Hub's analysis shows that misaligned mounts or insufficient venting can shorten the microwave’s life and create kitchen odors. Plan ahead, measure precisely, and mark the exact center of the mounting area to ensure a straight, level installation.
Model options and layout considerations
Over-the-stove microwaves come in several variants: standard OTR (over-the-range) microwaves, which combine microwave and exhaust venting; microwave drawers that sit above an oven; and wall-mount units that use a dedicated cabinet base. The choice depends on your cooking style, cabinet height, and whether you prefer ducted or ductless venting. If you already have a hood or specialized vent above the stove, ensure compatibility with the new microwave’s venting kit. The Stove Recipe Hub team notes that compatibility between the mounting bracket and your cabinet framework is essential; a poorly matched bracket can stress the wall and cause misalignment.
Electrical and venting prerequisites
Electrical requirements will vary by model, but most over-the-stove microwaves need a dedicated electrical supply and proper venting—either ducted to the outside or ductless recirculation. Before you begin, verify the outlet location, circuit capacity, and clearance to combustible materials. Do not power or air-duct tests without disconnecting power. Local codes and product manuals should guide whether a licensed electrician is needed; in many homes, wiring work is safer when performed by a pro. Stove Recipe Hub analysis shows that improper wiring or venting is a common reason for early unit failure, so plan for safe, compliant installation from day one.
Planning the install: measurements and layout
Start by marking the wall area where the unit will hang, then verify the space above and around it to ensure unobstructed hinges, door clearance, and venting paths. Use a stud finder to locate solid anchors, and confirm that the chosen mounting bracket aligns with the wall studs. Measure from cabinet faces to ensure the microwave will sit level with adjacent cabinetry and that there is enough clearance for opening and closing the door. Prepare for wiring by identifying the nearest acceptable outlet and measuring path length for any conduit or vent tubes. The goal is a clean, flush installation that blends with the kitchen design while preserving accessibility for maintenance.
Safety considerations and common mistakes
Safety first: disconnect power before handling any wiring, and never rely on an outlet extension or damaged cords. Missteps such as mounting on hollow walls, skipping venting, or using inadequate brackets can lead to appliance failure or fire risk. Always follow the manufacturer’s bracket templates and weight specifications, and consult local codes if you’re unsure. According to Stove Recipe Hub, many DIY attempts fail due to rushed measurements or under-spec mounting hardware, so take the time to verify support and compliance.
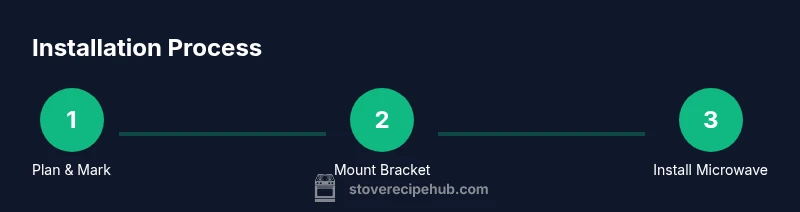
The installation workflow at a glance
This section provides a high-level overview of the main tasks you’ll perform. First, secure the mounting bracket to the wall using studs and level. Next, prepare the electrical path and confirm a safe, accessible outlet. Then, attach the microwave to the bracket and complete any venting connections. Finally, test the unit by running a short microwave cycle and verifying that venting operates correctly. For detailed, step-by-step instructions, see the dedicated STEP-BY-STEP section.
Authority sources
To verify safety guidelines and best practices, refer to these sources: - https://www.osha.gov - https://www.nfpa.org - https://www.energy.gov
Additional notes for DIYers
If you’re new to wall-mounted appliances, take your time with measurements and consider hiring a professional for electrical and heavy-mount work. Always verify that the wall has adequate structural support and that venting is pitched correctly to avoid condensation or backdrafts. The Stove Recipe Hub team reinforces that safety and compliance come first; a methodical approach reduces the risk of damage and ensures a durable installation.
Tools & Materials
- Measuring tape(Accurate length measurements for layout and clearance)
- Stud finder(Locate solid wall anchors to support the mounting bracket)
- Level(Ensure bracket and microwave sit perfectly plumb)
- Pencil(Mark hole locations precisely on the wall)
- Drill with bits(Drill holes for anchors; include masonry bits if mounting on masonry surfaces)
- Phillips screwdriver(Drive screws for bracket and wall anchors)
- Screws and wall anchors(Bracket-specific size; use masonry anchors if needed)
- Mounting bracket compatible with microwave model(Check the manual for bracket model and weight ratings)
- Vent kit or ducting kit (optional depending on venting type)(Ducted or recirculating kit as per model requirements)
- Electrical tester/voltage tester(Verify outlet availability and wiring condition)
Steps
Estimated time: 60-90 minutes
- 1
Assess mounting location
Identify the wall area above the stove that can bear weight and allow ventilation. Confirm there is an outlet nearby or a path for conduit. Check cabinet clearances and ensure there is space for door swing and any hood vent connection. This step reduces surprises later.
Tip: Double-check wall integrity and bracket fit before drilling. - 2
Choose and prepare the mounting bracket
Select a mounting bracket that matches your microwave’s dimensions and weight rating. Lay out holes on the wall using a level to ensure a straight installation. Drill pilot holes for anchors where needed.
Tip: Use manufacturer-provided templates to avoid misalignment. - 3
Mark hole locations on the wall
Transfer bracket hole locations to the wall with a pencil. Use a stud finder to ensure you strike studs for mounting. If mounting on masonry, plan for appropriate anchors and wall plugs.
Tip: Measure twice, drill once to prevent wall damage. - 4
Install wall anchors and bracket
Insert anchors into drilled holes and attach the mounting bracket securely. Make sure the bracket sits level and flush against the wall before proceeding.
Tip: Tighten screws firmly but avoid overtightening, which can crack brick or drywall. - 5
Prepare the electrical and venting path
Plan the electrical route to a grounded outlet and decide whether to route ducting to the exterior or use a recirculating kit. Ensure there is no interference with cabinet doors or the microwave’s venting path.
Tip: If wiring, consider hiring a licensed electrician per local codes. - 6
Mount the microwave and make connections
Hang the microwave onto the bracket, engage any locking tabs, and thread the power cord to the outlet. Connect venting duct or recirculation kit as required by your model.
Tip: Avoid pinching electrical cords or vent tubes during mounting. - 7
Test fit and finalize
Close the door, level the unit, and run a short microwave test to verify operation and venting flow. Check for unusual vibrations, rattles, or misalignment; adjust if necessary.
Tip: Verify venting flow by feeling air movement at the vent. - 8
Final checks and cleaning
Wipe down the unit, secure any exposed wiring, and ensure the installation area remains clean. Keep the manual handy for future maintenance or service.
Tip: Keep the warranty card and bracket instructions within reach for future reference.
Common Questions
Do I need a professional to install an over-the-stove microwave?
Not always. If you’re comfortable with basic electrical work, mounting, and reading the installation manual, you can install it yourself. However, many homes require a licensed electrician for wiring and a professional for heavy mounting to meet local codes.
You can do it yourself if you’re comfortable with basic electrical work and following the manual; otherwise, hire a professional.
What clearance is recommended above the microwave?
Always follow the manufacturer’s installation template. General guidance emphasizes leaving space for ventilation and cabinet clearance to prevent heat damage and ensure safe operation.
Check the manual for minimum clearance and don’t block vents.
Can I vent the microwave without exterior ducting?
Yes, you can use a recirculating vent kit if exterior venting isn’t possible. External venting is typically more effective for removing smoke and odors.
If you can vent outside, do it; otherwise a recirculating kit works.
Is a dedicated circuit required for most models?
Most over-the-stove microwaves require a dedicated electrical circuit. Always verify the unit’s electrical requirements in the manual and plan accordingly.
Most microwaves need their own circuit; confirm with the manual.
What are common installation mistakes to avoid?
Avoid mounting on hollow walls, skipping venting, and using undersized brackets. Misalignment and improper venting are frequent causes of issues.
Don’t rush measurements or skip the venting and bracket instructions.
How long does a typical installation take?
Most installations take about an hour, longer if wiring or venting requires professional assistance. Plan for up to a couple of hours in complex kitchens.
Usually around an hour, more if wiring is involved.
Watch Video
Top Takeaways
- Mount above the stove to save counter space.
- Ensure proper wall support and venting before mounting.
- Follow manufacturer templates to prevent misalignment.
- Consult local codes for electrical and venting requirements.
- Test thoroughly after installation for safe operation.