Pellet Stove and Installation: A Practical Home Guide
Learn how to choose, install, and operate a pellet stove safely. This guide covers venting, clearances, fuel handling, ignition basics, and maintenance for reliable heating.

This guide helps you safely install and operate a pellet stove. You’ll learn how to plan the space, choose venting options, handle pellets, connect electrical power, and perform a basic safety check. By following the steps and maintenance tips, you’ll achieve reliable heating, adhere to codes, and avoid common installation mistakes.
Pellet Stoves: What They Are and Why Installation Matters
Pellet stoves burn compressed wood pellets to produce steady heat with minimal emissions. They can be a cost-effective, efficient way to heat a space when installed and maintained correctly. The pellet stove and installation process is not just about filling a hopper and lighting a fire; it requires careful planning, adherence to codes, and attention to ventilation. According to Stove Recipe Hub, pellet stoves offer clean combustion and reliable warmth when you prioritize proper venting, clearances, and routine maintenance. This is why understanding the installation landscape is essential for safety, performance, and long-term enjoyment of your stove. A well-planned setup also improves indoor air quality and reduces ash buildup, making maintenance less time-consuming over the season. For DIY enthusiasts, laying out the room, selecting the right venting path, and scheduling a check with neighbors and inspectors can prevent costly rework later. Throughout this guide, you’ll see practical checks, common-sense tips, and maintenance routines designed for home cooks who want dependable heat from a stove that fits their living space.
Location, Venting, and Space Planning
Choosing where to place a pellet stove involves balancing heat distribution, safety, and ease of pellet access. Start by evaluating room shape, doorways, and the proximity to combustibles. The Stove Recipe Hub team recommends a location that maximizes airflow while preserving safe clearances from walls, furniture, and curtains. Plan vent runs that avoid sharp turns, excessive length, and potential snow or rain exposure if you’re venting through a wall. A well-planned layout reduces backdraft risks and ensures efficient combustion. Consider also how you’ll refill the hopper and how nearby outlets and electronics can impact heat flow. By mapping the space on paper or a simple layout app, you’ll minimize surprises during installation and ensure the finished setup looks tidy and operates reliably.
Venting Options and Clearances
Pellet stoves require a dedicated venting pathway to the outdoors. You’ll typically use a manufacturer-approved vent kit with metal ducting, proper gaskets, and secure hearth support. Confirm local codes for minimum and recommended clearances from walls, floors, and ceilings; these requirements vary by model and installation scenario. Avoid obstructing air intake grills and ensure the vent piping maintains a steady slope to prevent condensation. Seal all joints with high-temperature sealant and use heat-resistant straps to keep piping stable. A clean, properly sealed vent reduces creosote buildup and improves overall stove efficiency. The Stove Recipe Hub analysis shows that high-quality venting and correct clearances are foundational to safe operation and predictable heat output.
Fuel Handling, Combustion Air, and Pellet Quality
Quality pellets and proper storage are essential for dependable performance. Store pellets in a dry, dry area away from humidity and pests to prevent moisture absorption that can clog the burn pot. Keep the hopper topped up to avoid cycling on and off, which can increase wear. Pellet stoves draw combustion air from the room or a dedicated intake; ensure you have adequate air supply without pressurizing the space. Regularly inspect the door gasket for signs of wear and replace it when needed. Consistent fuel quality and clean air pathways are your best defense against poor flame quality, increased ash, and reduced efficiency.
Electrical Supply, Controls, and First Burn
Most pellet stoves require a dedicated 120V outlet and, in some cases, a dedicated circuit. Verify that the outlet is easily accessible and protected by a GFCI where required by local code. Before first ignition, read the manual for recommended heat settings, ignition procedures, and safety checks. When you perform the initial burn, monitor flame behavior, exhaust color, and odors closely. If you notice smoke, unusual noises, or a strong chemical smell, stop the burn and recheck venting and seals. Proper wiring and a controlled first burn set the tone for trouble-free operation.
Safety, CO Monitoring, and Routine Maintenance
Safety is the core of pellet stove operation. Install a carbon monoxide detector and a smoke detector in the same zone as the stove, and ensure detectors have working batteries and alarms. Check the firebox and ash pan regularly; remove ash to prevent clogging and maintain airflow. Schedule quarterly inspections during the first year, and consider professional servicing annually. A clean burn chamber, intact gaskets, and a sealed vent system reduce the risk of CO buildup and fire hazards. Remember to keep flammable items away from hot surfaces and never leave the stove unattended for extended periods when home.
Permits, Codes, and Professional Assessment
Local permitting requirements vary; some areas require permits or inspections for pellet stove installation, venting, and electrical work. Always consult local authorities and the stove manufacturer’s installation instructions before starting. Documentation of compliance can ease future maintenance checks or resale. If in doubt about electrical connections or venting through existing chimneys or walls, hire a licensed installer. A professional assessment can help you avoid costly rework and ensure the setup meets current safety standards. The right permit path also supports your warranty and insurance coverage.
Cost Considerations, Efficiency, and Practical Tips
Pellet stove installation costs can vary based on model, venting complexity, and material quality. While a DIY approach may save on labor, professional installation offers peace of mind and ensures code compliance. Focus on pellet quality, stove efficiency, and long-term maintenance costs rather than only the upfront price. Optimal efficiency comes from regular cleaning, proper pellet selection, and robust venting. Practical tips include keeping a small spare parts kit, maintaining a cleaning schedule, and creating a simple maintenance log. By planning ahead and investing in quality components, you can maximize heat output while controlling fuel costs over time.
Authority sources
- https://www.epa.gov/burnwise
- https://www.energy.gov/
- https://www.nfpa.org
Tools & Materials
- Pellet stove unit(Ensure model compatibility with pellet type and venting options)
- Vent kit / chimney adapter(Manufacturer-supplied components for a proper seal)
- Noncombustible hearth pad(At least 1/2 inch thick; extend beyond stove base)
- Fire-rated wall panels or shields(To protect nearby combustibles per manual)
- Metal vent pipe and elbows(Use appropriate wall caps and fittings; avoid sharp bends)
- Electrical outlet (120V) and dedicated circuit(GFCI recommended; ensure power is accessible)
- Carbon monoxide detector(With alarm; install near stove per code)
- Smoke detector(Include near sleeping areas and stove room)
- Measuring tape(For clearances and layout planning)
- Carpenter’s level(Ensure stove sits level on hearth)
- Heat-resistant gloves(Useful during burn-in and maintenance)
- Flashlight or headlamp(For working in dim vent spaces)
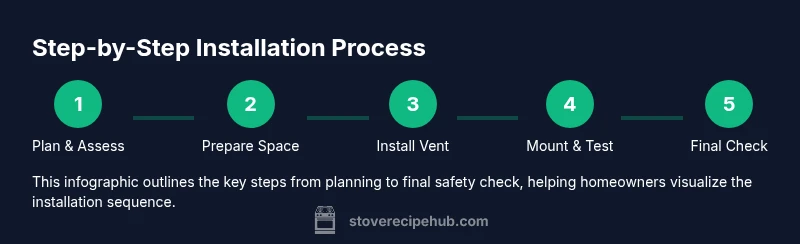
Steps
Estimated time: 6-12 hours
- 1
Assess space and plan
Survey the room and note heat distribution, airflow, and potential obstructions. Review the stove manual and local codes to map clearances and venting options before buying materials.
Tip: Take measurements and sketch a simple layout to avoid surprises later. - 2
Choose location and floor protection
Select a spot with good air circulation, away from doors and fabric. Install a noncombustible hearth pad and ensure the base is level to prevent rocking and uneven burn.
Tip: Use a spirit level to confirm level mounting across the hearth. - 3
Route venting to exterior
Install the vent kit with metal ducting, keeping bends gentle and joints sealed. Plan the shortest safe run that meets slope requirements to prevent condensation and backdrafts.
Tip: Avoid venting directly into attic spaces; ensure outdoor termination is clear of obstructions. - 4
Position stove and secure
Place the stove on the hearth, fasten as required, and connect exhaust piping to the stove outlet. Verify all connections are tight and fire-rated clearances are maintained.
Tip: Check alignment with the flue and ensure the stove remains stable during operation. - 5
Connect electrical power and controls
Plug into a dedicated 120V outlet. If the manual requires, connect any control panels or thermostats per instructions and verify that the display activates correctly.
Tip: Use a dedicated circuit to reduce nuisance trips and interference. - 6
Fuel loading, ignition, and first burn
Fill the hopper with clean pellets, set initial burn rate, and follow the ignition procedure outlined in the manual. Monitor for odd odors or smoke and adjust if needed.
Tip: Keep a fire extinguisher within reach during the first burn. - 7
Final inspection and safety test
Inspect seals, door gaskets, and vent connections. Test CO detectors and smoke alarms, and confirm there are no gas leaks or drafts around the vent. Document the test results for future reference.
Tip: Record dates of inspection and service for warranty compliance.
Common Questions
Do I need a professional to install a pellet stove?
Installation involves venting, electrical work, and safety. Local codes may require a licensed installer. Always consult the stove manual and consider professional help for critical steps.
Yes—consider professional installation to meet code and safety standards.
What venting is required for pellet stoves?
Pellet stoves require outdoor venting with a manufacturer-approved kit. Ensure joints are sealed and the run is as short and straight as possible.
Outdoor venting with proper sealing is essential.
Can a pellet stove be installed on a wood floor?
Yes, with a noncombustible hearth pad and proper clearance. Follow the manual to ensure safe installation.
Yes, but you must protect the floor and maintain clearances.
How often should I service a pellet stove?
Follow the manufacturer’s guidance; typically annual professional servicing plus periodic cleaning.
Annual service is common, with regular cleaning.
Is a pellet stove efficient?
Pellet stoves can be efficient when operated with quality pellets and kept clean; efficiency varies by model and maintenance.
Yes, with good pellets and regular maintenance.
What safety features should I look for?
Look for automatic shutoff, reliable gaskets, and proper CO and smoke detectors.
Automatic shutoff and detectors are essential.
Watch Video
Top Takeaways
- Plan venting and clearances before purchase
- Use proper hearth protection and noncombustible materials
- Keep detectors functional and perform regular cleaning
- Follow local codes and manufacturer instructions
- Schedule professional checks to safeguard warranty