Pellet Stove Installation Near Me: A Practical Guide
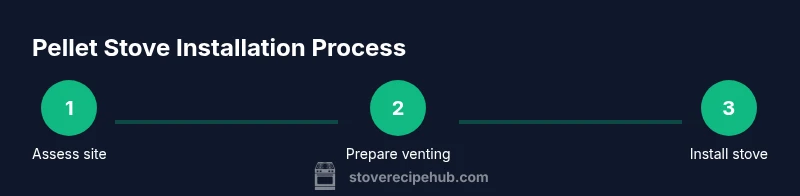
Step-by-step instructions for planning, permitting, venting, and safely installing a pellet stove near you. Learn site prep, choosing the right installer, and how to inspect the finished setup for safety and efficiency.

By finding a qualified installer and meeting local code requirements, you can safely complete a pellet stove installation near me. Start with permits, venting, proper clearances, and a solid foundation. The job should include venting assessment, electrical hookups, and a final inspection. According to Stove Recipe Hub, always verify licensing, warranties, and local regulations before scheduling the work.
Regulatory Foundations and Local Permits
When planning a pellet stove installation near me, the regulatory landscape is your first consideration. Permitting requirements, venting standards, and clearance rules vary by city and county, and failing to comply can lead to delays or unsafe operation. Begin with a professional site assessment to determine which codes apply to your home and to identify the best venting path (chimney, direct vent, or heat-exchanging options). Stove configurations may depend on your home’s layout, attic access, and whether you have a existing chimney. According to Stove Recipe Hub, starting with a thorough understanding of local regulations helps align your stove choice with code requirements and streamlines permit submissions. Keeping a clear record of approvals and compliance steps will save time later and reduce the risk of a failed inspection.
Planning the Installer, Stove, and Venting Strategy
Choosing a compliant pellet stove and a capable installer is as important as the stove itself. Look for technicians with Pellets Stove Association credentials or equivalent certifications, solid references, and experience with venting methods and electrical code compliance. Verify licenses and insurance before any work begins, and ask for an on-site evaluation that confirms clearance distances, floor protection, and the type of venting required. Decide on a stove model that fits the room’s size and climate, and establish a venting plan before purchase. You’ll need a compatible vent kit, a fire-rated hearth pad, noncombustible shields, CO detectors, a dedicated electrical circuit, and safe pellet storage. Thoughtful planning prevents expensive surprises and ensures long-term performance.
Site Preparation and Safety Essentials
Create a safe, ready-to-work space by removing combustibles from the stove’s clearance zone and ensuring a sturdy, fire-rated hearth. Install carbon monoxide detectors on every level and near sleeping areas, and test their sensitivity regularly. Check the electrical supply to confirm a dedicated circuit and proper amperage, and arrange a service disconnect if required by code. Gather heat-resistant gloves and eye protection for the install crew, and keep a fire extinguisher accessible during the process. A well-prepared site minimizes risk during installation and simplifies post-install checks.
Venting, Clearance, and Hearth Setup
Vent routing should follow the manufacturer’s recommendations, choosing vertical or horizontal paths based on roof access and structural constraints. Maintain specified clearances from walls, cabinets, and furniture; install noncombustible shields where needed and use a tested hearth pad to protect flooring. Secure vent pipes with approved clamps and seal joints to prevent leaks or backdrafts. Conduct an initial smoke test in a controlled manner to verify there are no drafts or leaks and that the system pulls properly during a simulated operation. Proper venting is critical for safe, efficient combustion and indoor air quality.
Commissioning, Testing, and Final Checks
After installation, perform a full test run following the manufacturer’s guidelines, checking heat output, fan operation, and exhaust flow. Verify that CO detectors respond and that no unusual odors or smoke are present during operation. Confirm all connections are secure, the stove remains stable on the hearth, and the clearance zones are maintained. Finally, document the installation with warranty information, inspection records, and a maintenance schedule. The Stove Recipe Hub Team notes that a thorough commissioning and final inspection are essential for safety and long-term performance.
Tools & Materials
- Vent kit compatible with stove(Includes piping, elbows, and seals designed for pellet stoves)
- Noncombustible hearth pad(Protects flooring and meets clearance requirements)
- Fire-rated hearth and wall shields(Prevent heat transfer to nearby combustibles)
- Carbon monoxide detectors (>=1)(Place on each level and near sleeping areas)
- Dedicated electrical circuit (120V/15-20A)(Follow stove’s electrical specifications)
- Measuring tape(For precise clearances and layout)
- Level and square(Ensure stove sits evenly and flush with hearth)
- Heat-resistant gloves and safety glasses(Personal protective equipment for handling parts)
- Chimney brush / vacuum(For periodic cleaning if applicable)
- Fire extinguisher (class ABC)(Keep readily accessible during installation)
Steps
Estimated time: Estimated total time: 4-6 hours
- 1
Check permits and codes
Verify local permits and building codes before starting any work. This keeps your project compliant and avoids delays. Confirm whether electrical work or venting modifications require inspections.
Tip: Contact your local building department early to confirm required documents. - 2
Choose stove model and venting plan
Select a pellet stove model that fits the space and climate. Decide on a venting strategy (chimney, direct vent, or other approved path) and confirm that the chosen kit matches the stove.
Tip: Ask the installer to review the venting path for backdraft risk and roof flashing needs. - 3
Prepare installation area
Clear the room of combustibles, install the hearth pad, and verify stable flooring. Ensure CO detectors are installed and accessible, and confirm proximity to sleeping areas.
Tip: Mark clearance zones on the floor to guide placement and future cleaning. - 4
Install venting components
Assemble and secure vent pipes per manufacturer instructions. Check seals, joints, and supports; ensure no kinks or obstructions in the vent path.
Tip: Use high-temperature sealant where required and test joints with a light smoke test. - 5
Make electrical and fuel connections
Connect to a dedicated circuit as specified by the stove’s manual. Stock fuel in a safe location and follow loading instructions to avoid risk of spills.
Tip: Have a licensed electrician verify the circuit and disconnects. - 6
Mount stove and verify clearances
Place the stove on the hearth, confirm it is level, and re-check all clearances from walls and furniture. Connect the stove to the vent and electrical systems.
Tip: Re-check level after final placement for even burn and safe operation. - 7
Test run and final inspection
Run a test cycle, monitor for smoke, odor, or leakage, and confirm chimney draft. Schedule a professional inspection if required by local code or warranty terms.
Tip: Document the test results and save warranty papers for future reference.
Common Questions
Do I need a permit to install a pellet stove near me?
In many jurisdictions, yes. Permits may cover venting, electrical work, and final inspections. Check with your local building department for specific requirements.
Permits are often required for venting and electrical work; consult your local building department.
Can I install a pellet stove myself?
It’s possible in some cases, but most jurisdictions require a licensed professional for venting and electrical connections. Review local codes and warranty implications before proceeding.
DIY installation is not always allowed; verify local codes and warranty terms first.
What venting options are available for pellet stoves?
Common options include direct vent, through-the-wall vent, and chimney connections. The choice depends on your home’s structure and code compliance.
Direct vent and chimney options are typical; your home will determine the best path.
How long does installation typically take?
Installation usually takes several hours, depending on site complexity, permits, and venting requirements. A professional crew provides an estimated timeline during planning.
It usually takes several hours; the exact time varies with the setup and codes.
What maintenance is required after installation?
Follow the stove’s manual for cleaning schedules, pellet quality, and vent inspections. Regular CO detector checks and annual professional inspections are recommended.
Stick to the manufacturer’s cleaning and inspection schedule, and test detectors yearly.
What safety devices should I have in place?
Install CO detectors on every level and near sleeping areas, and keep a fire extinguisher accessible. Ensure proper ventilation and smoke testing during commissioning.
CO detectors on every level and a fire extinguisher nearby are essential.
Watch Video
Top Takeaways
- Plan permits and code checks early.
- Ensure proper venting and safe clearances.
- Hire a licensed installer and schedule final inspection.
- Maintain detectors and follow the manufacturer's maintenance plan.