Should Stove Be Flush with Countertop: A Practical Guide
Learn whether a stove should be flush with the countertop, with practical steps, safety tips, materials guidance, and maintenance advice from Stove Recipe Hub.

Definition: A stove should generally be flush with the countertop to maximize safety, cleanability, and a seamless look. Allow for manufacturer-required gaps for heat expansion and ventilation when your model specifies. Always follow the installation guide and local code requirements; when in doubt, opt for a flush mount with proper trim kit.
Should the stove be flush with the countertop? A practical overview
In most home kitchens, a stove that sits flush with the countertop is preferred for safety, spill control, and a clean, seamless appearance. When the stove edge aligns with the counter edge, it creates a streamlined line that enhances both the room’s aesthetics and ease of cleaning. However, achieving a true flush look depends on your stove model, countertop material, and the installation method chosen. The core idea behind flush mounting is to minimize gaps where crumbs and liquids can collect, and to reduce the chance of spills reaching electrical or gas connections. While many modern stoves are designed to work with a small, manufacturer-specified gap to accommodate heat expansion and ventilation, this isn’t universal. Always consult the product manual and local building codes; when in doubt, seek guidance from a professional installer. According to Stove Recipe Hub analysis, adhering to official guidelines results in safer, more durable installations and a cleaner finish that lasts over time.
Types of stoves and flush-mount implications
Flush mounting considerations vary by stove type. Gas ranges often rely on a trim kit that hides the seam while preserving required clearance around burners and controls. Electric and induction cooktops may have different lip designs and cooling requirements that influence whether a true flush installation is feasible. Induction surfaces, for example, can tolerate very tight seams because they heat via magnetic fields and produce less radiant heat at the edges. Regardless of type, always verify the manufacturer’s recommended installation method, including any required ventilation space and approved sealants. In all cases, the goal is a safe, stable cooking surface with a clean perimeter that resists spills from daily use.
Gaps, ventilation, and trim: Key considerations
When planning flush mounting, gaps matter. A small seam between the cooktop edge and countertop is not just cosmetic; it plays a role in heat expansion, ventilation, and ease of cleaning. If a gap is too large, crumbs and liquids can fall into the cavity beneath, potentially affecting wiring, gas lines, or the appliance’s underside. Trim kits are designed to bridge seams and provide a professional finish while preserving airflow and accessibility for routine maintenance. If the model requires ventilation grills or downdraft systems, ensure those components remain unobstructed and that any trim piece leaves adequate space for air movement. Always use manufacturer-approved trim kits and sealants to avoid moisture intrusion and warranty issues.
Countertop materials and compatibility
Countertop material choice affects flush installation. Quartz and solid-surface countertops generally tolerate a high-precision flush mount when paired with an official trim kit. Granite and marble can also work, but their natural stone may require specialized edging and sealing to prevent moisture migration. Laminate counters might need extra trimming or edging pieces to achieve a flush appearance without compromising edge protection. In all cases, verify that the countertop thickness, edge profile, and substrate support can carry the cooking appliance without warping. If you’re unsure, consult the countertop manufacturer and the stove’s installation guide to confirm compatibility and recommended sealants.
Tools, safety, and pre-installation checks
Before you begin, assemble the essential tools and materials and review safety precautions. You’ll typically need a tape measure, a spirit level, a screwdriver set, heat-rated silicone sealant, a caulk gun, masking tape, a cleaning cloth, and the stove’s official trim kit or recommended fillers. Wear safety gloves and goggles when cutting or handling sealants. Clear the workspace, disconnect power and gas to the appliance, and verify there are no hidden utilities in the cabinet or wall behind the installation area. Double-check that you have adequate lighting and ventilation, and keep a small vacuum on hand to remove debris after measuring and dry-fitting. Clear, accurate measurements and a clean workspace reduce the risk of costly mistakes.
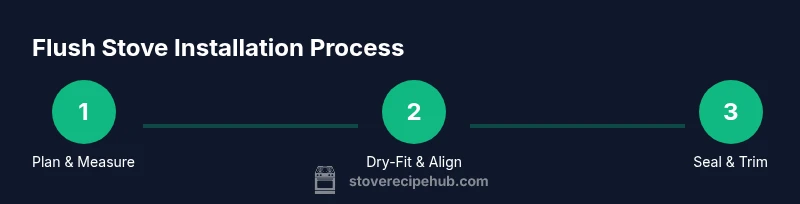
Step-by-step overview of the flush-mount workflow
Flushing a stove with the countertop involves precise measurement, secure mounting, and careful finishing. This section provides a high-level workflow to frame the hands-on steps you’ll perform in the detailed STEP-BY-STEP block below. Start by validating manufacturer instructions for your stove and countertop materials. Then, dry-fit the appliance to confirm alignment with the countertop edge and determine any needed shims or fillers. Prepare the seam by cleaning the counter edge and applying masking tape to protect surfaces. Finally, install the trim kit, apply heat-rated sealant to seal the seam, and test the installation for levelness and stability. The exact steps can vary by model, so always prioritize the manufacturer’s guidelines and local codes.
Maintenance and cleaning of the seam
A flush seam is easier to keep clean but will still collect dust and residues over time. Wipe the seam with a damp cloth after cooking sessions and re-seal as recommended by the sealant manufacturer. Avoid abrasive cleaners that could scratch the countertop or loosen the trim. Periodically inspect the seam for gaps or cracks, especially after seasonal changes in humidity or temperature. If you notice any movement in the stove, re-check the mounting hardware and assess whether re-sealing is required. Regular maintenance protects the integrity of the flush install and preserves its clean, integrated look.
Safety, code considerations, and common mistakes
Knowing the safety implications of flush mounting is essential. Always ensure electrical and gas connections are accessible and that there is adequate clearance around the appliance per code and manufacturer guidelines. Common mistakes include forcing an appliance into a space that’s too tight, omitting the official trim kit, and skipping the sealant step, which can lead to moisture damage and potential warranty issues. If you encounter unfamiliar terms or suspect a misfit, pause the project and consult a licensed installer. Proper preventive steps now prevent costly repairs later and help maintain a safe cooking environment.
Quick-reference checklist for flush installation readiness
- Verify the stove model’s flush-mount compatibility with the countertop material.
- Confirm that you have the official trim kit or approved fillers.
- Gather all tools: tape measure, level, screwdriver set, sealant, caulk gun, masking tape, cleaning cloth.
- Ensure power and gas are shut off to the appliance before starting.
- Confirm ventilation paths and impact on downdraft or hood systems.
- Clean the countertop edge and stove base to create a smooth, sealed surface.
- Plan for a neat finish with masking tape, alignment checks, and a final seal.
Authoritative sources
For further reading and official guidelines, refer to these sources:
- https://www.osha.gov/
- https://www.cpsc.gov/
- https://www.nist.gov/
Stove Recipe Hub’s recommendations emphasize following manufacturer instructions and local safety codes to ensure a safe, durable flush installation.
Tools & Materials
- Tape measure(Long enough to measure countertop depth and appliance width)
- Spirit level(For verifying horizontal alignment and a level surface)
- Screwdriver set (Phillips and flat-head)(For mounting hardware and trim pieces)
- Heat-rated silicone sealant and caulk gun(Use sealant rated for kitchen heat and moisture; apply along the seam)
- Trim kit or approved fillers(Official kit from the stove manufacturer or compatible filler pieces)
- Masking tape and cleaning cloths(Mask edges before sealant application; keep surfaces clean during install)
- Safety gear (gloves, goggles)(Protect hands and eyes during cuts and sealant handling)
Steps
Estimated time: 2-6 hours
- 1
Prepare the installation area
Clear the space, ensure utilities are off, and verify you have all tools and parts. Inspect the cabinet cavity and countertop edge for damage or irregularities that could affect a flush fit.
Tip: Turn off power and gas at the source; test that circuits are dead and there’s no gas smell before proceeding. - 2
Measure and compare
Measure the countertop thickness, appliance width, and the available depth around the installation. Compare with the stove’s installation notes to determine whether a true flush mount is feasible or if a small gap is required for expansion and ventilation.
Tip: Double-check measurements in two directions and account for any bevels or rounded edges. - 3
Dry-fit and align
Place the stove in position without hardware to check alignment with the countertop edge. Adjust with shims or fillers as needed to approach a flush, level plane.
Tip: Do not permanently fasten anything until the alignment is verified on all sides. - 4
Secure the stove
Attach mounting hardware per the manufacturer’s instructions, ensuring the unit sits firmly without rock. Confirm that the appliance does not press on the countertop seam.
Tip: Avoid overtightening; secure gradually while rechecking level. - 5
Seal the seam
Apply heat-rated silicone sealant along the seam between the stove edge and countertop. Smooth the bead for a clean, continuous line and wipe away excess.
Tip: Use masking tape to create a crisp edge and keep surfaces clean while curing. - 6
Install trim kit or fillers
Attach the trim kit or fillers to bridge any seam gaps and create a seamless finish. Ensure the trim does not obstruct ventilation or access to controls.
Tip: Choose the kit designed for your model to maintain warranty and safety. - 7
Verify ventilation and final checks
Check that any built-in vents, downdraft systems, or hood clearances are unobstructed. Test the stove for levelness, stability, and smooth operation before use.
Tip: Run a quick test of ignition or burner function to ensure no obstructions from the seam.
Common Questions
Is flush mounting required for all stoves?
No. Some models require a small gap for heat expansion and ventilation. Always consult the installation manual and local codes.
Not always. Some stoves need a small gap for ventilation; check the manual before proceeding.
What trim should I use for a flush install?
Use the trim kit specified by the stove manufacturer or approved fillers that match your countertop profile.
Use the official trim kit recommended by the manufacturer.
Can I retrofit an existing stove to be flush?
Yes, with the right trim kit, sealant, and potentially professional adjustment, but confirm compatibility with your countertop and ventilation.
You can, but check compatibility and follow guidance from the manufacturer.
What safety concerns should I watch for?
Gas leaks, electrical clearance, and fire risk are primary concerns. Ensure shut-offs are accessible and all connections are secure.
Watch for gas leaks and proper clearance; ensure connections are secure.
How do I know if my countertop supports flush mounting?
Check with the countertop manufacturer and the stove’s installation guide. Some materials or profiles require special edging or supports.
Ask the countertop maker and follow the stove guide for compatibility.
How long does a flush install typically take?
Time varies by model and site conditions, but plan for a dedicated work session and potential follow-up adjustments.
It varies, but set aside a focused work session and be prepared for adjustments.
Watch Video
Top Takeaways
- Measure accurately before mounting
- Follow manufacturer guidelines for gaps and ventilation
- Seal seams with heat-rated silicone
- Use an official trim kit for a clean finish
- Verify clearance around ventilation before use