When to Replace Stove Coil: A Practical Guide for Home Cooks
Learn how to tell when to replace stove coil, test for faults, choose compatible parts, and perform a safe replacement with step-by-step instructions from Stove Recipe Hub.

You will learn how to tell when to replace stove coil, understand common failure signs, and perform a safe, step-by-step replacement. The guide covers testing coils for continuity, choosing a compatible replacement, and post-install testing to ensure even heating. You’ll need basic tools, a multimeter, and a replacement coil that matches your stove model.
What is a stove coil and common failure modes
Electric coil stoves rely on radiant coils beneath a metal drip pan. When functioning, the coil responds predictably to temperature adjustments, delivering steady heat. Over years of use, coils can degrade due to thermal cycling, heavy pots, spills, and wiring wear. If you’ve ever wondered when to replace stove coil, recognizing failure modes helps you act before a total breakdown. Typical signs include a coil that won’t heat, heat that climbs unevenly, or takes excessively long to respond. Cracked insulation, visible scorch marks, or a burned odor around the burner are red flags. A coil that feels exceptionally hot to the touch even when the control is off indicates potential insulation damage or terminal issues. If you notice frequent tripping of the circuit breaker when the burner is engaged, that often signals a larger electrical fault rather than a simple nuisance. In many cases, repairing a severely degraded coil is impractical or unsafe, and replacement is the safer, more reliable choice. Throughout this guide from the Stove Recipe Hub team, you’ll see practical checks and compatibility tips to help decide when to replace stove coil rather than attempting risky DIY fixes.
Signs you should replace, not repair
When troubleshooting stove coils, it’s essential to differentiate between minor glitches and signals that a replacement is due. Look for persistent abnormalities that persist after basic cleaning and calibration. If the coil heats inconsistently, with some areas staying cooler than others, or if you observe buzzing, crackling, or sizzling noises during operation, these are strong indicators of a deteriorating coil. Visible cracks, melted insulation, or scorching around the coil housing suggest imminent failure. If a coil fails to heat at all or the surface remains cool despite the timer and controls, replacement is almost certainly needed. Recurrent tripping of the household circuit breaker when the burner is turned on is another sign you should consider a replacement, as it may reflect insulation wear or internal coil damage. For multi-coil setups, replacing only one coil can sometimes create imbalanced heat within the element, making a full replacement more sensible. Remember: the decision to replace should weigh safety, reliability, and the cost of a replacement coil against ongoing repair attempts. The Stove Recipe Hub guidance emphasizes choosing a coil that matches the model’s wattage and connector style to restore even heating and safe operation.
How to safely test a stove coil
Before any testing, unplug the stove or switch off the circuit at the service panel. Give the coil time to cool completely to avoid burns. Remove the drip pan to clearly access the coil terminals and wiring. Use a multimeter set to a suitable resistance range to test continuity between the coil’s terminals. A healthy coil usually shows some finite resistance; an open circuit indicates a damaged coil or faulty wiring. If the multimeter shows no continuity, the coil should be replaced. Inspect the terminal block for corrosion or loose connections, as these can masquerade as coil failure. After testing, reassemble the burner area, wipe away any spills, and perform a cautious test with the cooktop powered at a low setting. If you’re unsure about wiring, consult the appliance manual or a qualified technician. The timing decision for when to replace stove coil depends on the test outcomes, safety considerations, and the availability of a compatible coil.
Replacement considerations and compatibility
Not all coils fit every stove, even within the same line. Start by checking the coil’s wattage, connector type, and physical size to ensure compatibility with your model. The replacement coil should match the terminal layout and the number of resistance coils in the element. When selecting a replacement, consider the stove’s maximum power rating and your typical cookware. Heavier, thicker pans can require more even heat distribution, influencing coil selection. Determine whether your unit uses a plug-in coil or a screw-terminal coil, and follow the correct installation approach. If your stove uses a drip pan extension or a replacement frame, verify compatibility before purchase. Stove Recipe Hub guidance suggests choosing a coil that meets or slightly under the original wattage to avoid overloading the circuit, and ensuring the terminal block is free of corrosion. If electrical work feels intimidating, it’s wise to engage a pro. The decision to replace stove coil should be guided by performance, safety, and availability of a suitable replacement.
How to replace a stove coil: step-by-step overview
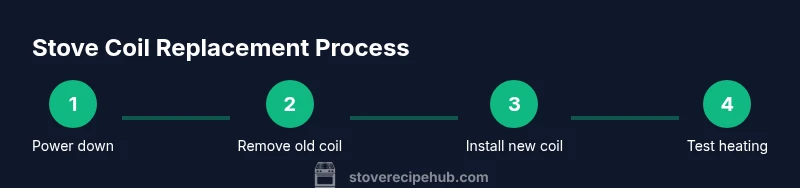
This section summarizes the full replacement process and should be read in conjunction with the detailed, step-by-step instructions later in the article. The emphasis is on safety, correct wiring, and validating a successful heat test before resuming cooking. You’ll replace the coil by removing the old unit, installing the new coil in the same orientation, reconnecting terminals, and conducting a controlled test.
Maintenance tips to extend coil life
Proper care can stretch the life of your stove coil. Clean the burner area and drip tray after cooking to prevent residue buildup, and dry all components thoroughly before reinstalling. Avoid dropping heavy cookware onto the coil area and minimize rapid heating or cooling cycles that stress insulation. Keep coil contacts clean and free of grease or food debris and inspect the terminal block periodically for corrosion. Consider keeping a small maintenance log noting coil age, observed symptoms, and replacements, which helps you decide when to replace stove coil more reliably. Following these best practices can reduce the frequency of premature coil failures and ensure safer, more consistent cooking.
Final notes on planning and safety
Understanding when to replace stove coil hinges on a balance of observed symptoms, safety concerns, and replacement part availability. If you encounter persistent issues despite thorough cleaning and proper operation, replacing the coil is typically the prudent course. Always prioritize turning off power and verifying that components are cool before handling. By following the steps outlined in this guide, you’ll make informed decisions and maintain stove-top performance.
Quick recap: checklist for replacement readiness
- Confirm the coil’s compatibility with wattage and connector type
- Verify coil symptoms and test results indicate failure rather than a plain malfunction
- Gather essential tools and a suitable replacement coil
- Follow safe disassembly, and re-test after installation to ensure even heating
Tools & Materials
- Multimeter(Set to appropriate resistance range; verify probes are in good condition)
- Replacement stove coil(Must match model wattage, connector type, and size)
- Screwdrivers (Phillips and flathead)(Used to remove screws or clamps holding coil and trim ring)
- Heat-resistant gloves(Protect hands when handling warm components; allow full cooling first)
- Non-slip mat or towel(Stabilizes tools and coil area during replacement)
- Camera or notebook(Document wiring layout before disconnecting for accurate reconnection)
Steps
Estimated time: 20-40 minutes
- 1
Power down and cool
Unplug the stove or switch off the circuit to remove all live power. Wait until the burner and coil have cooled completely before touching any components. This prevents burns and electrical shocks during handling.
Tip: Label the control switch or note the circuit number in a safe place before power-down. - 2
Remove the old coil
Lift and pull the old coil straight out of the receptacle, guiding the wiring away from the coils. Do not yank; keep the wires intact to avoid damaging the terminal block. If the coil is stubborn, check for clips or retainer rings that must be released first.
Tip: Have a magnetic tray ready for screws to prevent loss. - 3
Disconnect and document wiring
Carefully disconnect the wires from the coil terminals. Take a photo or draw a quick diagram showing which wire goes to which terminal. This ensures you reconnect the new coil correctly and avoids miswiring.
Tip: Double-check that no metal tools bridge terminals during disconnection. - 4
Prepare the new coil
Inspect the replacement coil for any shipping damage and confirm it matches the original coil’s wattage and connector layout. Align the coil so the terminals line up with the receptacle and ensure the coil sits flat in the burner opening.
Tip: If the coil has a different notch or clip position, contact the seller for an compatible part. - 5
Install and reconnect
Insert the new coil into the receptacle and reattach wires to the correct terminals as per your documentation. Secure the coil with any retaining rings or clips, then reassemble the drip tray and burner cover. Make sure connections are snug but not over-tightened.
Tip: Run a gentle visual check for any stray wires before powering up. - 6
Test heating and final checks
Plug the stove back in or restore circuit power. Turn on the coil to the lowest setting and observe for even heating and any unusual sounds. If the coil heats inconsistently or emits buzzing, power down and recheck connections or seek professional help.
Tip: Start with a low heat test to prevent cookware from overheating during the initial test.
Common Questions
Can I repair a broken stove coil, or is replacement always necessary?
Repairing a broken coil is often impractical or unsafe. Replacement is usually the safer, more reliable option, especially when there are visible cracks, overheating, or electrical faults.
Repairing a broken coil is usually not practical; replacement is typically safer and more reliable.
How do I know if a replacement coil will fit my stove?
Check the coil's wattage, connector type, and physical dimensions. Compare these with your stove’s manufacturer guidelines and the existing coil. If in doubt, consult the manual or contact the manufacturer.
Check wattage, connector type, and size against your stove’s manual to ensure a proper fit.
Is it safe to replace a stove coil myself?
With power off and careful handling, many coil replacements are doable for a confident DIYer. If you encounter stubborn wiring, corrosion, or uncertain wiring layouts, stop and seek professional help.
Replacing coils can be DIY-safe if power is off and you’re careful, but don’t hesitate to get help for tricky wiring.
What signs indicate terminal block corrosion?
Look for visible rust, green or white residues, or a powdery film around the terminal block. Corrosion can cause poor connections and misreading the coil’s condition.
Watch for rust or powdery residues around the terminals; corrosion means you may need to replace the terminal block too.
How long should a stove coil typically last?
Coil lifespan varies by usage and care; while some coils last many years, others may fail sooner due to heavy use or spills. If performance drops or warnings appear, consider testing and replacement rather than waiting for a total failure.
Coil life varies, but if you notice performance drops, plan for testing and possible replacement.
Should I replace multiple coils at once?
If your stove has several aging coils or if one coil failed recently, replacing related coils at the same time can prevent uneven heat distribution and future failures.
If several coils are aging, consider replacing them together to maintain even heat.
Watch Video
Top Takeaways
- Identify failure indicators early to decide on replacement.
- Use a compatible coil with proper wattage and connector type.
- Follow safe steps from power-down to post-install testing.
- Maintain a simple record of coil life and symptoms for future maintenance.