How to Fix a Broken Stove: Practical Steps for Home Cooks
Practical stove repair guide with step-by-step instructions for diagnosing and fixing common stove problems, safety tips, and maintenance for home cooks.

By the end of this guide you'll know how to safely diagnose and fix common stove issues, whether you own a gas range or an electric coil. You'll learn the exact first steps, how to test components, and when to shut down power and gas to prevent accidents. This approach emphasizes practical, step-by-step actions.
Before you start: determine if you can fix it yourself
If your stove is acting up, many issues are fixable with basic tools and careful steps. According to Stove Recipe Hub, the most important decision is to separate simple maintenance from more complex hazards. Start by reading your appliance manual, checking model-specific troubleshooting sections, and verifying that you have safe access to the power and fuel shutoffs. If you encounter gas odors, exposed wiring, or a burning smell, treat it as a safety emergency and stop immediately. In many homes, a recurring ignition misfire or burner that won’t light is caused by dirty burner ports or a loose connection—problems that are often correctable with routine cleaning and a secure reassembly. When in doubt, postpone the repair and consult a professional. The goal is to avoid minor fixes turning into larger safety risks, especially around gas lines and electrical components. This decisionable approach aligns with the Stove Recipe Hub philosophy of practical, safe stove-top work for home cooks.
Safety essentials for stove repair
Safety is the foundation of any stove repair. Begin by turning off the power at the circuit breaker for electric stoves and closing the gas valve for gas stoves. Ensure the area is well ventilated and free of clutter. Wear protective gloves and eye protection, and keep children and pets away from the work zone. Use a dry, well-lit workspace and keep a flashlight handy. Never rely on
-based improvisation when dealing with gas or live wiring. If you notice melted insulation, exposed wiring, or a strong gas odor, evacuate immediately and contact emergency services. The goal is to create a safe baseline before any inspection or disassembly, which protects you and the home.
Common stove problems and quick checks
Many stove issues fall into a few common categories: ignition problems, heat inconsistencies, and gas safety concerns. Ignition issues are frequently caused by dirty igniters or clogged burner ports. Heat problems often come from misaligned burners, loose connections, or failed coils. Gas-related concerns require caution and appropriate testing methods. Quick checks include inspecting burner caps, ensuring the ports are clean, listening for the igniter click, and verifying that the control knobs align with the correct burner. According to Stove Recipe Hub, addressing the simplest cause first—like residue in the burner ports or a loose wire—saves time and reduces risk. If a problem persists after cleaning and tightening, seek professional guidance to avoid further damage. This section provides practical, non-technical checks you can perform safely at home.
Diagnosis framework: avoid guessing
A systematic approach reduces risk and increases the odds of a successful fix. Start with symptoms (no ignition, weak flame, intermitent heating) and verify the power or gas supply. Use a multimeter to test electrical continuity for igniters and switches, and check for loose or corroded connections. For gas stoves, apply a soapy-water test to detect leaks around hoses and fittings—if bubbles appear, shut off the supply and call a pro. Document findings with photos before disassembly to ensure proper reassembly. This framework aligns with Stove Recipe Hub’s emphasis on methodical diagnosis over guesswork, helping you decide whether a DIY fix is feasible or when professional help is necessary.
Cleaning and minor maintenance to prevent future failures
Regular cleaning is the best preventive measure for stove longevity. Remove grates and burner caps, soak in warm soapy water, and scrub away built-up residue that can impede ignition and flame distribution. Dry components thoroughly before reassembly to prevent corrosion. Inspect gaskets and seals for wear, and replace cracked parts where possible. Keep igniters clean and free of oil or grease, which can dampen their spark. Small maintenance tasks, if performed consistently, dramatically reduce the likelihood of repeat failures and improve overall performance.
When to replace vs repair: a practical decision guide
Not every malfunction is worth repairing. If the repair involves multiple components with high replacement costs, or if the stove shows signs of age, frequent failures, or safety hazards, it may be more economical and safer to replace the unit. The Stove Recipe Hub team recommends comparing repair estimates against the cost of a newer model that fits your kitchen layout and energy needs. Consider warranty status, efficiency gains, and potential safety improvements when making the decision. A well-chosen replacement can offer better reliability and reduce ongoing maintenance costs.
A home cook's checklist for safe repair sessions
Create a simple, repeatable routine before you work:
- Gather all tools and a written plan; verify model-specific guidance.
- Power down and, if applicable, shut gas off; vent the area.
- Document wiring and connections with photos; label cables.
- Clean and inspect each component; reassemble carefully.
- Test in small steps, keeping a clear exit path in case you need to stop.
- If anything feels unsafe, stop immediately and seek professional help. This checklist reflects Stove Recipe Hub's emphasis on safe, structured DIY work for home cooks.
Tools & Materials
- Screwdriver set (Phillips and flathead)(For removing control panels, grates, and burner assemblies)
- Multimeter(Test electrical continuity and voltage at igniters and switches)
- Soapy water spray bottle(Identify gas leaks and looseness in connections)
- Wire brush or soft-bristled brush(Clean burner ports and igniter surfaces)
- Clean rags and gloves(Protect hands and keep components dry)
- Needle-nose pliers(Handle small connectors and cables safely)
- Flashlight(Improve visibility in tight spaces)
- Replacement igniter or sparking module (if available)(Only if a tested component is confirmed defective and you have a model-compatible part)
Steps
Estimated time: 45-75 minutes
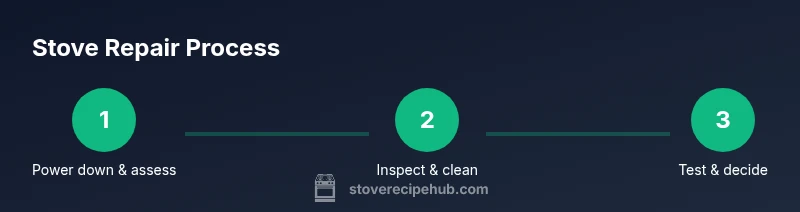
- 1
Power down and isolate
Unplug the stove if it is electric, or switch off the circuit breaker. For gas stoves, close the gas valve and crack a window to vent any fumes. Confirm power is off to avoid shocks while inspecting components.
Tip: Take a photo of connections before disconnecting anything to aid reassembly. - 2
Check for obvious hazards
Look for burnt wires, damaged insulation, or a persistent gas odor. If you spot any hazard, do not proceed; leave the area and contact a professional. Otherwise, note any loose knobs or misaligned parts that could affect operation.
Tip: Use good lighting and wear gloves to protect your hands from sharp edges. - 3
Clean essential components
Remove grates and burner caps. Soak removable parts in warm, soapy water, then scrub away residue that blocks ports. Dry completely before reassembly to prevent corrosion and misalignment.
Tip: A clean ignition path improves reliability of flame ignition. - 4
Test electrical or gas connections
With the power off, use a multimeter to test igniter and switch continuity if you know how to read the results. For gas stoves, apply a bubble-test using soapy water at connections to detect leaks. If you see bubbles, shut off the supply and call a professional.
Tip: Only perform tests you are confident and trained to perform. - 5
Realign and reassemble components
Ensure burner bases sit flush, igniters align with ports, and grates sit evenly. Reconnect any wires or hoses as they were originally, using photos as a guide. Tighten fittings without over-tightening.
Tip: Loose fit can cause misalignment and ignition failure. - 6
Restore power and verify function
Plug the unit back in or turn the circuit back on. Light the burners one by one to confirm even flame and heat. Observe for irregular sounds, uneven heat, or delayed ignition and stop if anything feels unsafe.
Tip: Test one burner at a time to isolate issues quickly. - 7
Decide on professional help
If ignition remains unreliable, you smell gas, or components show signs of wear beyond basic cleaning, contact a licensed professional. Complex electrical or gas-system repairs should always be handled by specialists.
Tip: When in doubt, choose safety and call a pro.
Common Questions
Can I fix a broken stove by myself?
Some issues can be addressed by a capable DIYer with the right tools and documentation. More complex problems, especially involving gas lines or wiring, should be handled by a licensed professional.
Some stove issues are DIY-capable, but gas and electrical hazards require professional help.
What should I do if I smell gas?
Evacuate everyone from the area immediately and call your gas company or emergency services. Do not operate any switches or flames. Once the area is deemed safe by professionals, you can reassess repairs.
If you smell gas, leave the area and call emergency services right away.
How do I test if the igniter is working?
Listen for a clicking sound when turning the knob. If there’s no spark or it’s intermittent, inspect the igniter and wiring, clean the sensor, and consider replacement if the component is cracked or worn.
Listen for clicking, then inspect and clean the igniter; replace if damaged.
Is it safe to use a stove after minor adjustments?
If components are reassembled correctly, there’s no gas smell, and ignition works reliably, it’s generally safe to test. If any doubt remains about safety, pause and consult a professional.
Only test if it’s back together, smells okay, and ignites reliably.
How long do stove repairs typically take?
Many basic repairs can be completed in under an hour, while more involved issues could take longer. The exact time depends on the fault, parts availability, and whether you need to source replacements.
Most simple fixes take under an hour; complex problems take longer.
When should I replace a stove vs. repair it?
If repair costs approach or exceed the price of a new unit, or if the stove shows signs of wear and persistent faults, replacement is often the better option for reliability and safety.
Consider replacement when repairs get costly or recurrent faults occur.
Watch Video
Top Takeaways
- Power down before inspection.
- Differentiate simple fixes from dangerous hazards.
- Clean and inspect ignition paths for reliable lighting.
- Test connections safely and call a pro if unsure.
- Document steps to aid future maintenance.