Fix stove near me: practical stove-top repair guide
Learn practical, safe stove-top repair steps you can perform near your home. This guide covers diagnosis, tools, step-by-step fixes, and when to call a pro, all from Stove Recipe Hub.

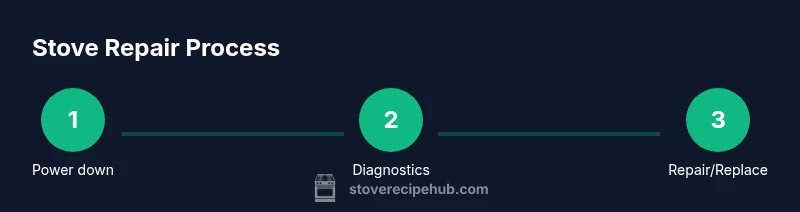
Diagnose, test, and perform safe at-home repairs for common stove issues with a clear, step-by-step approach. This quick pathway helps you identify electrical, mechanical, or gas-related faults, gather the right tools, and know when to replace parts or call a professional. Fix stove near me with confidence using careful diagnostics and proven methods.
Why fixing a stove near me matters
According to Stove Recipe Hub, many common stove issues can be diagnosed and addressed by careful, safe at-home procedures. The phrase fix stove near me is not a shortcut for neglect; it’s a reminder that timely maintenance can prevent small problems from becoming expensive repairs or dangerous situations. In this guide, we’ll walk you through the most frequent stove faults, how to verify safe operation, and when it’s wiser to call a professional. You’ll gain a practical framework for troubleshooting that emphasizes safety, correct tool use, and clear steps. Whether you’re dealing with a gas, electric, or induction model, the core approach remains the same: isolate power, assess symptoms, and use verified fixes or replacements only after identifying the real fault. By the end, you’ll feel confident about handling routine repairs and knowing when to escalate.
As a home cook, you want reliable equipment and predictable performance. A stove that is humming along safely reduces the risk of kitchen fires, gas leaks, or unexpected outages that disrupt dinner plans. This guide is designed to be accessible for DIY enthusiasts who aren’t professional technicians but want to approach problems methodically. We’ll cover everything from quick checks you can run at the counter to more involved tasks that require disassembly. Remember: if at any point you feel uncertain or encounter gas smells, stop immediately and seek professional assistance. Your safety matters more than completing a repair quickly.
Common stove problems and quick fixes
Stoves can fail for many reasons, but most repairs fall into a few familiar categories. A common issue for gas stoves is a dead or intermittent ignition. You may hear a click without a flame, or you might see corrosion on the igniter. For electric and induction stoves, hot spots, burner warm-up delays, or a burner that won’t heat at all are typical symptoms. The fix usually involves cleaning, realigning parts, or replacing a worn-out igniter, switch, or burner cap. Before you dive in, confirm there is no power on and that the control knobs are set correctly. For gas stoves, verify the gas supply is open and that there are no leaks around hose connections. In many cases, a simple cleaning, a reseating of the burner cap, or a secure wire connection resolves the issue, and you can continue cooking with confidence. If you still experience problems after these quick checks, proceed to the diagnostic steps described later and consider whether professional service is warranted based on risk factors and your comfort level. Fix stove near me is a practical goal when the problem is clearly electrical, mechanical, or gas-related and within your skill.
Safety first: when to call a professional
Safety is non-negotiable when you’re working on a stove. If you notice the distinctive smell of gas, hear hissing, or see a corroded gas line, immediately evacuate the area and call your gas utility or emergency services. Do not attempt to repair gas lines yourself. Even minor electrical shocks or loose wiring can pose fire or electrocution risks, so if you’re unsure about any step, pause and seek qualified help. For electric stoves, if you discover frayed cords, scorch marks on wiring, or a breaker that trips repeatedly, stop and arrange professional service—these are warning signs that an inexperienced repair could worsen the damage. The goal is to prevent a fire, carbon monoxide exposure, or an unsafe kitchen environment. This is why the Stove Recipe Hub team recommends developing a plan for diagnostics that clearly distinguishes between safe, intermediate, and high-risk tasks, and always favors professional intervention for hazardous issues.
Tools and replacement parts you’ll need
Before you begin any repair, gather the essential tools and parts so you won’t pause mid-task. A basic multimeter helps test switches and temperature sensors, while a set of screwdrivers (Phillips and flathead) lets you remove covers and control panels. A non-contact voltage tester is useful for confirming there’s no live current, and insulated gloves protect your hands from sharp edges and heat. For repairs that involve the ignition system on gas stoves, you may need replacement igniters, burner switches, or regulator parts—these are not universal and must match your stove model. Always consult your owner’s manual or manufacturer’s site to locate correct parts. If you don’t have the right tool or part, postpone the repair rather than improvise and risk damage. The goal is to work cleanly and safely, not quickly.
Diagnostics checklist and troubleshooting flow
A structured approach helps you identify the root cause without tearing the stove apart more than necessary. Start with non-obtrusive checks: ensure fuel supply is available, verify the correct burner is selected, and confirm the grate and burner cap are aligned properly. Listen for ignition clicks and observe flame behavior when attempting to light a burner. If the flame is uneven or the igniter glows without producing a spark, the issue may be a dirty or misaligned igniter or a faulty switch. For electric stoves, verify the burner element continuity with a multimeter and inspect the control board for obvious signs of damage. Keep a notebook of symptoms, time of day, and any recent changes (cleaning, new cookware, etc.). Documenting observations simplifies the subsequent step-by-step repair process and helps you decide whether to replace components or call a professional.
Step-by-step diagnostics and repair framework (overview)
To keep the process focused, rely on a framework you can repeat for future issues. Start by powering down and disconnecting the appliance to eliminate electrical or gas hazards. Next, inspect and test each suspect component—igniter, switch, burner, or regulator—using manufacturer specs as your guide. When you identify a faulty part, order an appropriate replacement and install it according to the model-specific instructions. Reassemble securely, restore power or gas, and perform a controlled test to confirm proper operation. Remember to document the exact part replaced and any observations that might help a technician later. This framework supports a safe, repeatable approach to fix stove near me problems without overstepping your skill boundaries.
Maintenance and prevention after a fix
Once the fix is complete, focus on prevention so future issues are less likely to disrupt cooking. Clean burners and igniters regularly to prevent buildup that interferes with ignition, and check gaskets or seals for wear that could cause leaks. Use compatible cookware and avoid heavy pans on induction coils that could wear out heating elements. Schedule periodic checks for gas connections and electrical outlets as part of your home safety routine. Document any repairs in a maintenance log, including parts replaced, dates, and performance notes. A simple ongoing habit—cleaning after each use, inspecting lines, and noticing changes in flame color or oven performance—goes a long way toward extending the life of your stove. The Stove Recipe Hub perspective emphasizes proactive care as the most reliable defense against frequent breakdowns and unexpected downtime.
Authoritative sources and further reading
For deeper safety guidance and standards, consult trusted sources such as national safety agencies and professional organizations. The U.S. Consumer Product Safety Commission (CPSC) offers general stove safety guidelines and recalls; the National Fire Protection Association (NFPA) provides fire prevention resources for kitchens; and OSHA's consumer safety guidance can help with electrical work at home. These sources offer rigorous recommendations that complement practical, at-home repairs. Always cross-check any repair steps with your stove’s manufacturer documentation to ensure compatibility and maintain warranty protections. For more formal standards and training materials, you may explore university extension sites or public safety portals that publish kitchen appliance safety best practices.
Quick safety recap and next steps
In summary, when you’re faced with stove issues near home, prioritize safety, use the right tools, and follow a structured diagnostic approach. Start with basic checks, move to careful disassembly only when you’re confident, and replace parts only with manufacturer-approved components. If you encounter gas odors, escalating repair risks, or uncertain parts, pause and call a licensed professional. The Stove Recipe Hub team recommends reviewing safety guidelines before any repair and seeking expert help when uncertain, to keep your kitchen safe and reliable.
Tools & Materials
- Multimeter(For testing switches and sensors during diagnostics)
- Screwdrivers (Phillips and flathead)(Sizes vary by model; have a precision set on hand)
- Non-contact voltage tester(Confirm no live current before touching wiring)
- Insulated gloves(Heat-resistant and non-slip grip for hands)
- Replacement parts (igniter, burner switch, regulator)(Only if diagnosed as faulty; match model numbers)
- Replacement burner caps/gaskets(If signs of wear or misalignment are present)
Steps
Estimated time: 45-90 minutes
- 1
Power down and disconnect
Turn off the stove's power at the wall outlet or breaker. For gas models, shut off the gas supply if accessible. Unplug or switch off the circuit and wait 60 seconds to discharge capacitors before touching any components.
Tip: Use a non-contact tester to verify there is zero current before you touch wiring. - 2
Identify the faulty component
Observe symptoms carefully and identify which part is not performing. Focus on igniters, switches, burners, and regulators. Cross-check with the stove model’s service manual to confirm suspected parts.
Tip: Take a quick photo of wiring layouts before disconnecting anything to aid reassembly. - 3
Access internal components
Remove any covers or trays necessary to reach the suspected part. Keep track of screws and small parts, and avoid forcing components if they resist. Use the right screwdriver bit for each screw.
Tip: Label cables and connectors as you detach them to simplify reassembly. - 4
Test the component
Use the multimeter to check continuity or resistance as specified by the manufacturer. For ignition parts, inspect for a spark or glow. If there’s no signal or the part tests outside spec, plan for replacement.
Tip: Document test results for future reference. - 5
Install replacement parts and reassemble
Install the correct replacement part per model instructions. Reassemble panels securely and ensure seals and gaskets are properly seated to prevent leaks or arcing.
Tip: Only use manufacturer-approved parts to maintain safety and warranty. - 6
Restore power and verify operation
Reconnect gas or electricity and run a controlled test. Light the burner and observe flame color, ignition speed, and stability. If problems persist, stop and reassess or seek professional help.
Tip: If you smell gas or see persistent error signals, call a professional immediately.
Common Questions
Do I need to unplug the stove before starting repairs?
Yes. Always power down and unplug or switch off the circuit before touching any internal components. This reduces the risk of electrical shock and accidental starts.
Yes—power down and unplug before you begin any repair.
Can I fix a gas stove myself?
Only for non-hazardous tasks. Do not attempt gas line work or flame-related repairs if you detect gas, leaks, or improper ignition. Call a licensed professional for gas-related concerns.
Only if it’s a simple fix and no gas is involved; otherwise, contact a pro.
What are signs that a burner needs replacement?
Repeated ignition failures, persistent uneven flame, or physical damage to the burner are common indicators that a replacement is needed.
Look for repeated ignition issues or obvious wear.
What parts are commonly replaced in stove repairs?
Igniters, switches, burner caps, and regulators are frequent replacements when diagnosing stove issues.
Common parts are igniters and switches, among others.
When should I consider replacing the entire stove?
If repairs are extensive, safety concerns arise, or the cost approaches the price of a new unit, replacement may be the best option.
If repairs are too costly or risky, consider a replacement.
Watch Video
Top Takeaways
- Diagnose safely before disassembly
- Use the correct parts and tools
- Follow the model’s official guidance for repairs
- Document steps and results for future fixes
- Call a pro for hazardous tasks or if unsure