Near Me Gas Stove Repair: Safe DIY Guide
Learn practical, safety-first steps to diagnose and address common gas stove issues near you. This guide explains when to DIY, what tools you need, and how to find qualified local help for gas stove repair.

This guide helps you diagnose and safely address common gas stove problems near you. It covers essential safety steps, the basic tools you’ll need, and when to call a licensed professional for near me gas stove repair.
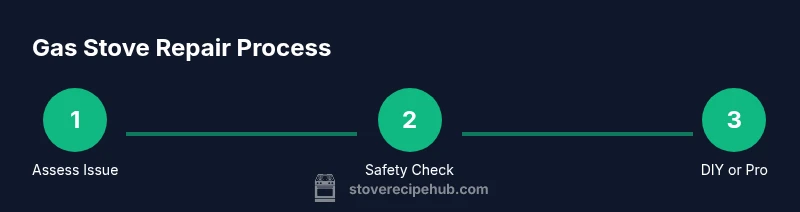
Understanding the scope of near me gas stove repair
When home cooks search for near me gas stove repair, they expect practical, hands-on guidance that respects safety and local regulations. Gas appliances demand respect for their fuel source, ignition systems, and venting. Start by identifying the symptom (burner won’t light, flame is uneven, igniter clicks without ignition, or there’s a gas smell). This helps you decide whether to proceed with DIY steps or to contact a licensed technician. Always remember that the goal is safe operation, not a quick fix. Stove Recipe Hub recommends a cautious, safety-first approach, particularly if you notice gas odors, hissing sounds, or dead burners. By approaching the problem methodically, you minimize risk and maximize the chance of a lasting repair while keeping your household safe.
Safety first: gas leaks, appliance integrity, and your rights
Gas stove repair involves potential risks including gas leaks and fire hazards. Before you do anything, ensure proper ventilation, remove any ignition sources, and shut off the gas supply if you smell gas or hear rushing air. Do not use electrical switches, lighters, or phones near the appliance while a leak is suspected. If a leak is confirmed or suspected, evacuate the area and call your gas utility or fire department immediately. In most areas, you have the right to request a licensed professional for repairs; using non-licensed help can void warranties and create safety liabilities. The Stove Recipe Hub team emphasizes prioritizing safety and licensing for gas-related work, especially for persistent leaks or damaged gas lines.
DIY checks you can perform safely (no disassembly of gas lines)
There are several safe, non-invasive checks you can perform to assess a gas stove without risking exposure to gas lines. Start by cleaning the burner ports and igniter with a dry brush or compressed air to remove oil and residue that block flame ignition. Check that the burner cap is seated correctly and that the igniter sparks when the terminal is dry. If the flame is yellow or uneven, it can indicate improper air-to-gas ratio, which you can often remediate by cleaning or adjusting air shutters according to the manufacturer’s guidance. Remember: never disassemble gas valve components or replace pressure regulators without professional training. This section aligns with practical guidance from Stove Recipe Hub on safe DIY stove maintenance.
When to hire a licensed technician
If you suspect a gas leak, smell gas, or can’t identify the root cause after basic cleaning and inspection, stop DIY work and contact a licensed technician. Gas appliances require precise calibration, proper venting, and encoder diagnostics that often involve internal components and gas lines. A licensed pro can verify appliance integrity, calibrate burners for even flame distribution, test for CO emissions, and ensure compliance with local codes. The cost and complexity of repairs can vary, and professional service is the safest path when fundamentals like gas supply, regulator function, or thermocouples are involved. Stove Recipe Hub underscores that safety overrides everything in gas stove repair.
How to find a reputable local gas stove repair pro
Start by checking licenses, insurance, and warranties. Read reviews from multiple sources, and ask for written estimates that itemize labor and parts. Verify that the technician has experience with your stove’s make and model, and request a copy of their service agreement. It’s wise to ask about safety certifications and whether they provide a safety check after service, including CO monitoring. If a contractor cannot provide proof of license or insurance, move on to another specialist. Stove Recipe Hub’s guidance here helps you locate qualified professionals who prioritize safety and quality.
Common mistakes to avoid during stove repairs
Avoid bypassing safety steps or attempting to reassemble gas components without clear documentation. Don’t ignore a consistent leak, odd smells, or frequent burner outages—that signals a deeper issue. Refrain from using unverified DIY parts; incorrect ignition modules or air shutter settings can worsen performance or cause hazardous conditions. Always keep a detailed note of symptoms, steps taken, and outcomes to share with a pro if you hire one. Finally, never perform disassembly beyond your comfort level—the risk of injury or property damage is not worth the potential savings.
Maintenance tips to prevent future failures
Preventive care reduces the likelihood of sudden failures. Clean burners and ignition systems weekly, replace worn igniters with manufacturer-approved parts, and keep the area around the stove free of flammable materials. Use a soft brush or compressed air to clear ports, and periodically inspect gas hoses and connections for signs of wear. Regularly test the flame color (blue with a stable yellow tip in older models may indicate adjustment needs) and ensure proper ventilation in your kitchen. These practices support long-term reliability and align with Stove Recipe Hub maintenance guidelines.
What to expect from a professional inspection
A professional inspection typically starts with a safety assessment: gas tightness, regulator function, ignition stability, and correct burner flame. Expect a detailed written report with findings, recommended parts, and a clear estimate for work. The technician may perform a leak test, CO detection, and a calibrated burner tune-up to achieve an even, blue flame. After completion, a follow-up check ensures that all aspects of the stove operate safely and efficiently. Stove Recipe Hub emphasizes documentation and post-service safety checks as essential components of any repair.
Quick reference: safety steps you can take today
- If you smell gas: leave the area, call the utility, and do not operate electrical switches.
- If the burner won’t light: ensure the gas supply is on, clean the igniter, and verify the burner cap alignment.
- If you’re unsure: stop and contact a licensed professional.
- Keep a CO detector in the kitchen area for ongoing safety.
Tools & Materials
- Gas shut-off wrench(Keep accessible near the appliance)
- Phillips screwdriver(For igniter screws and trim plates)
- Nut driver set(Use appropriate size for burner hardware)
- Soft brush or compressed air canister(Clean ports without damage)
- Non-contact infrared thermometer or flame color test tool(Optional for flame quality checks)
- Isopropyl alcohol and lint-free cloths(For cleaning igniter and burner surfaces)
- Replacement ignition module or igniter (model-matched)(Only if you have part-compatible instructions)
- Owner’s manual or appliance spec sheet(Guides model-specific steps)
Steps
Estimated time: 60-90 minutes
- 1
Identify the issue safely
Observe and document the symptom (burner won’t light, weak flame, or odd smells). Confirm there is no visible gas leak and ensure room is well-ventilated. This helps you decide whether to proceed with low-risk DIY steps or to call a pro.
Tip: Write down the exact symptom and any recent changes to usage or wiring. - 2
Shut off gas and power if needed
If a leak is suspected, immediately shut off the gas supply at the valve and disconnect or switch off the appliance’s electrical supply. Do not operate switches or create sparks.
Tip: If you can’t quickly locate the shut-off valve, evacuate and call emergency services. - 3
Clean and inspect the burner and igniter
Remove the burner cap and clean ports with a dry brush or compressed air. Inspect the igniter for cracks or grime. Re-seat the cap and test ignition with dry hands to see if sparking improves.
Tip: Always dry-hand the igniter to avoid moisture interfering with sparking. - 4
Check alignment and air flow
Ensure burner gaps and air shutters are positioned per manufacturer specs. Misalignment can cause uneven flames or poor ignition.
Tip: Refer to the model’s diagram before adjusting shutters or caps. - 5
Test operation after cleaning
Turn the gas back on and attempt to ignite each burner. Listen for a steady spark and observe a steady blue flame. If flame remains yellow or sputters, stop and seek professional help.
Tip: If flame is irregular after cleaning, do not force further DIY fixes. - 6
Decide on professional support
If gas smell persists, ignition is unreliable, or gas line components are suspected, contact a licensed technician. Document symptoms and steps you took to share with the pro.
Tip: Have model information, serial number, and warranty status ready.
Common Questions
Is it safe to repair a gas stove by myself?
DIY can be appropriate for simple cleaning and ignition checks if you strictly follow safety guidelines. However, any issues involving gas lines, leaks, or regulators should be handled by a licensed professional to prevent leaks or fires.
DIY can be safe for basic cleaning if you follow safety steps, but call a licensed pro for leaks or gas line work.
What should I do if I smell gas around my stove?
If you smell gas, evacuate the area, avoid flames or electrical switches, and call your gas utility or emergency services immediately.
If you smell gas, leave the area and call the gas company right away.
Can I replace the igniter myself?
Igniter replacement is possible for some models with the correct part and instructions. If you’re unsure about wiring or safety, seek professional service.
You may replace the igniter if you have the right part and a clear guide; otherwise, hire a pro.
How do I evaluate a local gas stove repair pro?
Look for licensed technicians with insurance, read reviews, and request a written estimate detailing labor and parts. Verify model experience and safety certification.
Check licenses, insurance, and reviews; ask for a written estimate and model experience.
What costs should I expect for a gas stove repair?
Repair costs vary by issue, parts, and labor. Get multiple written estimates and ask for a scope of work before approving any repair.
Costs vary; get written estimates and a clear scope of work before any repair.
Watch Video
Top Takeaways
- Shut off gas if you smell a leak and call for help immediately.
- Start with safe, non-invasive DIY checks before replacing parts.
- Only use model-specific parts and approved tools.
- Know when to escalate to a licensed gas stove repair professional.