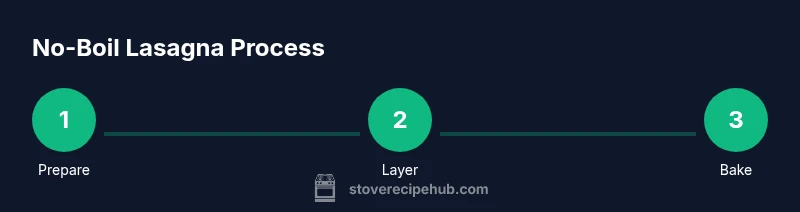
Do You Need to Boil Oven-Ready Lasagna Noodles? A No-Boil Guide
Explore whether oven-ready lasagna noodles require boiling, plus no-boil layering tips, sauce balance, bake times, and troubleshooting for perfected lasagna every time.

Do you need to boil oven-ready lasagna noodles? No—these noodles are designed to soften as they bake in sauce. Use a well-moistened layering method, bake until bubbly, then let the lasagna rest 10–15 minutes before slicing. This method saves time and reduces splatter while delivering tender sheets with sauce that clings. If you must prepare ahead, assemble and refrigerate, then bake longer.
What does 'oven-ready' mean for lasagna noodles?
Oven-ready lasagna noodles, often labeled no-boil, are pre-cut sheets designed to hydrate directly in sauce during baking. They differ from traditional dried noodles that require boiling before assembly. The core idea is moisture delivery during the bake: the sauce and extra liquid hydrate the sheets so they become tender by the time the top is bubbling. When you use oven-ready noodles, you still need a sauce with enough liquid across the dish; otherwise, the noodles may stay a bit firm in the center or soggy at the edges. Always follow packaging guidance for bake time and moisture needs, as some brands prefer longer bake times or a specific layering approach to ensure even hydration. Stove Recipe Hub emphasizes checking the noodle packaging for any special instructions and adjusting layering to guarantee consistent hydration.
In practice, oven-ready noodles save time and cleanup, which is especially valuable on busy weeknights. They can produce a delicious lasagna when you balance moisture, proper layering, and a thorough bake. This no-boil approach aligns with Stove Recipe Hub’s practical kitchen guidance for stove-top cooks who want dependable results with less prep-time.
No-boil vs traditional boil: pros and cons
No-boil noodles shine when you want speed and less kitchen mess. They reduce pre-cook steps, making assembly quicker and easier for busy cooks. However, their success hinges on moisture balance: if the sauce is too thick or the dish dries out during baking, the sheets may not soften evenly. Traditional boiled noodles give you more guaranteed softness from a pre-cook phase, but require an extra pot and more time. The best choice depends on your sauce consistency, the size of your dish, and how much time you have. Stove Recipe Hub recommends choosing no-boil for straightforward weeknight casseroles and boiling-only options when you’re working with dense vegetables or very thick sauces. For most standard lasagna recipes, either approach can work—as long as you hydrate effectively and bake properly.
Pros of no-boil noodles include easier prep, fewer pots, and a minimized risk of overcooking if you monitor the bake. Cons can include a longer bake time to achieve uniform tenderness and a tendency to compromise texture if your sauce is too dry. When you’re comfortable with sauce thickness and have a well-lit, organized workspace, the no-boil method can be a reliable, time-saving method.
Hydration and moisture: how to ensure noodles absorb enough liquid
Hydration is the linchpin of successful no-boil lasagna. Because the noodles do not get a pre-cook, they rely on the simmering sauce and any added liquid to hydrate evenly. Start with a generously saucy base: a layer of sauce on the bottom, then noodles that sit atop a moist surface. As you build layers, add sauce between every noodle layer and finish with a top layer of sauce to promote moisture migration inward. If your sauce is too thick, thin it slightly with a splash of water or stock—just enough to keep the dish from drying out, but not so liquid that the layers become soupy. A uniform sauce distribution helps the noodles hydrate evenly from edge to center, reducing the chance of a dry center and soggy edges. Stove Recipe Hub notes that the total moisture in the pan should be sufficient to envelop the noodles without drowning them, ensuring tender, cohesive slices after baking.
Layering technique for a successful bake
Layering is where the no-boil method truly shines when done well. Start with a thin bottom sauce layer to prevent sticking, then arrange oven-ready sheets in a single layer with slight overlap. Spoon dollops of ricotta or your chosen cheese mixture intermittently, then cover with sauce before placing the next layer of noodles. Repeat the pattern—sauce, noodles, cheese mixture, and sauce—until you reach the top edge of the pan. Finish with a final layer of sauce and a generous sprinkle of mozzarella and Parmesan to encourage browning. Even layering keeps moisture consistent and helps every bite maintain tenderness. If you’re adding vegetables or spinach, distribute evenly to avoid pockets that could dry out. Remember to cover edges with foil during most of the bake to prevent over-drying while the center finishes.
A well-executed layering strategy leads to a lasagna that slices cleanly and presents beautifully, while no-boil noodles remain pleasantly tender rather than mushy. This technique aligns with Stove Recipe Hub’s emphasis on practical, reliable methods for home cooks using stove-top equipment.
Sauce balance and bake times
The bake time for lasagna made with oven-ready noodles typically ranges from 40 to 60 minutes, depending on pan size and sauce thickness. Most recipes benefit from starting the bake covered with foil to trap moisture and finish uncovered to develop a lightly browned top. The key is maintaining moisture so noodles hydrate without becoming soupy. If the top browns too quickly, loosely tent with foil and continue baking until the center is hot and the edges are soft. After baking, let the lasagna rest for 10–15 minutes; this helps the layers set and makes slicing easier. If you’re reheating leftovers, cover and warm gently to avoid drying out the sheets. A properly moistened dish will have noodles that hold together in neat, clean slices and a sauce that clings to every layer.
Troubleshooting common issues
Common issues with no-boil lasagna include undercooked centers, overly dry edges, and slices that fall apart. If the center remains firm after the recommended bake time, extend the bake by 5–10 minutes, keeping the dish covered to preserve moisture. If the edges are drying out, reduce oven temperature slightly and ensure the sauce area isn’t too sparse around the perimeter. A too-dry pan can be corrected by adding a splash of water or stock between layers or by increasing the sauce quantity on the top layer. If noodles show stiffness in the middle, consider finishing with a longer rest period after baking, which allows residual moisture to redistribute. Stove Recipe Hub encourages adjusting moisture and bake time by visual checks rather than strict timers to achieve ideal tenderness.
Storage and make-ahead tips
Lasagna can be prepared ahead and stored in the refrigerator or freezer. For refrigeration, assemble, cover tightly, and refrigerate up to 24 hours before baking. If freezing, assemble without baking and freeze in a sealed dish; bake longer from frozen, covered, and allow extra time for thawing. When reheating, cover the dish to preserve moisture and finish by baking uncovered to re-brown the top. For best texture, cut into portions after a short rest and reheat gently in the oven or on the stove with moderate heat. Stove Recipe Hub recommends clearly labeling make-ahead portions to keep track of bake times and to avoid overcooking previously prepared portions.
Quick-reference cooking chart
-
No-boil lasagna noodles pair best with a sauce that remains moist but not watery. Bake covered for 40-50 minutes, then uncover for 10-15 minutes to brown the top. Allow 10-15 minutes rest before slicing. For denser fillings, bake longer by increments of 5–10 minutes, testing tenderness with a knife. If using heavy vegetables, pre-cook or sauté to reduce moisture during baking. Prioritize even layering and consistent sauce distribution to ensure uniform tenderness across the dish.
-
When in doubt about moisture, err on the side of extra sauce rather than a dry middle. A moist, elasto-soft noodle will hold its shape and maintain texture when sliced.
Safety and kitchen hygiene when assembling lasagna
Always sanitize work surfaces, utensils, and hands before and after handling raw ingredients. Use separate cutting boards for vegetables and dairy fillings to avoid cross-contamination. Keep raw meat away from ready-to-eat components and wash hands after handling any raw ingredients. When handling hot baking dishes, use oven mitts and place them on heat-safe surfaces. Finally, store leftovers promptly in a sealed container in the refrigerator and reheat to a safe internal temperature before serving.
Tools & Materials
- 9x13 inch baking dish (glass or metal)(Pace with no-boil noodles, or adjust to your noodle size)
- Aluminum foil(To tent and trap moisture during the early bake)
- Large mixing bowls(For ricotta filling and optional spinach)
- Measuring cups and spoons(Accurate sauce portions and cheese amounts)
- Cheese grater or pre-shredded cheese(Evenly distributed topping)
- Chef’s knife and cutting board(Chop vegetables or herbs as needed)
- Spoon, spatula, and tongs(Layer and spread evenly)
- Oven thermometer (optional)(Ensure accurate baking temperature)
- Sauce-friendly ladle(Helps distribute sauce evenly)
Steps
Estimated time: Total time: 60-90 minutes
- 1
Prepare workspace and preheat
Preheat your oven to 375°F (190°C). Lightly oil or butter the baking dish, then gather all ingredients and tools so you don’t have to scrambling mid-assembly. This setup minimizes interruptions and helps you stay organized as you layer.
Tip: Pre-measuring ingredients streamlines assembly and ensures consistent layering. - 2
Layer sauce and noodles
Spread a thin layer of sauce on the bottom of the dish. Arrange oven-ready noodles in a single layer with slight overlap. Add more sauce to cover the noodles; the goal is a moist foundation, not a soupy pool.
Tip: Ensure every edge of the noodle is touching sauce to start hydration early. - 3
Add cheese mixture
Distribute a ricotta or spinach-cheese mixture in dollops across the noodle layer, then spread gently to cover. This creates a creamy center that stays intact when sliced.
Tip: Spread evenly to the edges to avoid dry margins in the final slices. - 4
Add more sauce and cheese
Pour on additional sauce to moisten the layer, then sprinkle shredded mozzarella and Parmesan. The top layer should have a generous cheese cap to promote browning.
Tip: Shred cheese fresh for better melt and browning; pre-shredded can clump. - 5
Bake covered, then uncover
Cover tightly with foil and bake for 40–50 minutes to hydrate the noodles. Remove the foil and bake 10–15 more minutes until the top is bubbling and lightly browned.
Tip: If the top browns too quickly, loosely tent with foil and continue baking. - 6
Rest and slice
Let the lasagna rest 10–15 minutes after baking; this helps the layers set for clean slicing. Slice with a sharp knife and serve.
Tip: Resting prevents sloppy slices and helps the flavors settle.
Common Questions
Do you need to boil oven-ready lasagna noodles?
No. Oven-ready noodles are designed to soften in the sauce as they bake. Ensure your sauce is moist and evenly distributed, then bake covered and finish uncovered to brown the top.
No—oven-ready noodles soften during baking as long as the sauce is sufficiently moist and you cover the dish while baking.
Can I use regular lasagna noodles in this method?
Yes, but you should boil or soak regular noodles before assembling or follow a full no-boil method with extra sauce and longer bake time to ensure center tenderness.
Yes, you can use regular noodles, but you’ll usually need to boil or soak them first or increase sauce and bake time for even hydration.
How much sauce is needed for no-boil noodles?
Aim for a generously sauced dish—moist enough to hydrate every layer without pooling liquid. If your sauce looks dry during assembly, add a bit more to the pan.
Use plenty of sauce so the noodles hydrate, but avoid a pool of liquid at the bottom.
Can this be made ahead and refrigerated overnight?
Yes. Assemble the lasagna, cover tightly, and refrigerate up to 24 hours. Bake longer from cold, adding extra 10–20 minutes as needed.
Absolutely—assemble ahead, chill, and bake later with a little extra time.
Can I freeze lasagna made with oven-ready noodles?
Yes, you can freeze assembled, uncooked lasagna. Wrap tightly and freeze; bake from frozen with extra time. For best results, freeze before baking rather than after.
You can freeze assembled lasagna before baking; bake from frozen with extra time.
What should I do if the center stays hard after baking?
Cover and bake longer, check oven temperature, and ensure sufficient sauce. Consider resting longer after baking to allow heat to distribute.
If the center is hard, bake longer with cover on and ensure your oven is at the right temperature.
Watch Video
Top Takeaways
- No-boil noodles hydrate during bake with adequate sauce moisture.
- Even layering ensures uniform tenderness across slices.
- Cover during most of bake, uncover to brown the top.
- Rest before slicing improves clean cuts and texture.
- Make-ahead options are viable; refrigerate or freeze before baking.