How to Use Oven-Ready Lasagna Noodles: A Practical Guide
Learn how to use oven-ready lasagna noodles (no-boil) for easy, delicious lasagna. This guide covers hydration, layering, timing, and troubleshooting with practical tips for home cooks.

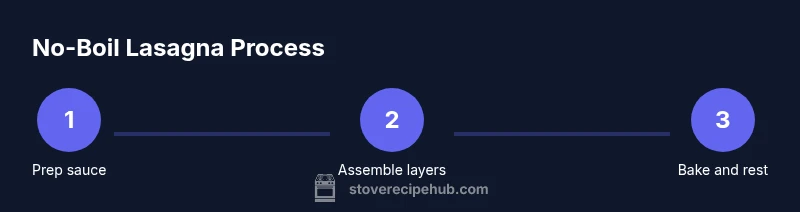
Oven-ready lasagna noodles can be used without pre-boiling; this no-boil method hydrates the noodles in sauce during baking. Expect a saucy, evenly hydrated dish if you hydrate properly, layer thoughtfully, and bake with proper resting time. This guide covers when to use them, how to scale recipes, and common pitfalls to avoid.
What oven-ready lasagna noodles are and when to use them
Oven-ready lasagna noodles, also called no-boil noodles, are pre-cut sheets designed to hydrate during baking without a pre-boil. They’re a popular choice for busy weeknights and for cooks who want to assemble ahead of time. According to Stove Recipe Hub, oven-ready noodles shine when paired with a sauce that is rich and moist enough to hydrate the pasta through the baking process. The Stove Recipe Hub team found that the no-boil method saves time and reduces cleanup while still delivering a creamy interior and a nicely textured top. Choose noodles of standard thickness for best results, and avoid overly thick sauces that can leave the noodles underhydrated. If you prefer a crisper edge or extra moisture control, lightly sauce the bottom and top layers to promote even hydration. In practice, no-boil noodles work beautifully in layered casseroles, meat lasagnas, and vegetarian builds, with a flexible cheese blend and herbs that let fillings shine. The core idea is to hydrate the pasta with sauce and bake long enough for steam to permeate every layer.
This approach is especially handy for weeknights, large family meals, or freezer-ahead lasagnas. By using oven-ready noodles, you can focus more on flavor balance and texture rather than minute cooking times for each noodle sheet. Remember: the goal is even hydration, not soggy noodles, so adjust sauce moisture and layering accordingly.
No-boil vs traditional lasagna noodles—key differences
No-boil noodles differ from traditional pre-cooked sheets mainly in hydration dynamics and workflow. Traditional noodles often require a pre-boil, which reduces the amount of water they must absorb during baking. Oven-ready noodles rely on a sauce that provides sufficient moisture to hydrate during the bake, so the sauce should be liquid enough to steam and soften the pasta sheet evenly. Texture-wise, no-boil sheets should emerge tender with a gentle bite rather than mushy, provided the bake time and oven temperature are appropriate. In terms of timing, you’ll typically bake no-boil lasagna longer than a boiled version to ensure all layers hydrate and heat through. Cheese and fillings should be chosen to complement the pasta’s moisture profile—think creamy ricotta, melty mozzarella, and a well-seasoned sauce. A common pitfall is layering too thickly or using a sauce that is too dry, which can lead to dry edges or tough noodles. Conversely, overly watery sauces can make the dish soggy; balance is key.
From a home-cook perspective, oven-ready noodles offer reliability when you follow a consistent layering pattern and ensure adequate sauce depth. The Stove Recipe Hub team emphasizes using sauce as the primary hydrator and coordinating fillings to maintain moisture distribution across the pan. For best results, choose a pan size that allows the noodles to lie flat with even coverage and avoid cramming layers tightly, which can impede heat and moisture flow.
Planning your sauce, fillings, and layering
Successful lasagna with oven-ready noodles begins with planning moisture, flavor balance, and layering geometry. Start with a sauce that is flavorful and relatively moist—tomato-based sauces, béchamel, or a hybrid can all work, but the key is enough moisture to hydrate without making the dish soupy. Cheese choices matter: a creamy layer of ricotta or cottage cheese provides moisture and richness, while shredded mozzarella and grated Parmesan contribute melt and sharpness. If you’re using eggs in the cheese mixture (a common binding step), keep the mixture light enough to spread smoothly between layers. For fillings, consider vegetables like spinach, mushrooms, or zucchini as complements to meat sauces or as a vegetarian option. The order of layers matters: a light sauce at the bottom, noodles laid flat, a cheese layer, then more sauce, and finally the top with cheese to create a molten, golden finish. As you assemble, aim for even distribution of sauce and fillings so every bite has balanced moisture and flavor. Remember to save a small amount of sauce for the final top layer to prevent dryness on the edges.
Common mistakes and how to fix them
Even with oven-ready noodles, several missteps can derail a no-boil lasagna. A frequent issue is using noodles that are too dry or sauce that is overly thick, which prevents proper hydration and can leave pasta chewy. Another pitfall is uneven layering, which creates dry pockets or soggy areas. To fix these, ensure your sauce is sufficiently liquid and that each layer covers the pan evenly. If you notice moisture pooling at the bottom, reduce the top-layer sauce slightly and let heat distribute gradually. Using a preheated oven helps maintain steady hydration throughout the bake, and covering the lasagna for the majority of baking time helps trap steam. Finally, allow the lasagna to rest after baking; this rest period lets moisture settle and makes slicing easier. The combination of proper moisture, even layering, and a balanced cheese mixture yields the best results when using oven-ready noodles.
Authority sources and further reading
For additional guidance on safe handling and best practices, check authoritative sources. The U.S. Food and Drug Administration and USDA provide general food-safety considerations for preparing casseroles and baked dishes. For practical cooking guidance and no-boil noodle considerations, you can consult state extension resources and university-tested recipes. See the links below for trustworthy information:
- https://www.fda.gov/food/buy-store-prepare-food
- https://extension.illinois.edu/food-nutrition/no-boil-lasagna
- https://www.usda.gov/food-safety
Tools & Materials
- 8x11/13 inch baking dish(Classic lasagna size; ensure pan fits in your oven with some clearance)
- Large saucepan(For simmering sauce and hydrating noodles if needed)
- Mixing bowl(For ricotta or cottage cheese mixture)
- Measuring cups and spoons(To portion cheese, sauce, and seasonings)
- Spatula or large spoon(For spreading sauce and layering evenly)
- Aluminum foil(To cover during the initial bake and trap moisture)
- Shredded mozzarella and grated Parmesan(Top layer for melt and color)
- Ricotta cheese or cottage cheese(Creamy middle layer; can mix with egg if desired)
- Salt, pepper, Italian seasoning(Flavor boosters to taste)
Steps
Estimated time: 60-90 minutes
- 1
Prepare the sauce
Heat your sauce over medium heat until simmering; season to taste and adjust moisture with a splash of water or stock if needed. The goal is a sauce that can hydrate the pasta sheets without becoming watery.
Tip: Taste the sauce for salt balance early; under-seasoning now is easier to fix than after layering. - 2
Hydrate noodles in sauce
Spread a thin layer of sauce on the bottom of the baking dish. Lay a first sheet of noodles, slightly overlapping if needed. Spoon some sauce over the noodles to begin hydration; repeat so every noodle is contacted by sauce.
Tip: Avoid dry sheets; ensure each noodle has surface contact with sauce to hydrate evenly. - 3
Prepare cheese filling
In a bowl, combine ricotta (or cottage cheese) with a pinch of salt, pepper, and optional egg for binding. Stir until creamy and spreadable.
Tip: If using egg, whisk well to avoid curdling during baking. - 4
Layer components
Add a layer of cheese filling over the noodles, then spoon a portion of sauce and sprinkle shredded mozzarella. Repeat layers, ending with a top cheese layer.
Tip: Keep layers thin and even; bulky layers hinder moisture distribution. - 5
Cover and bake
Cover the pan tightly with foil and bake in a preheated oven until the dish is heated through and the noodles have hydrated. Steam will help soften the sheets.
Tip: Covering early traps steam; avoid removing the cover too soon to prevent uneven hydration. - 6
Uncover and finish baking
Uncover, bake until the top is bubbly and lightly golden, then let the lasagna rest before slicing to allow moisture to redistribute.
Tip: Resting is crucial for clean slices and even texture.
Common Questions
Can I use oven-ready noodles with non-traditional fillings?
Yes. Oven-ready noodles work with a wide range of fillings, including vegetables, meats, and cheese blends. Ensure the total moisture remains enough to hydrate the noodles, and adjust seasoning to balance flavors.
Yes, you can use oven-ready noodles with different fillings. Keep moisture balanced and season well.
Do I need extra sauce when using no-boil noodles?
Some extra sauce helps hydrate the noodles more evenly, but avoid a sauce that is overly watery. Aim for a balanced amount that coats layers without pooling at the bottom.
A little extra sauce helps hydrate the noodles; avoid too much liquid.
Refrigerate before baking?
Yes. You can assemble and refrigerate for several hours or overnight. If chilled, bake a bit longer to ensure thorough hydration and even cooking.
You can refrigerate assembled lasagna; bake longer to hydrate fully.
Freeze after baking?
Lasagna with oven-ready noodles freezes well. Cool completely, slice if desired, wrap tightly, and freeze. Reheat covered in a moderate oven until heated through.
Yes, you can freeze baked lasagna; reheat gently until hot.
Prevent soggy noodles?
Choose a sauce with enough body and ensure even layering. Avoid overly watery sauces on top; keep a balanced moisture profile across layers.
Keep moisture balanced and layer evenly to prevent soggy noodles.
Gluten-free option?
Gluten-free pasta can be used with the no-boil method, but be mindful of moisture and cooking times as GF noodles can vary in absorbency.
Gluten-free noodles work with no-boil lasagna, just adjust moisture and bake time.
Watch Video
Top Takeaways
- No-boil noodles hydrate during baking with proper sauce moisture.
- Even layering prevents dry edges and soggy centers.
- Preheat and rest the lasagna for best texture and slicing.
- Balance fillings with sauce to maintain moisture.
- Follow a consistent no-boil workflow for reliable results.