Can You Open the Oven While Baking Chicken: A Practical Guide
Learn whether you can safely open the oven while baking chicken, how to peek without heat loss, and practical tips for juicy, safe poultry every time.

Yes, you can briefly open the oven to check on chicken, but avoid frequent door openings. Each peek lets heat escape and resets the oven temperature, which can extend cooking time and dry out the meat. Plan checks at key milestones, use a timer, and rely on an instant-read thermometer for doneness rather than guessing.
Why Opening the Oven Matters
Can you open the oven while baking chicken? The short answer is yes, but with caution. The oven is engineered to maintain a precise temperature, and every time you crack the door, a jet of hot air escapes and the temperature inside drops. For home cooks, this heat loss can slow down the browning and evenness of the cook, which is especially noticeable with poultry. The Stove Recipe Hub team emphasizes that controlled peeks are acceptable when you plan them carefully and stay mindful of the oven's recovery time. Expect a brief drop in heat every time you peek, followed by a several-minute recovery period as the appliance climbs back to temperature. The goal is to minimize disruption while still confirming that the chicken is progressing toward doneness. In practical terms, this means you should only peek at well-timed moments and use a thermometer rather than relying on color or texture alone. By thinking of peeks as strategic, you maintain consistent roasting conditions and predictable outcomes. Additionally, remember that food safety remains the top priority; do not postpone essential checks if you suspect undercooking.
The Physics of Heat Loss When You Peek
Opening the oven door interrupts the steady heat that cooks chicken evenly. The moment you open, hot air escapes and the interior temperature can drop several degrees. Even a small temperature dip can lengthen total cooking time by a few minutes, which matters when you’re aiming for safe, juicy poultry. Temperature recovery depends on your oven’s power, door seal, and the dish’s size. Heavier pans and bone-in pieces retain heat differently than boneless cuts, so two nearly identical roasts can behave a little differently. The Stove Recipe Hub Analysis highlights that the cumulative effect of multiple peeks accumulates over the entire bake, especially during the middle phase when the oven is most actively browning the skin. A practical takeaway is to minimize openings and rely on meat temperature readings for doneness whenever possible. If you must peek, do so quickly and plan around the oven’s recovery time to avoid overcooking the outer layers while the interior finishes.
When to Peek: Safe Moments During Chicken Baking
Knowing when to peek is as important as knowing how. For most whole chickens or bone-in cuts, plan to check only at key milestones rather than every 5 minutes. A common approach is to peek once about halfway through the bake to assess color and juices, then again 15–20 minutes before the expected finish to confirm doneness with a thermometer. If you’re roasting chicken parts, shorter cooking times require tighter scheduling. The goal is to catch progression (browning, juices clearing, and the internal temp rising) without repeatedly lowering heat. Using a timer helps you stick to a pre-planned schedule. Throughout, keep the oven door closed except for deliberated, brief openings. Remember: doneness is best determined by internal temperature, not visual cues alone, especially with poultry.
How to Peek Without Hurting Doneness
To peek without compromising doneness, use a two-pronged strategy: leverage the oven light and perform quick checks with an infrared or probe thermometer. A bright interior light makes it easier to monitor browning and visible juices without opening the door. If you need to check internal temperature, slide a probe thermometer into the thickest part of the meat before or while still in the oven, then read the display through the door if your model supports it. For traditional thermometers, open the door just long enough to insert or adjust the probe, then close promptly. Always keep a hand on the handle to prevent burns and maintain control of the pan. By combining visual cues with precise temperature data, you reduce the risk of undercooking or overcooking while still confirming progress.
Tools and Techniques for Keeping Juicy Chicken
A successful bake often hinges on proper equipment and technique. Use a roasting rack to elevate the chicken so heat circulates evenly and juices don’t pool beneath. An oven-safe, dial- or digital-thermometer with a long probe lets you watch internal temperature without heavy door-opening. A sturdy, heat-resistant glove protects your hand during quick re-entries. For bone-in pieces, position the thickest part of the meat toward the center of the oven to promote even browning. If you’re cooking multiple pieces, ensure they’re not crowded so hot air can circulate. A dry surface on the skin promotes crispness, so pat the chicken dry before seasoning. These steps support consistent results and juicy meat, even when you occasionally peek.
Common Mistakes and How to Avoid Them
Frequent peeks are the most common pitfall. Each door-open interrupts heat, lengthening total cooking time and increasing the chance of dry meat around the edges. Relying on color alone is another mistake; raw-looking skin can accompany undercooked interiors. Skipping preheating or using an oven with a poor seal also harms results. Finally, ignoring resting time reduces juiciness, so plan for a short rest before serving. By avoiding these missteps and following a thermometer-based approach, you’ll bake chicken that’s safe and consistently tasty.
Final Doneness, Safety, and Rest
Safety-first cooking means verifying the internal temperature reaches a safe level before serving. The standard guideline is 165°F (74°C) in the thickest part of the chicken. After removing from heat, let the meat rest for 5–10 minutes; this allows juices to redistribute and improves moistness. Resting also gives you a moment to re-check temperatures if you’re uncertain, especially with larger birds. Always use a clean knife and cutting board to avoid cross-contamination, and wash your hands after handling raw poultry. With careful peeks, precise temperature checks, and proper resting, you’ll achieve delicious, safe chicken with minimal guesswork. Stove Recipe Hub’s approach emphasizes practical steps and reliable outcomes for home cooks.
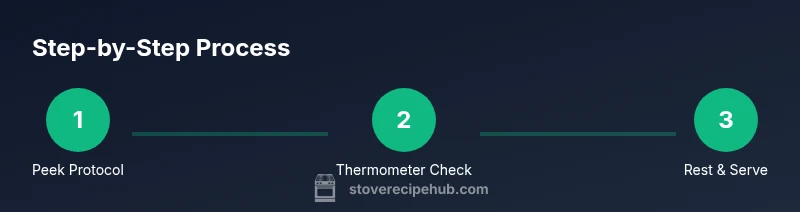
Quick Peek Protocols and Milestones
Create a simple peek protocol before you start: preheat, place chicken on a rack, insert thermometer, set a main timer for halfway, and schedule a final check within 15–20 minutes of finish. If the thermometer reads the safe range before you reach the final minute guidelines, you can remove the bird early and rest. If not, continue baking, then rest and re-check. The protocol reduces panic mid-bake and ensures you’re not relying on imperfect cues. By following the milestones, you’ll bake chicken that’s both safe and juicy.
Tools & Materials
- Oven-safe thermometer with probe(Insert into thickest part of the meat; ensure probe is heat-resistant and intact)
- Kitchen timer or smartphone timer(Set for key milestones (e.g., halfway, 15–20 minutes before end))
- Roasting rack and pan(Elevates chicken for even heat circulation and browning)
- Heat-resistant oven gloves(Protects hands during brief door openings)
- Paper towels or a clean cloth(Pat dry the chicken before seasoning to promote crisp skin)
- Meat thermometer or remote-read system(Optional for continuous monitoring without opening the door)
- Roasting rack or elevated sheet(Helps air circulate around the pieces and reduces soggy bottoms)
Steps
Estimated time: 45-60 minutes
- 1
Preheat and prepare
Preheat the oven to your target temperature and pat the chicken dry. Season evenly, and set up the rack and pan so the bird sits elevated. This step creates a crisp exterior and even heat circulation, which helps the internal temperature rise steadily. Place the thermometer probe in the thickest part if you plan to monitor continuously.
Tip: Dry skin browns better; don’t skip patting the surface dry. - 2
Insert thermometer and position
Place the chicken on the rack and insert the probe into the thickest part without touching bone. Position the pan so air can circulate around the meat. This gives an accurate reading and keeps you from over-relying on surface color.
Tip: Avoid bones; touching bone yields a falsely high reading. - 3
Plan your peeks and timers
Decide in advance when you’ll peek (e.g., halfway and 15–20 minutes before the end). Set a timer for each milestone. This minimizes unnecessary door openings while keeping you informed about progress.
Tip: Keep a written peek schedule to reduce guesswork. - 4
Peek briefly and close
When the timer goes off, open the door just long enough to confirm with the thermometer or visual cues, then close it immediately. Check readings via the thermometer if possible, and resume baking. Short openings preserve most of the oven’s heat.
Tip: Limit door-open time to 2–3 seconds if possible. - 5
Assess doneness and adjust
If the thermometer reads 165°F (74°C) in the thickest part, you’re done. If not, continue cooking with short checks every few minutes until you reach the target. Avoid rushing the finish, which can dry the outside before the inside is fully cooked.
Tip: Don’t rely on color alone; internal temp is the gold standard. - 6
Rest before serving
Transfer the chicken to a cutting board and let it rest 5–10 minutes. Resting redistributes juices and improves tenderness. If you suspect it’s still a touch undercooked, finish with a brief rest and recheck the temperature.
Tip: Cover loosely with foil to keep warm without steaming the skin.
Common Questions
Is it safe to open the oven while chicken is baking?
Yes, brief openings are generally safe if you act quickly and wear heat-safe gloves. Minimize heat loss by limiting door openings and relying on internal temperatures for doneness.
Yes, brief openings are fine as long as you move quickly and use an oven mitt. Check doneness with a thermometer rather than relying on color.
How often should I peek during baking?
Peek only at planned milestones, not every few minutes. This reduces heat loss and helps maintain even cooking.
Peek only at milestone times to avoid losing heat and uneven cooking.
What temperature should chicken reach?
The safe internal temperature for chicken is 165°F (74°C) in the thickest part.
Aim for 165 degrees Fahrenheit in the thickest part for safe, juicy chicken.
Can color indicate doneness?
Color is not a reliable indicator for doneness. Use a thermometer to confirm internal temperature.
Color isn’t reliable—check the temperature with a thermometer.
Should I rest the chicken after cooking?
Yes, rest for 5–10 minutes to reabsorb juices and improve tenderness.
Let the chicken rest 5–10 minutes before slicing.
How can I check doneness without opening the oven?
Use a thermometer with a remote read or a heat-safe probe to monitor without opening the door.
A remote thermometer lets you check without opening the oven.
Watch Video
Top Takeaways
- Peek strategically to minimize heat loss.
- Rely on thermometer readings for safe doneness.
- Rest the chicken to retain moisture.
- Plan milestone checks to avoid overcooking.