How Long to Cook Chicken on the Stove: Timelines and Tips
Learn stove-top chicken timelines for boneless, bone-in, and skin-on cuts. Get temps, resting times, and practical tips to ensure juicy, safe chicken every time with guidance from Stove Recipe Hub.

By the end of this guide, you’ll know exactly how long to stove-cook chicken for safe, juicy results across common cuts. The guidance covers boneless vs bone-in, skin-on vs skinless, pan-searing, simmering, and resting times, plus how to verify doneness with an instant-read thermometer. You’ll also learn how thickness and pan temperature affect timing.
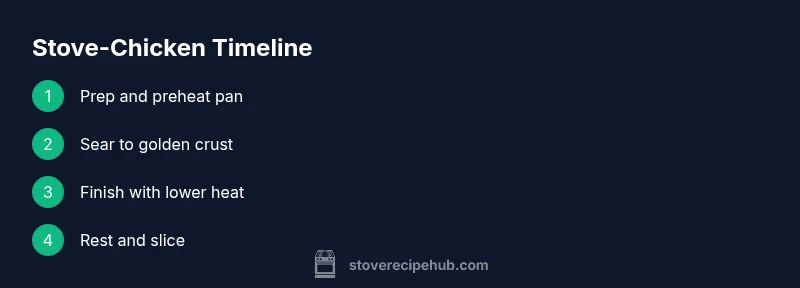
Understanding stove-top timing for chicken
Getting chicken right on the stove starts with recognizing that heat, pan type, and thickness drive every minute of cook time. According to Stove Recipe Hub, the most reliable way to estimate doneness is to focus on the thickest part of the meat and the heat scheme you choose—brown quickly at a high sizzle, then finish with gentler heat or a lid. In practice, you’re balancing two things: a good sear for flavor and a safe internal temperature for safety. You’ll often see two common paths: quick searing for a thin piece and longer simmering or covered cooking for larger or bone-in portions. Understanding these patterns helps you plan meals without sacrificing juiciness or safety. This section lays the groundwork for calculating times based on cut, thickness, and method.
Key factors that influence cook times
Several variables determine how long chicken will stay in the pan. First, thickness matters more than total weight; a 1-inch-thick breast will cook faster than a double-thick piece. Second, whether you use boneless or bone-in cuts changes the time; bone slows heat transfer slightly. Third, pan material and preheating temperature influence sear quality and time; cast iron maintains heat well, while lightweight stainless can heat unevenly. Fourth, whether you start with frozen meat dramatically increases time and risk of uneven cooking. Fifth, whether you keep the pan covered or uncovered shifts the balance between browning and moisture retention. Finally, resting time after cooking does not affect safety but improves juiciness. Mastery comes from recognizing that these factors combine to shape the final cooking window.
Time ranges by cut and method
Note that these times are approximate and assume a standard stove and pan size. They are intended as practical starting points, not rigid rules. For boneless, skinless chicken breast cooked on medium-high heat with a quick sear, plan about 6-8 minutes total, flipping once, then checking for a 165°F internal temperature. For bone-in thighs or drumsticks, expect about 12-18 minutes total, with an inch or more thickness potentially requiring a minute or two longer. Skin-on pieces often land in the 10-15 minute range, depending on thickness and whether you finish with a cover. Always confirm doneness with a thermometer at the thickest portion.
Practical techniques to maximize juiciness
Preheat your pan on medium-high for 2-3 minutes to ensure a proper sear. Use 1-2 tablespoons of a high-smoke-point oil to prevent sticking and maximize browning. Do not overcrowd the pan—room for air helps create a crisp exterior. Sear without moving the chicken for 2-4 minutes per side until a deep golden crust forms, then reduce heat to medium or lower and cook to completion. If you are finishing with a lid, monitor closely to avoid steaming the meat—lift the lid briefly to check color and temperature.
Resting, safety checks, and common mistakes
Resting for 3-5 minutes after removal from heat allows juices to redistribute, yielding juicier slices. Always verify the internal temperature at the thickest part; 165°F (74°C) is the safe target for most poultry. Common mistakes include browning for too long at too high heat, which can dry the exterior while the interior remains undercooked, and crowding the pan, which traps steam and prevents good browning. Keep a thermometer handy and practice with smaller pieces to calibrate your timing on your stove and pan.
Authority sources
- USDA: Safe Minimum Internal Temperature for poultry: https://www.fsis.usda.gov/food-safety/safe-food-handling-and-preparation/food-safety-basics
- CDC: Food safety information for consumers: https://www.cdc.gov/foodsafety/index.html
- FDA: Safe food handling and cooking practices: https://www.fda.gov/food/buy-store-serve-safe-food/safe-food-handling
Tools & Materials
- Cast-iron skillet (12-inch) or heavy stainless pan(Even heat distribution; helps browning)
- Oil with high smoke point (e.g., canola, grapeseed)(About 1–2 tablespoons)
- Instant-read thermometer(To verify 165°F internal temp)
- Tongs(For turning without piercing meat)
- Paper towels(Pat dry for better sear)
- Salt and pepper(Season generously but evenly)
- Lid (optional)(Aids finishing with gentle heat)
- Cutting board and knife(For trimming and portioning)
Steps
Estimated time: 25-40 minutes
- 1
Prepare and season
Pat chicken dry with paper towels, then season both sides with salt and pepper. If time permits, let seasoned pieces rest 10-15 minutes at room temperature to promote even cooking. This step helps the surface dry and improves browning.
Tip: Patting dry is crucial for a crisp exterior; moisture on the surface steams rather than sears. - 2
Preheat the pan and oil
Place the pan on medium-high heat and let it warm for 2-3 minutes until a drop of water sizzles. Add 1–2 tablespoons of oil and swirl to coat.
Tip: A hot pan creates a crust; if the oil starts to smoke excessively, reduce heat slightly. - 3
Sear the first side
Lay the chicken gently in the pan, skin-side down if using skin-on pieces. Do not move the pieces for 2-4 minutes, until a deep golden crust forms.
Tip: Use tongs to check color on the edges; a clear, browned crust indicates readiness to flip. - 4
Flip and finish with gentler heat
Flip and reduce heat to medium or medium-low. Cook until the internal temperature approaches 150–160°F, then switch to covered or lower heat to finish.
Tip: Cover briefly to trap heat if you’re finishing bone-in pieces; steam should finish cooking without over-drying. - 5
Check doneness and rest
Insert the thermometer into the thickest part; remove from heat at 165°F. Let rest 3–5 minutes before slicing to retain juices.
Tip: Resting is as important as the cook; it redistributes juices for juicier slices. - 6
Serve or store safely
Slice and serve immediately, or refrigerate leftovers within 2 hours. Reheat safely to 165°F if reclaiming from the fridge.
Tip: Store in shallow containers to cool quickly and safely.
Common Questions
What is the safe internal temperature for chicken?
The safe internal temperature for poultry is 165°F (74°C). Use an instant-read thermometer to verify the thickest part.
Chicken should reach 165 degrees Fahrenheit for safety; check the thickest part with a thermometer.
Can I cook frozen chicken on the stove?
Cooking frozen chicken on the stove is possible, but it will take longer and may cook unevenly. It’s best to thaw before pan-cooking for even results.
Yes, but it takes longer and can be uneven; thaw first for best results.
Should I cover the pan while cooking chicken on the stove?
Covering can help finish cooking bone-in or thick pieces, but it reduces browning. Use a lid for the final minutes if needed.
Cover near the end to finish cooking; uncover to regain browning.
Is it safe to taste-test chicken during cooking?
Tasting during cooking is not a reliable safety test. Always rely on a thermometer to confirm doneness.
Don’t rely on taste; check with a thermometer instead.
What pan is best for stove-top chicken?
A heavy pan like a cast-iron skillet or seasoned stainless steel provides even heat and good browning.
A heavy skillet is ideal for even cooking and a nice crust.
How long can cooked chicken be stored after cooking?
Cooked chicken can be stored safely in the refrigerator for 3-4 days or frozen for longer storage.
Keep it in the fridge up to 4 days, or freeze for longer storage.
Watch Video
Top Takeaways
- Cook time varies by cut and thickness
- 165°F is the safe internal temperature for poultry
- Sear first, then finish with lower heat or lid
- Rest for 3-5 minutes before slicing
- Use a thermometer for accuracy