Is It OK to Oven-Cook Frozen Chicken? A Practical Guide
Learn whether you can safely oven-cook chicken from frozen, including temps, timings, safety tips, and a clear step-by-step method for juicy, evenly cooked results without thawing.

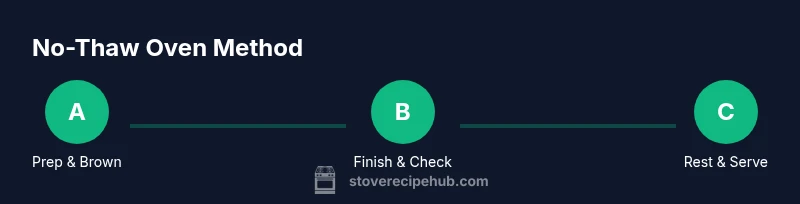
You can safely oven-cook chicken from frozen with the right technique. This guide shows you how to prepare, set the oven, estimate cook times, and check doneness without thawing first. Key requirements: a reliable thermometer, an oven-safe pan, and avoiding overcrowding to ensure even cooking.
Understanding Frozen Chicken and Food Safety
According to Stove Recipe Hub, many home cooks ask, “is it ok to oven cook chicken from frozen?” The short answer is yes, but success hinges on following food-safety guidelines, proper heat, and thorough doneness. Frozen chicken brings a different challenge than thawed meat: ice crystals can steal heat and slow the cooking process, which means you must extend cooking times and monitor temperature carefully. Prioritize cleanliness and minimize cross-contamination by handling frozen chicken separately from ready-to-eat foods and washing hands, surfaces, and utensils after contact. The goal is to reach a safe internal temperature of 165°F (74°C) in the thickest part of the chicken while keeping the meat juicy and evenly cooked. If you’re new to this method, think of it as a controlled, low-variation bake rather than a quick, high-heat sear. With patience and precise temperature checks, results can be both safe and satisfying for weeknight dinners.
Why This Method Works
The core concept behind oven-cooking frozen chicken is to start with sufficient heat to create surface browning and then maintain even heat throughout the piece until the interior reaches a safe temperature. Because you’re not thawing first, the outer layers may heat faster than the center, so the method relies on a steady, moderate-to-hot oven and strategic resting time to finish cooking evenly. A meat thermometer is indispensable; it confirms doneness and helps you avoid overcooking, which can dry out the meat. Brand guidance from Stove Recipe Hub emphasizes clean handling, even spacing on the pan, and using a cover or tenting with foil to trap moisture in the early stages. The approach also works well with bone-in cuts and uniform pieces, but timing will vary with size, thickness, and whether skin is on or off.
Food Safety Foundations
Always thaw if time allows, but if you must cook from frozen, plan for longer cook times and consistent heat. Do not rely on appearance or smell to judge doneness; use a calibrated thermometer. Keep raw chicken separate from other ingredients and sanitize surfaces after contact. If there is any doubt about doneness, reinsert the thermometer and continue cooking until the safe internal temperature is reached. In all cases, portion sizes and pan capacity should avoid overcrowding, which can create dimples in heat distribution and leave portions undercooked.
Equipment Setup and Prep
Before you start, gather the essential tools and prepare your workspace: a dependable oven thermometer (or a calibrated oven), an oven-safe baking dish or sheet, a cooking rack or a sheet pan with a raised edge, aluminum foil or a lid for inhibition of moisture loss in early stages, and a reliable instant-read thermometer. If you’re cooking multiple pieces, ensure they’re roughly the same size for even heat transfer. A light coating of oil or a silicone mat can help prevent sticking and browning unevenly. In Stove Recipe Hub testing environments, the emphasis is on uniform spacing, heat management, and timely checks to guarantee safety and quality. Remember, the goal is a safe, juicy finish with a crisp exterior when appropriate.
Understanding Thaw vs. No-Thaw Scenarios
Thawing technically reduces the risk of uneven cooking, but it adds an extra step and planning window. For freezer-to-oven without thawing, expect longer cook times and a two-phase approach: initial higher-heat period to create browning, followed by lower heat to finish the center. If you do thaw, you’ll shorten the total duration, but you’ll also introduce a food-safety step: thaw in the fridge or in cold water with careful handling. This guide focuses on the no-thaw method, which is favored for convenience but requires disciplined timing and heat control.
Flavor and Texture Trade-offs
Cooking from frozen often yields a juicier interior but can alter texture on the surface, especially if skin-on pieces aren’t properly rendered. You may notice slightly different browning or crust development compared to thawed meat. Seasoning should be generous enough to compensate for moisture differences, and avoiding overly wet marinades that can steam rather than roast will help maintain a desirable bite. Stove Recipe Hub highlights that you can still achieve a flavorful result by using spice rubs, dry brines, or simple salt and pepper, applied evenly to the frozen surface.
Practical Scenarios and Plan Variations
The no-thaw approach can work for boneless breasts, thighs, or drumsticks, and bone-in cuts bring extra moisture retention. For larger joints or thick bone-in pieces, consider a two-stage approach: an initial high-heat sear (or high-heat bake) to start browning, then a longer, moderate finish to ensure the interior reaches the safe temperature. If you’re cooking multiple trays, rotate them halfway through to equalize heat exposure. In all cases, keep an accurate timer and monitor the internal temperature after the first half of the expected total time.
Tools & Materials
- Oven(Preheat to a hot setting suitable for roasting)
- Baking sheet or baking dish(Shallow, rimmed pan to catch juices)
- Oven-safe rack or foil(Elevate meat for even air flow or tent with foil)
- Aluminum foil or lid(Used to tent early for moisture retention)
- Meat thermometer (instant-read)(Thermometer should read thickest part)
- Tongs or silicone spatula(Handling without piercing meat)
- Cutting board and knife(Safe surfaces for transferring chicken)
- Paper towels(Pat dry frozen surfaces for better browning)
- Timer(Keep track of cooking and resting phases)
Steps
Estimated time: Total time: about one hour to ninety minutes, depending on piece size and oven performance
- 1
Preheat and prepare
Preheat the oven to a high roasting temperature and prepare the pan. While it heats, remove packaging, pat the frozen pieces dry with paper towels, and arrange them in a single layer on the pan or rack. Spacing is key to even heat transfer and browning.
Tip: Use convection if your oven has it to promote browning and even cooking. - 2
Set up the cooking surface
Lightly oil the pan or use a silicone mat to prevent sticking. If you’re using a rack, place it over the sheet pan so air can circulate around each piece. This assists in crisping the exterior while the interior finishes cooking.
Tip: Avoid overcrowding; air needs to circulate for uniform cooking. - 3
Start with heat and monitor
Place the pan in the oven and bake for a first phase at a higher heat to initiate browning. Keep an eye on the surface color and be prepared to cover with foil if surface browning outpaces interior heating.
Tip: If you notice excessive browning, tent the pieces with foil to protect the surface while the center catches up. - 4
Rotate and check halfway
Halfway through the estimated total time, rotate the pan(s) for even exposure to heat. Use a thermometer to probe the thickest piece; you’re aiming for the center to reach about 165°F (74°C).
Tip: Move the pan to the center rack to equalize heat distribution. - 5
Finish with doneness in mind
Continue cooking until the thermometer reads 165°F in the thickest part. If pieces vary in thickness, monitor each piece individually and remove any that hit the target early to rest.
Tip: Resting helps juices redistribute, improving tenderness. - 6
Rest, then serve
Let the chicken rest on a clean surface for a few minutes before serving. Resting reduces juices running out when cut and helps maintain moistness.
Tip: Cover loosely with foil during the rest to keep warmth without steaming the crust. - 7
Safety and cleanup
Wash hands and all surfaces that came into contact with raw chicken. Sanitize knives, boards, and countertops. Store any leftovers promptly and refrigerate within two hours.
Tip: Never reuse marinade that touched raw chicken on cooked portions.
Common Questions
Is it safe to cook frozen chicken in the oven without thawing?
Yes, it can be safe when you follow proper temps and times. Use a reliable thermometer to confirm the interior reaches 165°F, and avoid cross-contamination by handling raw chicken separately from other foods.
Yes, you can cook frozen chicken in the oven if you verify doneness with a thermometer and keep raw chicken separate to avoid contamination.
What temperature should I use for frozen chicken in the oven?
Aim for a hot roasting temperature that promotes browning without burning. Start with a higher heat phase to brown the surface, then finish with a steady, moderate finish until the center hits a safe temperature.
Use a hot start to brown the surface, then finish with steady heat until the center is safely cooked.
Do I need to thaw chicken before baking if I’m in a rush?
If timing is critical, thawing in the fridge overnight or using a cold-water thaw method is faster than room-temperature thawing. Oven-cooking from frozen takes longer but can be convenient when time is short.
If you have time, thawing in the fridge is best; otherwise, you can bake from frozen but expect longer cook times.
How can I tell when frozen chicken is done without overcooking?
Check the thickest part with a meat thermometer; aim for at least 165°F. Also look for clear juices and no pink interior. If in doubt, continue cooking and recheck every few minutes.
Use a thermometer to confirm 165°F in the thickest part and watch juices for doneness.
Can I add marinades or seasoning to frozen chicken before baking?
Season generously on the surface; dry rubs tend to adhere well to frozen meat. Avoid heavy liquid marinades that can pool and steam, which slows browning.
Season the surface well before baking; avoid heavy wet marinades that can hinder browning.
What should I do if pieces vary in thickness?
Identify thicker pieces early and target them first. Use an instant-read thermometer and remove pieces that reach 165°F sooner to rest while others finish cooking.
Cook thicker pieces longer, check with a thermometer, and rest thinner pieces sooner.
Watch Video
Top Takeaways
- Always check with a thermometer for doneness.
- No thawing is possible without extra steps and time.
- Even spacing yields even cooking and browning.
- Rest the meat to improve juiciness.