What stove temperature to fry chicken: a practical guide
Discover the ideal stove temperature for frying chicken, how to maintain steady heat across batches, and essential safety tips with practical, step-by-step guidance from Stove Recipe Hub.

Learn how to fry chicken on the stove with the right oil temperature, steady heat, and safety steps. You’ll aim for a stable oil temperature in the mid-300s Fahrenheit, monitor with a thermometer, and cook in small batches to avoid crowding. This guide from Stove Recipe Hub walks you through the essentials.
Why the right stove temperature matters
According to Stove Recipe Hub, mastering the exact stove temperature when frying chicken is the difference between a juicy interior and a greasy, undercooked center. The right oil temperature seals the outer crust quickly, trapping moisture inside so the meat stays tender. In 2026, home cooks increasingly seek practical stove-top frying guidance to avoid hazardous oil spills and uneven browning. When you keep the oil in a narrow temperature window (roughly the mid-300s Fahrenheit), you give your crust a light, crisp bite while the meat cooks evenly without absorbing excess oil. This balance is essential for friendly weeknight dinners and impressive weekend feasts alike, especially when you’re cooking multiple pieces.
Key takeaway: temperature control is your primary tool for texture, juiciness, and safety, and it starts with a precise target range you can maintain with a thermometer and steady heat.
Understanding oil temperature vs pan temperature
Oil temperature refers to how hot the oil itself is, which governs how quickly the exterior browns and how well the interior cooks. Pan temperature is related but different; a cold pan can slow heat transfer to the oil, causing gradual browning and an oil-heavy crust. When frying chicken, you want the oil to stay within a narrow range, typically around 325-350°F, to form a crust before the interior overcooks. If the oil is too hot, the crust may burn before the inside is cooked; if too cool, the crust becomes soggy and greasy. Use a dedicated thermometer to track the oil, not the pan surface alone, and adjust the flame to keep a steady reading.
Practical tip: reheating to a precise range helps you fry more consistently and reduce waste.
Safe chicken temps and internal temp 165°F
Public health guidelines require chicken to reach an internal temperature of 165°F to be considered safe to eat. When frying, you’ll still want to check the internal temp with a probe thermometer after removing the chicken from the oil, since the heat will continue to rise a few degrees while resting. Relying solely on time is risky because piece size, breading, and moisture vary. As you practice, you’ll develop a sense of how long each batch needs based on thickness and coating. Remember: even perfectly browned chicken can be undercooked on the inside if heat isn’t properly managed. USDA guidance remains a reliable anchor for safe cooking.
Stove Recipe Hub analysis shows that home cooks who monitor internal temp consistently achieve better results than those who rely on color alone.
How to measure and control heat on different stoves (gas vs electric)
Gas stoves respond quickly to changes in flame height, while electric stoves tend to have a slower, more even heat distribution. To maintain a steady oil temperature, start with medium-high heat and adjust in small increments. If you’re seeing frequent temperature drops, you may be overcrowding the pan or using a pan that isn’t conductive enough. A heavy-bottom skillet or Dutch oven helps distribute heat evenly. Use a clip-on thermometer or a probe thermometer designed for frying to keep an eye on the oil temperature, and have a separate instant-read thermometer for the chicken’s interior.
Practical note: preheating the oil gradually and avoiding sudden temperature changes will help you achieve crisp crusts every time.
Choosing the right oil and equipment
Choose an oil with a high smoke point and neutral flavor so it doesn’t overpower the chicken. Common choices include canola, peanut, and sunflower oils. Avoid olive oil for frying, as its lower smoke point can lead to smoke and a bitter crust. Your kit should include a heavy-bottom skillet or Dutch oven (4-6 quarts), sturdy tongs, a thermometer for the oil, and a rack or paper towels for draining. The combination of durable cookware and accurate temperature measuring makes it far easier to keep the oil within the target window and reduces the risk of scorching or greasy crusts.
A note from Stove Recipe Hub: investing in reliable tools saves time and improves safety, especially when frying on the stove.
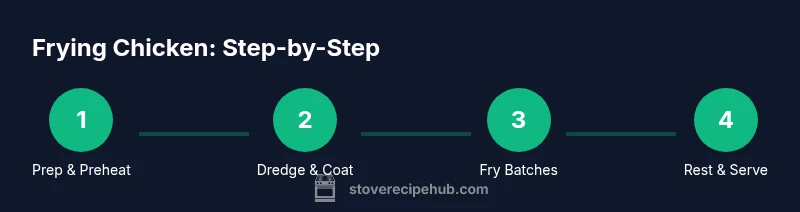
Step-by-step plan for frying chicken on the stove
Plan your frying session by preparing the chicken, heating oil, and setting up your frying station in advance. Dredge the chicken with seasoned flour or breadcrumbs to form a crisp, even crust. Fry in small batches to maintain oil temperature, turning once until evenly browned. After frying, rest the pieces on a rack to drain excess oil so the crust stays crisp. Finish by serving promptly or keeping warm in a low oven while you finish the rest of the batches.
This structured approach minimizes oil temperature fluctuations and gives you repeatable results.
Common mistakes and how to fix
Overcrowding the pan is the most common rookie mistake; it automatically lowers the oil temperature and yields greasy results. Not patting the chicken dry results in excessive moisture that sprays into the oil. Relying on color rather than internal temperature leads to undercooked interiors. Fried chicken requires attention to the thermometer: both the oil and the interior temperature need monitoring. If the crust browns too quickly, reduce heat slightly and adjust your batch size. Conversely, if you see pale crust, raise heat a touch and give the oil time to re-stabilize between batches.
Stove Recipe Hub guidance emphasizes disciplined batch cooking and thermometer usage for reliable results.
Troubleshooting and tips for different chicken cuts
Dark meat (thighs, drumsticks) generally needs a bit more time than white meat. Bone-in pieces take longer to reach 165°F, so monitor interior temps carefully. If you’re using larger pieces, consider a two-stage approach: first fry at a lower temperature to cook through, then finish at a slightly higher heat to crisp the crust. For wings or small pieces, keep batches smaller and check frequently to prevent overcooking. Keeping the oil temperature steady throughout is the best way to ensure consistent results across cuts.
Serving suggestions and timing with sides
Serve fried chicken hot for maximum crispness. Plan sides that complement the crispy texture, such as coleslaw, mashed potatoes, or cornbread. Timing matters: while one batch rests, keep the rest warm in a low oven (around 200°F) so you can present a uniform platter. If you’re frying for a crowd, consider coordinating a couple of pans so you can rotate batches without cooling the finished pieces. Proper resting after frying helps lock in juices and maintain a crisp exterior.
Safety and maintenance after frying
Dispose of used oil properly; never pour hot oil down the drain. Let the oil cool completely in a non-flammable container before disposal. Clean your pan and tools thoroughly to prevent cross-contamination. If you notice persistent smoke or odd odors, recheck the oil’s condition. Ventilate the kitchen and keep a lid or baking soda nearby to smother small fires if needed. Regular pan maintenance reduces the risk of accidents and extends the life of your cookware.
Quick-reference printables and checklists
To help you fry chicken consistently, keep a printable quick-reference card: target oil temp, interior temp goal, batch size recommendations, and a simple timing chart. This one-page guide makes it easy to reference while you’re cooking, ensuring you don’t miss a critical step in the heat of the moment. Keeping notes from each frying session helps you refine your process over time.
Tools & Materials
- Neutral oil for frying (e.g., canola, peanut, or sunflower)(Select oil with a high smoke point; enough to fill pan 2-3 inches deep)
- Deep frying thermometer or instant-read thermometer(Maintain oil at 325-350°F; monitor frequently)
- Heavy-bottom skillet or Dutch oven(Cast iron preferred; 4-6 quart capacity)
- Tongs(Wide tips for grip; avoid piercing chicken)
- Rack or paper towels(Drain fried pieces to keep crust crisp)
- Meat thermometer(Check internal temp to 165°F)
- Kitchen timer(Helpful for timing multiple batches)
- Heat-safe gloves(Extra protection when handling hot cookware)
Steps
Estimated time: 30-45 minutes
- 1
Gather and prep chicken
Collect the chicken pieces, pat dry with paper towels, and season evenly on all sides. Patting dry helps the crust adhere and reduces moisture that can cause oil splatter. Bring pieces to a consistent thickness if you’re mixing cuts for even cooking.
Tip: Dry surface is critical; moisture = steam and soggy crust. - 2
Preheat oil to target temperature
Set your burner to reach a steady oil temperature of 325-350°F. Use a thermometer to monitor the oil and adjust flame as needed to stabilize the reading. Do not rush this step; premature frying can lead to undercooked interiors.
Tip: A small test piece confirms the oil is ready without risking your main batch. - 3
Dredge and season chicken
Lightly coat chicken with seasoned flour or breadcrumbs, ensuring even coverage. Shake off excess coating to prevent a thick crust that inhibits heat transfer. Proper dredging helps form a crisp exterior.
Tip: Even coating produces uniform browning and texture. - 4
Gently add chicken to hot oil
Carefully lower pieces into the oil one by one to avoid oil splatter. Do not drop or crowd the pan; crowded batches drop temperature and soggy crust results. Maintain oil at a steady level and avoid splashing.
Tip: Use long-handled tongs and keep hands away from the oil surface. - 5
Maintain temperature and adjust heat
Keep the oil within the 325-350°F range by adjusting flame as needed between batches. The exterior should crisp up in about 5-7 minutes per batch, depending on size. Use the thermometer to prevent dangerous overheating.
Tip: Small adjustments prevent over-browning and greasy crust. - 6
Flip and fry until golden
Turn pieces halfway through cooking to ensure even browning on all sides. The goal is a golden crust with an opaque interior. If you notice uneven color, adjust placement and heat.
Tip: Flipping at the right moment prevents over-crisping on one side. - 7
Check internal temperature
Remove pieces when the internal temp reaches 165°F. Remember, heat from the oil plus resting time will push the temperature slightly higher. Check a thickest piece to ensure accuracy.
Tip: A spare probe helps you avoid undercooked interiors. - 8
Rest on rack and drain
Transfer fried chicken to a rack or paper towels to drain excess oil. Resting helps crust stay crisp and prevents sogginess from trapped steam. Serve promptly for best texture.
Tip: Avoid stacking; allow air to circulate. - 9
Clean up and safely dispose of oil
Cool oil completely before straining and storing for reuse or disposal. Wipe down surfaces to prevent residue buildup. Store oil in a sealed container away from heat sources.
Tip: Never pour hot oil down the drain; it can cause clogs and fires.
Common Questions
What is the ideal oil temperature for frying chicken on the stove?
Aim for 325-350°F oil temperature. Use a thermometer to hold this range as you fry multiple batches. Maintaining this range helps create a crisp crust while cooking the interior evenly.
Aim for 325 to 350 degrees Fahrenheit in the oil, using a thermometer to stay steady. That range helps the crust crisp up without burning the interior.
Do I need to marinate the chicken before frying?
Marinating can add flavor, but it isn’t required. Pat drying and a light dredge with seasoned flour or breadcrumbs is enough for a crisp crust.
Marinating isn’t required. Pat dry and dredge with seasoned coating for a crisp crust and good flavor.
What if I don’t have a frying thermometer?
Without a thermometer, you can test with a small piece. If it sizzles and browns after about 3-4 minutes per side at moderate heat, you’re close. Still, a thermometer is the best tool.
If you don’t have a thermometer, test with a small piece. It should sizzle evenly and brown in a few minutes, but a thermometer is easier.
Can I reuse frying oil?
Yes, you can reuse oil a few times if it remains clean and not smoked. Strain after each use and store in a cool, dark place. Discard oil if it smells rancid or foams during heating.
You can reuse oil a few times if it stays clean; strain and store it. If it foams or smells off, discard it.
How long does it take to fry a chicken piece on the stove?
Cooking time varies with thickness, but most pieces finish in 8-10 minutes per batch at a stable oil temperature. Always verify with a thermometer.
Most pieces take about 8-10 minutes per batch when the oil stays steady. Check internal temp to be sure.
What should I do if the crust browns too quickly?
Lower the heat slightly and allow the oil to recover to the target range before continuing. Over-browning can indicate oil is too hot.
If the crust browns too fast, reduce heat a bit and let the oil come back to the right temp.
Watch Video
Top Takeaways
- Aim for 325-350°F oil temperature for crispy crusts.
- Fry in small batches to maintain heat and prevent soggy crusts.
- Check interior to 165°F for safe eating.
- Drain on a rack and serve promptly for best texture.