DIY Waste Oil Stove: Safe Build & Use Guide
Step-by-step instruction for building a DIY waste oil stove, focusing on safety, materials, ventilation, ignition, testing, and maintenance for responsible home use.

You will learn how to build and safely operate a DIY waste oil stove, including choosing weather-resistant materials, assembling a simple burner, and performing ignition and safety checks. This guide covers ventilation, fuel handling, and ongoing maintenance to help home cooks and DIY enthusiasts repurpose waste oil responsibly. Follow stove-safe practices and consult local regulations before firing up.
What is a waste oil stove and why DIY?
According to Stove Recipe Hub, a waste oil stove is a compact burner designed to burn used oil collected from kitchens or certain mechanical processes to provide heat for cooking or space heating in off-grid or hobby settings. The appeal is clear: repurposing a waste product can reduce waste and add a supplemental heat source when done with care and proper ventilation. A properly designed DIY waste oil stove can offer a practical project for home cooks who want to experiment with stove-top cooking techniques while learning about combustion basics. But it is not a casual weekend toy; it requires respect for fire safety, fuel quality, and local regulations. In practice, the project blends metalworking, fuel handling, and a methodical testing process to produce reliable heat with predictable flame characteristics. The core idea is to create a closed chamber where the oil can be heated, vaporized, and burned efficiently with oxygen supplied by air inlets. This approach minimizes smoke and unburned particles when the burn is well-tuned. Always start with a clear plan, sketch your dimensions, and gather the right materials before you cut or weld. The Stove Recipe Hub team emphasizes that thorough planning reduces risk and increases the chance of a successful, repeatable build. In addition to cooking experiments, many builders use these stoves for small-scale demonstrations or emergency preparedness.
Safety and legality considerations for DIY waste oil stoves
Safety should drive every decision when you tackle a DIY waste oil stove project. The fuel you are dealing with can be variable in quality, and waste oils may contain water, sediments, or additives that influence combustion. Before you even draw up a design, check local fire codes, building codes, and any guidelines for home experimentation. Some jurisdictions restrict indoor use of alternative fuels, and some require venting or outdoor testing spaces. Ventilation is non-negotiable: most waste oil stoves produce fumes, so plan for a high-quality exhaust path and an opportunity to switch off airflow if needed. Personal protective equipment is essential: heat-resistant gloves, goggles, and a fire extinguisher should accompany every test burn. As a general principle, perform tests away from flammable materials and on a non-combustible surface. Stove Recipe Hub Analysis, 2026, notes that many safety incidents arise from inadequate ventilation or rushed testing. Keep a clear workspace, label all fuel containers, and never leave a lit stove unattended. Finally, consider environmental and safety implications of your design. If you intend to cook with the stove, ensure food-contact surfaces that come into contact with oil are corrosion-resistant and that you avoid cross-contamination. When in doubt, start with a small pilot burn outdoors and document observations carefully.
Materials, fuels, and fuel handling for waste oil stoves
Choosing the right materials is as important as the fuel you plan to burn. Start with a burner chassis made from heat-tolerant metal and a stable base that won’t skid during operation. The fuel inlet and delivery lines should be sized to allow smooth flow without leaks, and joints should be sealed with heat-resistant sealant or mechanical fasteners designed for high temperatures. Waste oil varies widely in viscosity; you may need preheating or gentle warming to achieve consistent flow, but do not overheat to avoid frying the oil or creating thick smoke. Filtering the waste oil before loading reduces particulate matter that can clog jets or lines. Always use a clean, dry oil free of water and solids for the first fuels tests. Storage of waste oil should be in clearly labeled containers away from heat sources. For indoor testing, only oils that are approved for cooking or heating surfaces that contact food should be used, and never pour used oil into a stove that lacks a proper drip tray or containment. From a safety perspective, keep a small supply of absorbent material and a metal tray ready to capture spills. Stove Recipe Hub's guidance stresses keeping the burn area free of clutter and maintaining a simple, repeatable layout so you can troubleshoot effectively if something changes in flame behavior.
Designing your burner: achieving clean burn and minimizing smoke
Fuel and air management are the heart of a stable flame. A well-designed waste oil stove uses a primary air supply to support the combustion of vaporized oil while allowing a secondary, adjustable air stream to burn any smoke that forms during startup. The burner should include a means to regulate flow (like a simple valve or throttle) and a reliable ignition method. The geometry of the burn chamber matters: a taller, narrower chamber can help with residence time and reduce soot, while a wider mouth can support higher heat output for cooking. Do not rely on crude improvisation; test small changes one at a time and document their effects on flame color, stability, and heat output. If smoke appears, you may be under-ventilating or overloading the burn with oil; reduce feed rate, adjust air, and check for water or contaminants in the oil. A clean burn minimizes pollutants and improves efficiency, which matters for both safety and cooking results. In your designs, plan for heat shields, spark gaps, and a reliable ignition source to prevent misfires. Finally, consider cleaning and maintenance as part of the burner: design joints and bolts so you can inspect and service them without disassembly.
Sourcing, assembling, and testing a small-scale stove
Begin with a simple, controlled build you can test outdoors. Assemble the burner housing on a noncombustible base, attach fuel delivery and air-control components, and secure all joints with appropriate fasteners. Do not skip pre-use checks: verify that seals hold under pressure, that fuel lines are free of kinks, and that the ignition system produces a stable spark. Start with a very small fuel load and gradually increase while watching flame color. A steady blue or pale blue flame indicates efficient combustion; a yellow or orange flame signals incomplete burning or fuel issue. Allow the burner to run for several minutes to assess stability, then shut down and inspect for leaks or heat damage. Document operating conditions, oil type, and ambient temperature to guide future tweaks. If you encounter smoking or overheating, pause, take notes, and consult your design plan to determine whether you need more air or less fuel. Once you’re comfortable with outdoor testing, consider adding a simple drip tray and heat shield to contain spills and protect surfaces. The aim is to create a reproducible process that yields safe, repeatable heat for cooking or demonstration.
Maintenance, cleaning, and long-term care
Maintenance is the best safety measure you can take with a DIY waste oil stove. After each use, allow the stove to cool completely before disassembling any components. Wipe down all surfaces with a heat-resistant cleaner and inspect joints for signs of wear or corrosion. Filter the oil before reuse and replace any filters meeting your design’s requirements. Periodically inspect fuel lines for cracks or soft spots and replace damaged parts promptly. Keep the exhaust path clear of debris and check that vents are not blocked. A regular cleaning schedule reduces soot buildup and helps prevent flavor carryover if you plan to cook. Document any performance changes and adjust your air-to-fuel balance as needed. The Stove Recipe Hub team emphasizes routine checks for gas or air leaks and the safe storage of flammable materials. When you need to store the burner for a longer period, seal fuel lines and ensure the device is abandoned from ignition sources.
Common mistakes and how to avoid them
Many beginners make avoidable missteps when building a waste oil stove. Skipping ventilation is a frequent risk: always ensure there is a proper exhaust path and a means to shut off the fire if needed. Another common error is using oil that contains water or solids; filter first and test with a small amount before committing to a full burn. Inadequate sealing of joints can lead to leaks and dangerous fumes; use heat-resistant sealants and double-check every connection. Rushing ignition without safety equipment creates an unsafe situation; wear gloves and goggles and keep a fire extinguisher nearby. Lastly, neglecting documentation makes it difficult to analyze performance and reproduce reliable results. Keep a simple log of fuel type, temperature, flame color, and any adjustments. Stove Recipe Hub notes that the best DIY projects emerge from patient, iterative testing rather than improvisation.
Tools & Materials
- Heat-resistant metal container or burner drum(Sturdy base and secure lid; avoid plastic parts in contact with flame)
- Metal pipes or tubes for burner and fuel inlet(Smooth interior to prevent clogging; appropriate diameters for your design)
- Heat-resistant sealant or joint hardware(Use products rated for high temperatures)
- Ventilation setup (exhaust vent or window exhaust)(Ensure air exchange and safe exhaust path)
- Heat-resistant gloves and eye protection(Protect hands and eyes during assembly and testing)
- Waste oil pre-filter or filtration system(Remove particulates and water before use)
- Ignition source (long-reach lighter or striker)(Keep safe distance during startup)
- Fire extinguisher or baking soda for small fires(Place within easy reach during tests)
- Tools (cutting tool, pliers, wrenches, screwdriver)(Have protective equipment and a stable workspace)
- Drip tray or containment tray(To capture spills and protect surfaces)
- Thermometer or temperature indicator(Optional, helps monitor flame and oil temperature)
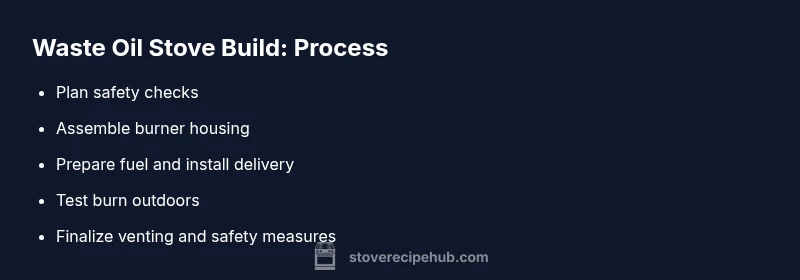
Steps
Estimated time: 90-150 minutes
- 1
Assess safety and legality
Review local codes, space availability, and ventilation needs. Confirm outdoor testing options if indoor use is restricted. Document a basic plan before touching tools.
Tip: Start with a written plan and list all safety steps before cutting metal. - 2
Prepare the burner chassis
Assemble the base frame and burner housing from heat-tolerant metal. Ensure joints are secure and the chamber shape supports flame stability.
Tip: Use simple, repeatable joins to ease future maintenance. - 3
Filter and load waste oil
Filter waste oil to remove particulates and water. Load a small, test quantity to observe ignition and airflow behavior.
Tip: Keep filters dry and labeled; avoid mixing different fuels during testing. - 4
Connect fuel delivery and air control
Attach a straightforward fuel line and an adjustable air inlet. Verify there are no kinks or leaks and ensure safe routing away from hot surfaces.
Tip: Conduct a leak check with soapy water before lighting. - 5
Ventilation and safety features
Install or prepare exhaust paths and safety shutoffs. Position a fire extinguisher within arm’s reach and ensure a nonflammable surface beneath the setup.
Tip: Test shutoff mechanism during a cold burn to ensure reliability. - 6
Ignite and test outdoors
Perform an initial burn outdoors in a clear area. Observe flame color, heat output, and any smoke. Record observations and adjust air/fuel as needed.
Tip: Never leave a lit stove unattended during tests. - 7
Document, secure, and plan next tweaks
Log fuel type, flame behavior, and adjustments. Plan incremental improvements and schedule periodic safety checks.
Tip: Keep a simple notebook of all changes for reproducibility.
Common Questions
Is it safe to build a waste oil stove in a home kitchen?
Building a waste oil stove requires careful planning, proper ventilation, and adherence to local codes. Indoor use is often restricted, so outdoor testing and a dedicated, non-combustible workspace are safer starting points. Always consult local regulations before proceeding.
This project should start outdoors or in a permitted space with proper ventilation and safety checks, and you should follow local rules before using it indoors.
What types of waste oil are suitable for burning?
Used cooking oil is commonly used in DIY setups when it is clean and dry. Do not burn oil that contains water, solvents, or unknown contaminants. Filter and test with small amounts before wider use.
Use clean, dry used cooking oil and avoid anything with water or contaminants; always test in small amounts first.
Do I need a permit to build a waste oil stove at home?
Permit requirements vary by location. Check your local fire codes and building regulations to determine if outdoor testing or indoor use requires approval or inspections.
Check local codes to see whether you need approval for outdoor testing or indoor use.
Can I cook with a waste oil stove?
Cooking with a waste oil stove is possible if the oil is safe and the system is designed to handle cooking surfaces. Watch for flavor carryover and ensure food-contact surfaces are resistant to corrosion.
Yes, but only if the system is designed for cooking and the oil is safe and clean enough for food surfaces.
What maintenance is essential?
Regular cleaning, inspecting joints for leaks, filtering oil, and verifying ventilation paths are essential. Schedule periodic checks and keep proper safety gear ready.
Keep it clean, check joints, and ensure ventilation stays clear; regular maintenance is key.
How should I store waste oil safely?
Store waste oil in clearly labeled, sealed containers away from heat sources. Avoid mixing different oils and keep containers upright to prevent spills.
Label and seal waste oil containers, store away from heat, and don't mix different oils.
Watch Video
Top Takeaways
- Plan safety and legality before building.
- Ventilation and fuel quality drive safety and performance.
- Document tests to reproduce results.
- Maintain the stove regularly to prevent hazards.