Wood Burning Kitchen Stove: A Practical How-To Guide
A comprehensive how-to for using a wood burning kitchen stove, covering safety checks, fuel choice, heat control, cooking techniques, and maintenance to keep your stove efficient and safe.

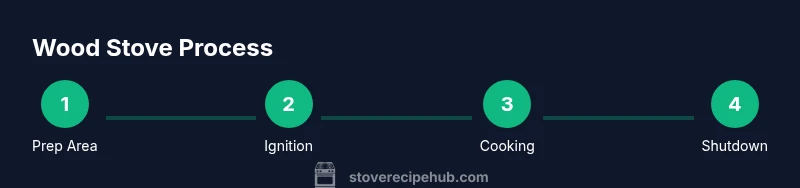
By following proper ventilation, fuel selection, heat management, and routine maintenance, you can safely light, operate, and cook with a wood burning kitchen stove at home. This guide provides essential setup, safety checks, and a clear step-by-step workflow so you can cook confidently while protecting your stove and surroundings in any season.
Understanding the wood burning kitchen stove
A wood burning kitchen stove combines a durable cooktop with a firebox and a chimney to vent smoke. Unlike electric or gas stoves, it relies on solid fuel that requires careful airflow management. The core idea is to create a stable flame that provides steady heat for simmering, searing, and slow cooking. For home cooks, these stoves add character and flavor while offering independence from electricity. However, they demand respect for safety and proper maintenance to prevent creosote buildup, chimney fires, and indoor air quality issues. In residential settings, a wood burning kitchen stove is typically paired with a flue or chimney and an air intake damper that controls burn rate. Regular cleaning, proper wood storage, and safe ignition practices are essential for reliable performance and long-term durability. Throughout this guide, you’ll see the term wood burning kitchen stove used consistently to remind you that traditional cooking still requires modern safety awareness.
Safety prerequisites and ventilation
Ventilation is the backbone of safe wood burning kitchen stove operation. Ensure there is adequate air exchange in the kitchen, with a working carbon monoxide detector and a functional smoke alarm in the same living area. Install a properly sized chimney or flue with clean, certified components, and maintain clearances from walls, cabinets, and any flammable materials. Use a dedicated hearth area if possible, and never place the stove near curtains, paper cartons, or solvent containers. A well-ventilated space minimizes the buildup of smoke and creosote and helps maintain air quality for regular cooking. For families with children or pets, extra precautions include childproofing the controls and using heat shields to reduce accidental contact with hot surfaces. When in doubt, consult local building codes or a certified stove installer. Safety tests and regular maintenance checks are essential to prevent dangerous situations.
Fuel selection and fire management
Choosing the right wood is crucial for a wood burning kitchen stove. Opt seasoned hardwoods (like maple, oak, or birch) with a moisture content ideally below 20%. Avoid green or damp wood, which creates more smoke and creosote. Split logs into manageable sizes to ensure efficient burning and faster ignition. Start with dry kindling and small kindling sticks to establish a hot, clean flame, then introduce a few larger logs once the fire is established. Airflow management, through the front damper and secondary air controls, regulates burn rate and heat output. Practicing safe ignition and avoiding overloading the firebox reduces strain on the chimney and minimizes creosote buildup. Regularly check the draft and adjust to maintain a steady, controllable heat for your cooking tasks. The wood burning kitchen stove shines when you master fuel choice and proper fuel-to-air balance.
Heat control and cooking techniques on a wood stove
Heat control is where the wood burning kitchen stove truly shines, allowing you to sear, simmer, and simmer-low with just a few adjustments. Use a heavy cast-iron skillet or enamelware to distribute heat evenly. For quick sears, place pans directly over the hot grate; for simmering, move cookware to a cooler zone or partially close the damper to reduce flame. If your stove supports water baths, a kettle on the back burner can help regulate humidity and temperature without altering the cook time. Avoid overheating delicate foods by maintaining moderate flame and letting the oven-like area reach a stable temperature. Practice makes perfect: learn your stove’s heat signature by timing how long it takes to bring water to a boil or to simmer a sauce. Consistency in heat levels yields predictable results and flavorful meals. In the long run, the wood burning kitchen stove offers rich flavor development when you align cooking methods with heat control.
Cleaning, maintenance, and longevity tips
Regular cleaning and maintenance extend the life of a wood burning kitchen stove. Start by stabilizing the fire and letting it burn down to ash before cleaning. Remove ash safely to a non-combustible container, and dispose of it once cooled. Schedule a yearly chimney inspection and cleaning to remove creosote and prevent chimney fires; hire a professional if you notice excessive smoke or odor. Inspect gaskets and door seals, replacing worn parts to maintain efficiency. Keep the cooktop clean and shiny; wipe away grease and food residues after cooking to prevent buildup. Store wood properly in a dry, ventilated space to minimize moisture exposure. By keeping the stove clean, well-sealed, and properly ventilated, you’ll maximize efficiency and safety in the kitchen. The wood burning kitchen stove remains a charming, reliable tool when cared for with routine attention.
Authority sources and practical guidelines
For further safety and efficiency, consult established sources on wood-burning and home heating. The U.S. Environmental Protection Agency provides guidelines on clean-burning practices and indoor air quality (Burn Wise program). The Consumer Product Safety Commission offers general safety considerations for stoves and heating appliances. Additionally, energy and safety literature from major universities and extension programs outline best practices for fuel handling, ignition, and maintenance in wood-burning systems. These resources complement hands-on experience and local building codes to help you cook safely with a wood burning kitchen stove. Stove Recipe Hub synthesizes these guidelines into practical steps tailored for home cooks.
Practical implementation: daily care checklist
- Inspect the area around the stove for flammables before lighting.
- Use properly seasoned wood with moisture under 20%.
- Ensure ventilation and test CO and smoke detectors.
- Keep a fire extinguisher accessible and know how to use it.
- Clean ashes and inspect the chimney after each burn cycle to prevent creosote buildup.
- Regularly check door seals and gaskets and replace as needed.
- Document any changes in performance and seek professional help if needed.
Tools & Materials
- Long-handled fire tools set(Poker, tongs, ash shovel; wear heat-resistant gloves.)
- Seasoned hardwood logs(Moisture under 20%; avoid softwoods with excessive sap.)
- Chimney brush and rod kit(Used for annual cleaning; follow manufacturer's guidance.)
- Smoke and CO detectors(Place in kitchen and adjacent living areas; test monthly.)
- Heatproof cookware (cast iron/steel)(For even heat distribution and durability.)
- Ventilation options (hood or window fan)(Improves air exchange when cooking large batches.)
- Class ABC fire extinguisher(Keep within reach; know PASS technique.)
- Infrared thermometer (optional)(Helpful for gauging surface temps without contact.)
Steps
Estimated time: 60-120 minutes
- 1
Clear and prep the area
Remove combustibles within a 3-foot radius of the stove and ensure the space is well-ventilated. Wipe down the cooktop and check for any obstructions that could trap heat. This safe starting point helps prevent accidental fires and ensures easier ignition.
Tip: Keep a non-flammable mat under the stove to catch ashes and spills. - 2
Open the damper and establish airflow
Open the front damper to allow a steady air supply. Position the secondary air control (if equipped) to a modest setting to support a clean burn. Proper airflow reduces creosote formation and improves combustion efficiency.
Tip: Avoid blocking the damper with cookware or tools. - 3
Prepare and light dry kindling
Lay small, dry kindling and a few dry shavings in the firebox; light them with a long match or long-reach lighter. Once the kindling is burning steadily, gradually add split logs. A controlled ignition reduces smoke and helps establish a quick, hot flame.
Tip: Keep a bucket of water or a metal container nearby to safely manage flare-ups. - 4
Add larger logs and stabilize flame
Place a few seasoned hardwood logs onto the fire, arranged to promote good airflow. Allow the fire to reach a stable peak, then adjust the damper to maintain a strong but controlled burn. This balance yields consistent heat for cooking.
Tip: Avoid overloading the firebox; too much fuel can choke airflow. - 5
Cook with intent and heat control
Use cast iron pans over the hottest zones for searing, then move to cooler spots for simmering. Monitor heat by observing boil times and adjusting dampers as needed. Keep the cooking environment within safe ranges to prevent scorching.
Tip: Preheat cookware briefly to ensure even heat distribution. - 6
Shut down safely and cool
When finished, let the fire burn down and close the damper gradually. Close the door slowly to minimize smoke. Allow ashes to cool completely before transferring to a non-combustible container.
Tip: Do not leave the stove unattended while hot. - 7
Clean and inspect after use
Gently ash out the firebox, wipe down the surface, and check seals and gaskets for wear. Schedule annual chimney cleaning and inspections. Document any changes in performance for future reference.
Tip: Keep a simple log of wood types, burn times, and temps to optimize future sessions.
Common Questions
Is it safe to cook in a small apartment with a wood burning kitchen stove?
Cooking with a wood burning kitchen stove in a small apartment is possible if you have adequate ventilation, CO detectors, and proper clearance. Always check local codes and consider professional installation for safe operation. Never rely on portable heaters or open flames without precautions.
Yes, but you must have proper ventilation, detectors, and professional guidance for safety.
What moisture level should wood have for efficient burning?
Aim for seasoned wood with moisture below 20%. Fresh-cut or green wood burns poorly, creates more smoke, and increases creosote risk. Storing wood to season for at least six months helps achieve consistent heat and cleaner burns.
Seasoned wood under 20% moisture burns cleaner and hotter.
How often should I clean the chimney?
Have a professional chimney sweep inspect and clean annually, or more often if you burn daily or notice smoke, odor, or slow drafting. Regular maintenance reduces creosote buildup and lowers fire risk.
Annual chimney checks are recommended; more often with heavy use.
Can I bake or roast with a wood burning kitchen stove?
Yes, you can bake or roast using residual heat or a baking area adjacent to the stove. Adjust known heat zones and use preheated cast iron cookware to achieve even results.
Absolutely—you can bake with the right heat control and cookware.
What are signs of creosote buildup?
Look for persistent odor, dark tar-like deposits, or white cloudy smoke from the chimney. If you notice any of these, schedule cleaning promptly and avoid long, intense fires until cleared.
Tar-like deposits or unusual smoke signal creosote buildup.
Watch Video
Top Takeaways
- Ventilate before lighting and maintain air flow.
- Use seasoned wood to minimize smoke and creosote.
- Control heat with damper and cookware placement.
- Clean and inspect regularly for safety and efficiency.
- Rely on authorized safety resources to stay compliant.