Earth Stove: Practical Guide for Stove-Top Cooking
Explore how to safely use, maintain, and cook with an earth stove. This guide by Stove Recipe Hub covers safety, fuel options, and step-by-step tips for home cooks who want a traditional clay stove experience.

Earth stove cooking can be safe and efficient when you follow proper setup, fuel choices, and ventilation. This concise guide points you to a complete process with step-by-step instructions, safety tips, and maintenance ideas to help you get started. Read on for the full approach and practical tips.
What is an earth stove?
An earth stove is a clay- or mud-walled cooking appliance that absorbs and radiates heat from burning wood or biomass. Traditional versions rely on locally sourced soil, sand, and organic fibers, forming a compact chamber that concentrates heat for pots placed on a simple grate or support. Unlike metal stoves, earth stoves are affordable to build in areas with limited access to manufactured hardware and fuel. They excel at slow, steady simmering and impart a distinctive, earthy flavor to foods when used correctly. In many cultures, these stoves sit at the heart of the kitchen or outdoor cooking area, serving as a reliable, low-tech workhorse that can be repaired with basic materials. For home cooks aiming to reconnect with traditional techniques, an earth stove offers a tactile, hands-on experience that aligns with sustainable cooking practices. This guide will help you understand how to evaluate, assemble, and safely operate an earth stove in modern home settings.
A note on terminology: “earth stove” is a broad term that covers a family of clay-based cookers, not one fixed design. The exact shape or thickness of walls varies by region and skill level, but the core principle remains the same—use earthen materials to create a heat-retaining chamber for cooking.
Why home cooks choose earth stoves
There are compelling reasons to consider an earth stove for stove-top cooking. The materials are often inexpensive or locally sourced, reducing upfront costs and dependence on electricity or gas. The thermal mass of clay walls can absorb heat and release it slowly, enabling even simmering and long-braised dishes without constant fire tending. Cooking with an earth stove also supports a hands-on approach that many home cooks find rewarding, especially when you enjoy traditional techniques and flavors. According to Stove Recipe Hub, home cooks who experiment with earthen stoves frequently report reduced fuel use when the stove is properly insulated and operated at moderate flame. However, users must accept trade-offs: smoke management, longer preheating times, and periodic maintenance. Understanding these realities will help you decide if an earth stove fits your kitchen and lifestyle. This is especially true for those seeking sustainable, off-grid cooking options.
Historical context and cultural variations
Earth-based cookers have appeared in many cultures, evolving to suit local climates and materials. In some regions, traditional mud stoves (often called chulhas or clay stoves) have shaped daily cooking routines for generations. In other areas, clay ovens like tandoors emphasize radiant heat for breads and dishes that benefit from a high-temperature crackle. The design philosophy is simple: maximize heat retention, minimize fuel waste, and keep construction accessible with readily available materials. While modern kitchens rely on gas or electric heat, many home cooks today explore earth stoves to reconnect with culinary roots, experiment with smoky flavors, and learn foundational fire-management skills. As you explore variations, you’ll notice how wall thickness, venting, and fuel types alter performance in subtle but meaningful ways.
Materials and design variations
A well-built earth stove uses a mix of earthen components and a durable cooking surface. Common materials include clay soil, sand, straw fibers for reinforcement, and water to bind the mixture. Some designs incorporate a stone or brick base for stability, with an inner chamber lined to resist cracking. Air intake is often controlled by a simple sleeve or vent, which helps regulate flame size and heat output. Cooking surfaces may use a metal grate, a flat stone, or a low-profile metal plate that can withstand repeated heating. Insulation is typically achieved with thicker walls or a surrounding layer of packed earth. Each variation trades off ease of construction against heat retention and durability, so choose a design that matches your skill, climate, and the kinds of dishes you plan to prepare.
Safety considerations and ventilation
Safety comes first with any stove, and an earth stove is no exception. Proper ventilation is essential to avoid smoke buildup and carbon monoxide in enclosed spaces. Always cook in a well-ventilated area or outdoors, and keep a clear path to an exit. Position the stove away from flammable materials, furniture, and walls, with a non-flammable base underneath. Use fireproof gloves when handling hot surfaces, and keep a metal tray or water source nearby for quick response in case of embers. Consider installing a CO detector in the cooking area and a small ash containment system to reduce airborne dust. If you must use an earth stove indoors, ensure there is an exhaust vent or window open during operation and never leave it unattended while lit. Stove Recipe Hub emphasizes consistent airflow control to prevent overheating and excessive smoke.
Fuel types and efficiency
Most earth stoves run on wood or biomass. The key to efficiency is using dry, seasoned wood with low moisture content to minimize smoke and maximize heat transfer. Store fuel in a dry, sheltered location to prevent warping and deterioration. Cutting or splitting larger logs can help the stove draw air more effectively and shorten ignition time. Because earthen stoves have substantial thermal mass, heat is stored and released gradually, so plan dishes that benefit from slow simmering, braising, or gentle boiling. Through careful fuel choices and staging the flame, you can achieve consistent temperatures with less fuel waste. If you live in a place with seasonal weather, adapt your practice to the climate—more insulation in cold months and better airflow during warmer conditions.
Cooking techniques on an earth stove
Mastering heat control is essential. Use a lid to trap heat for simmering and use a larger cooking surface for high-heat searing. When you need a gentler boil, close the air intake slightly to reduce flame size and preserve flavor without scorching. The overall design of an earth stove encourages slow, even heating; plan recipes that benefit from longer cooking times, such as stews, sauces, beans, and grains. For stir-frying or quick sautéing, you’ll want a more direct flame and careful temperature management. Always preheat the cooking vessel on a small flame, then adjust as needed for even heat distribution. In practice, this means you’ll frequently adjust air flow and reposition pots to maximize contact with heat.
Maintenance, cleaning, and longevity
Regular maintenance extends the life of an earth stove. After cooking, allow the stove to cool, then remove ash and debris from the inner chamber. Inspect walls for cracks and reapply a thin clay slip if needed to seal tiny fissures. Keep the vent or air intake free of soot to maintain consistent airflow. A cured, well-constructed stove can last for many seasons with minimal repair if kept dry and protected from weather. Seasonal checks are a good habit: re-linings, reseal cracks, and replace damaged supports as necessary. With simple care, your earth stove remains a reliable centerpiece for stove-top cooking and future family meals.
Troubleshooting common issues
If smoke is excessive, check fuel moisture, air intake position, and whether the stove is adequately ventilated. Uneven heating often points to wall thickness inconsistencies or a warped cooking surface; patch with fresh clay and smooth edges. Cracking is common with new stoves—time and proper curing reduce this risk. If embers fail to stay contained, review the base hardware and ensure the fire is fully contained within the chamber. Persistently smoky odors may indicate moisture in the fuel or insufficient draft—adjust vents and use drier fuel. For all issues, step back to a warm, dry, well-ventilated area and perform small iterative adjustments until performance stabilizes.
Getting started: a beginner-friendly project
If you’re new to earth stoves, begin with a small, simple design that you can complete over a weekend. Choose a flat, non-flammable surface and gather dry, clay-rich soil, sand, and straw for reinforcement. Build a shallow base, then add a single-walled inner chamber to keep the heat confined. Allow a curing period, then perform a gentle burn to dry and set the structure. Start with low flames and practice air-control techniques before attempting full cooking sessions. Keep safety gear on hand, and document your process so you can refine your technique over time. With patience and attention to detail, you’ll develop confidence and enjoy flavorful meals prepared on your earth stove.
Authority sources
To deepen safety and technique, you can consult a few reputable sources:
- https://www.epa.gov/burnwise
- https://www.osha.gov
- https://www.nfpa.org
These resources offer general fire safety, ventilation guidelines, and education about safe fuel use that support responsible practice when working with earthen stoves.
Tools & Materials
- Heat-resistant surface(Non-flammable base like concrete slab or metal tray with fireproof mat)
- Clay soil mixed with straw(Moist but workable; ratio adjustments based on site materials)
- Sand(Lining for insulation and shaping inner chamber)
- Water(To moisten clay and achieve workable consistency)
- Shovel or trowel(Mixing and shaping the clay walls)
- Metal grate or pot supports(Withstanding heat and providing a stable cooking surface)
- Fireproof gloves(Protection when handling hot surfaces and embers)
- CO detector(Compact detector for indoor use or enclosed spaces)
- Dry wood or biomass(Low moisture content minimizes smoke)
- Water bucket or extinguisher(For quick response to stray embers)
Steps
Estimated time: 2-6 hours active work plus several days for drying and curing
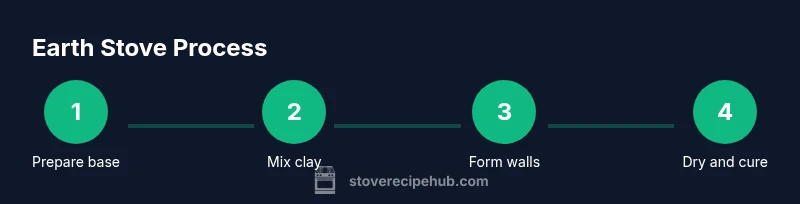
- 1
Choose a safe location and prepare the base
Select a dry, level spot away from overhead branches and dry vegetation. Clear the area and lay down a non-flammable base to prevent heat transfer to carpets or wood floors.
Tip: Place a metal tray or fireproof mat under the stove to catch embers and protect the surface. - 2
Mix the earthen clay
In a sturdy container, combine clay soil, sand, and a small amount of water. Mix until you reach a damp, workable consistency that holds its shape but can be molded.
Tip: Add water gradually; overly runny mix will crack during drying. - 3
Form the stove walls and inner chamber
Build a circular or rectangular chamber with even wall thickness. Shape the walls to create a smooth inner surface that will resist cracking when heated.
Tip: Keep edges rounded to reduce stress points as the clay dries. - 4
Install a cooking surface and air intake
Place a metal grate or flat plate atop the chamber to support pots. Create a controllable air inlet to regulate flame size.
Tip: Ensure the grate sits securely and won’t shift when adding cookware. - 5
Dry the structure completely
Allow the stove to air-dry in a shaded area for several days. Slow drying prevents cracking and ensures dimensional stability before firing.
Tip: Cover with a breathable cloth at night to prevent rapid moisture loss in cold weather. - 6
Light a small initial fire and cure the stove
Start with a small flame and gradually increase heat to cure the clay walls. This reduces thermal shock and improves durability.
Tip: Keep a close eye on cracking or warping during the first burns. - 7
Begin cooking and maintain safety
Use low to moderate flames for most dishes. Monitor heat closely and adjust airflow to prevent scorching and excessive smoke.
Tip: Always have water or a fire extinguisher nearby when cooking on a new stove.
Common Questions
Is an earth stove safe to use indoors?
Indoor use is possible only with proper ventilation, such as an exhaust or open window, and a carbon monoxide detector. Outdoor use is generally safer but not always practical for every home.
Indoor use requires proper ventilation and a CO detector.
What materials work best for an earth stove?
A mix of clay soil, sand for structure, and straw for reinforcement creates a durable, heat-retentive chamber. A sturdy base and a metal grate improve safety and cooking performance.
Clay with sand and straw works well, plus a metal grate.
Can I cook quickly on an earth stove?
Earth stoves excel at slow simmering and braising. For quick tasks, preheat thoroughly and use a high flame briefly, then reduce heat to finish.
They’re great for slow cooking; for quick meals, preheat and then simmer.
Do earth stoves require a chimney?
Chimneys are not always required, especially for outdoor setups. If used indoors, a proper exhaust or venting path is essential to avoid smoke buildup.
Chimneys aren’t always needed, but ventilation is essential indoors.
How do I prevent excessive smoke?
Use dry fuel, maintain appropriate airflow, and ensure adequate ventilation. If smoke persists, pause cooking to rebuild the fire with drier wood and clearer air intake.
Keep fuel dry and airflow steady to reduce smoke.
Watch Video
Top Takeaways
- Understand what an earth stove is and how it works
- Evaluate materials, heat retention, and ventilation needs
- Follow a clear step-by-step build and curing process
- Prioritize safety with ventilation and protective gear
- Maintain and troubleshoot to extend stove life