How to Measure Stove Pipe: A Practical Home Guide for Cooks
Learn how to measure stove pipe accurately for safe venting and optimal draft. This comprehensive guide covers outer vs inner diameters, measurement steps, tool selection, safety tips, and how to translate measurements into the right pipe size.

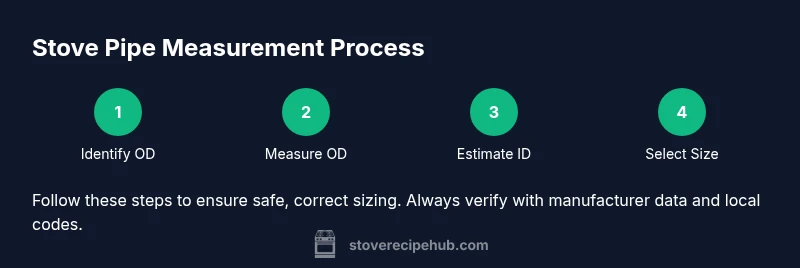
By the end of this guide, you will know exactly how to measure a stove pipe: identify outer and inner diameters, measure length, and verify clearances for safe operation. Start with cooling the pipe, gather a tape measure, calipers if available, and note joints and adapters. The process hinges on distinguishing OD from ID and using manufacturer specs.
Understanding how is stove pipe measured
In practical terms, measuring stove pipe means determining its true diameter and length so you can select the correct replacement parts and ensure safe clearance. The phrase how is stove pipe measured refers to two closely related ideas: outer diameter (OD) and inner diameter (ID). For most residential stoves, the standard way to describe pipe size is by its nominal outer diameter, because metal thickness varies by material and age, and the inner passage is what affects airflow. According to Stove Recipe Hub, you should start by identifying whether you are dealing with a traditional stovepipe (round cross-section) or a flexible/chimney flex liner. This distinction matters for measurement technique and for locating the correct adapters. Always assume measurement points may vary along the run, especially where elbows or joints are present. The goal is to capture consistent, repeatable data you can compare to manufacturer specs or a sizing chart. Safety comes first: cool pipe, verify unobstructed access, and protect the work area from ash or soot.
Outer diameter, inner diameter, and nominal size: navigating the terminology
Understanding what each term means helps prevent mis-sizing. Outer diameter (OD) is the actual width of the pipe's exterior, while inner diameter (ID) is the usable passage inside. In many home applications, the industry describes pipe sizes by nominal OD, not by the precise math of ID or wall thickness. Stove Recipe Hub emphasizes that walls still wear, and older piping can be thinner, which alters the ID and airflow. To compare sizes effectively, gather the most consistent data point you can across visible sections: near joints, straight runs, and before any elbows. Record OD first, then estimate wall thickness if you can access it safely. If you find conflicting measurements, use the smallest consistent value when shopping for replacements to maintain adequate clearance and chimney draft.
Visual cues and measuring locations
Choose measurement spots away from elbows and joints where distortion can occur. A straight section of pipe provides the best reading. Place the tape measure across the exterior to capture OD, then verify again at a parallel angle to confirm accuracy. When measuring ID, use calipers if you can reach the interior passage or subtract twice the wall thickness from the OD, depending on pipe construction. If you lack access to the interior wall, rely on manufacturer charts that map OD to corresponding pipe size. Always note the position of each measurement—near the stove connection, mid-run, and at the outlet—to build a reliable profile of the entire length. Safety remains a priority; never lean into the chimney or use metal tools that might damage the pipe.
Tools, safety, and setup
Select measurement spots away from joints where distortion can occur. A straight section of pipe provides the best reading. Place the tape measure across the exterior to capture OD, then verify again at a parallel angle to confirm accuracy. When measuring ID, use calipers if you can reach the interior passage or subtract twice the wall thickness from the OD, depending on pipe construction. If you lack access to the interior wall, rely on manufacturer charts that map OD to corresponding pipe size. Always note the position of each measurement—near the stove connection, mid-run, and at the outlet—to build a reliable profile of the entire length. Safety remains a priority; never lean into the chimney or use metal tools that might damage the pipe.
Interpreting results and choosing pipe size
With your OD readings in hand, compare them against the pipe sizing chart provided by the manufacturer or a reputable code reference. The goal is to identify the nominal pipe size that corresponds to the measured OD while ensuring the interior passage remains unobstructed. If you encounter multiple readings that disagree, follow a conservative approach: use the smallest OD that still provides a safe clearance around all joints and heat sources. When replacing e.g. a stove pipe, you may need adapters to connect to different stove models or chimney sections. Keep a log of all measurements, including dates, so you can track wear and plan replacements.
Tools & Materials
- Tape measure (flexible, at least 3 meters)(Metal or fiberglass blade; measure OD accurately)
- Calipers (digital or dial)(Useful for precise ID measurements if you can reach the interior passage)
- Pencil and notebook(Record measurements clearly and consistently)
- Flashlight(Improve visibility around joints and inside elbows)
- Safety gloves(Protect hands from sharp edges and hot surfaces)
Steps
Estimated time: 30-60 minutes
- 1
Prepare the workspace
Turn off the stove and allow the pipe to cool completely. Clear the area of combustibles and ensure a stable ladder or platform if you're working at height. This prevents accidents and makes measurements accurate.
Tip: Wear heat-resistant gloves and protective eyewear. - 2
Inspect the pipe for damage
Look for dents, corrosion, or soot buildup near joints. Damaged sections can distort measurements and may require replacement.
Tip: Note any damage with photos before touching the pipe. - 3
Measure outer diameter (OD) at multiple points
Using a tape measure, take OD readings on straight portions away from joints. Take 3 readings along the run and average them to reduce error.
Tip: Record OD to the nearest 1/16 inch (2 mm) for precision. - 4
Estimate inner diameter (ID) or verify with calipers
If you can access the interior, measure ID with calipers. If not, subtract twice wall thickness from OD to estimate ID, understanding wall thickness varies by material.
Tip: Use manufacturer wall-thickness data if available. - 5
Record length and junctions
Measure total pipe length from stove outlet to the chimney section you intend to connect. Note the position and type of each elbow or adapter.
Tip: Label measurements by location for future reference. - 6
Compare with charts and select size
Compare OD and estimated ID to a reputable sizing chart. Choose the pipe size that ensures proper fit and adequate clearance.
Tip: When in doubt, round down to a smaller size for safety.
Common Questions
What is the difference between outer diameter and nominal size for stove pipe?
Outer diameter is the pipe's actual width; nominal size describes a standard sizing used for parts. Understanding the distinction helps you pick compatible fittings and ensures proper fit.
OD is the actual width, while nominal size is the standard size used for fittings.
Why does length matter when measuring stove pipe?
Length affects draft and the ability to connect joints without stressing adapters. Accurate length helps you choose the right sections and maintain safe clearances.
Length matters for fit and safe operation; measure from stove outlet to the target chimney.
What tools are essential for this task?
A flexible tape measure, calipers if possible, a pencil and notebook, and a flashlight. Protective gloves improve safety when handling potentially sharp edges.
Use a tape measure, calipers if possible, plus a flashlight and gloves.
Can measurements vary along the run?
Yes. Ovalities, joints, and worn walls can cause readings to differ. Take multiple measurements and rely on the most conservative (smallest) reading for sizing.
Yes, readings can vary; average or use the smallest reliable reading.
What should I do with the measurements after?
Log the values with locations, compare to the manufacturer chart, and plan replacements or adapters. If in doubt, consult a professional.
Record and compare to charts; consider professional help if unsure.
Watch Video
Top Takeaways
- Differentiate OD vs ID clearly before shopping
- Record measurements with location context
- Use manufacturer charts to translate measurements
- Prioritize safety and code-compliant clearances