How to Cook Pork Chops on the Stove Top
Master how to cook pork chops on the stove top with a hot skillet, precise timing, and a simple pan sauce. This guide covers bone-in and boneless cuts, temps, resting, and common mistakes for juicy results.

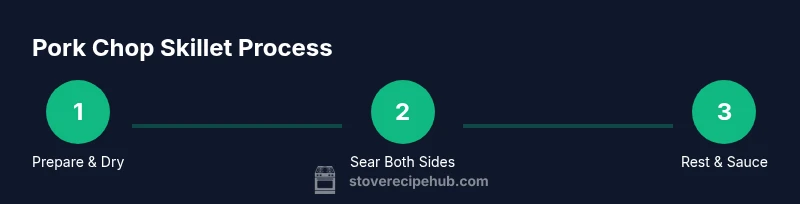
You will learn to cook pork chops on the stove top with a hot skillet, careful searing, and a brief rest. Essential gear includes a heavy skillet, tongs, an instant-read thermometer, oil, and pork chops (bone-in or boneless). Start by patting dry, seasoning well, then sear 2-3 minutes per side and finish with a brief rest before serving.
Why the Stove-Top Sear Matters
When you learn how to cook pork chops on the stove top, the tricks are simple: a hot pan, dry surface, and precise timing. The crust builds flavor quickly, while the interior stays juicy if you manage heat and resting. According to Stove Recipe Hub, a deep, caramelized crust in the first few minutes locks in juices and creates a reliable foundation for both bone-in and boneless chops. Good searing also sets up a quick finish with or without a pan sauce. This approach works well with standard 1-inch thick chops and scales to thicker cuts when you adjust heat and time.
Choosing and Preparing Pork Chops
Pork chops come in bone-in and boneless varieties. Bone-in chops are often juicier and more forgiving, while boneless chops cook faster. Aim for a thickness around ¾ to 1 inch; if your chops are thicker, plan for a brief oven finish or longer sear. Before cooking, pat both sides dry with paper towels to remove surface moisture, which helps form a crust. Let them sit at room temperature for 10–15 minutes to promote even cooking, then season generously with salt, pepper, and any optional spices you love.
The Right Pan and Heat Setup
A heavy skillet—preferably cast iron or thick stainless steel—provides even heat and a great crust. Preheat the pan over medium-high heat until it is hot but not smoking, then add a high-smoke-point oil like canola or neutral oil. The oil should shimmer; if it starts to smoke, reduce the heat slightly. Sufficient space around each chop is essential; crowding lowers the pan temperature and soggy crusts result. Have a thermometer ready to monitor doneness as you cook.
Searing Technique: Narrative Guide
Place the seasoned chops in the hot pan gently, laying them away from you to avoid splatter. Let the first side sear undisturbed for 2–4 minutes until a deep crust forms and the meat releases easily from the pan. Flip once and sear the other side for 2–4 minutes. For medium doneness, aim for an internal temperature around 145°F (63°C) and remove from heat a touch early to account for carryover cooking. Optional butter, garlic, and herbs can be added during the last minute to baste and enrich flavor.
Finishing Techniques: Resting and Sauces
After cooking, rest the chops for 3–5 minutes to let juices redistribute. This step prevents a rush of juices when you cut into the meat. If you want a quick pan sauce, deglaze the skillet with a splash of wine or stock, scrape up the fond, and finish with a small pat of butter for gloss and richness. Serve the chops with the pan sauce spooned over the top for a restaurant-style finish.
Troubleshooting and Common Mistakes
Common issues include under-seasoning, crowding the pan, and cooking too hot or too cold. If your crust stays pale, the pan needed more heat or more dry surface can help. If the chops seem dry, they likely cooked too long or were not rested. Always let the meat reach 145°F at the center and use a thermometer for accuracy. Finally, avoid basting with butter too early, as it can burn.
Variations: Finishes and Healthier Options
For a lighter finish, use olive oil and finish with a squeeze of lemon and chopped herbs instead of a heavy pan sauce. For a richer flavor, finish with a small knob of butter near the end and baste the chops as they rest. If you prefer thicker chops, you can start on the stove and finish in a 425°F oven for 5–7 minutes. Bone-in chops benefit from a slightly longer sear and, if needed, a brief oven finish.
Tools & Materials
- Heavy skillet (cast iron or thick stainless)(Preheat to ensure even crust.)
- Tongs(For turning chops without piercing meat.)
- Instant-read thermometer(Target 145°F (63°C) with 3-minute rest.)
- Oil with high smoke point(Canola, grapeseed, or avocado oil.)
- Pork chops (bone-in or boneless)(1 inch thickness is ideal.)
- Paper towels(Dry surface thoroughly.)
- Seasonings(Salt, pepper, and optional garlic powder or paprika.)
- Plate to rest chops(Allow juices to redistribute.)
Steps
Estimated time: 15-25 minutes
- 1
Pat dry and prep
Pat the chops dry with paper towels and set on a plate. Let them sit 10–15 minutes to remove surface moisture, which helps crust formation. This prep step ensures the surface browns evenly.
Tip: Dry surface is essential for a good crust; moisture kills sear quality. - 2
Season generously
Season both sides with salt and pepper, and add optional spices if you like. Seasoning early helps flavor penetrate the surface.
Tip: Even seasoning across both sides prevents uneven flavor. - 3
Preheat pan and oil
Preheat a heavy skillet over medium-high heat until hot. Add oil and wait for it to shimmer; if it smokes, lower the heat slightly.
Tip: Droplets of water should dance in the pan; if not, give it more time to heat. - 4
Sear the first side
Place chops in the pan, away from you, and resist the urge to move them. Sear 2–4 minutes until a deep crust forms and they release easily.
Tip: A good crust will form before you attempt a flip. - 5
Flip and finish to temp
Flip the chops and sear 2–4 minutes on the other side. Check with a thermometer; remove once center hits about 145°F (63°C). Expect carryover cooking.
Tip: Use the thermometer for precision; carryover will finish cooking after removal. - 6
Rest and optional sauce
Transfer chops to a plate and rest 3–5 minutes. If desired, deglaze the pan and whisk in a pat of butter for a quick pan sauce.
Tip: Resting makes juices redistribute; cutting early sheds moisture.
Common Questions
What thickness is best for stove-top pork chops?
About ¾ to 1 inch thick works well on the stove top. Thicker chops may need an oven finish for even doneness.
Aim for ¾ to 1 inch thick; thicker chops may require an oven finish.
Should I finish thicker chops in the oven?
Yes. Sear on the stove to develop crust, then finish in a preheated 400°F oven for 5–7 minutes depending on thickness.
Yes, finish thicker chops in a hot oven after searing.
Can I use butter instead of oil for searing?
Butter adds flavor but can burn at high heat. Use a high-smoke-point oil for the main sear and add butter toward the end for flavor.
Use oil for searing, then add a little butter at the end if you like.
Why did my pork chop turn out dry?
Cooked too long or at too high heat, and insufficient resting. Use a thermometer and rest the meat to reabsorb juices.
Likely overcooked or not rested enough; use a thermometer and rest before serving.
What sauce goes well with stove-top pork chops?
A simple pan sauce with deglazed fond, a splash of stock or wine, and a knob of butter pairs beautifully.
Try a quick pan sauce with deglazing and butter for a glossy finish.
Watch Video
Top Takeaways
- Preheat a heavy skillet to ensure a solid crust.
- Dry surface and proper seasoning drive flavor.
- Aim for 145°F and rest 3–5 minutes before serving.
- Use a thermometer to guarantee doneness without overcooking.