How to know when your stove is ready
A practical, step-by-step guide to determine when your stove is ready for cooking. Learn cues, tests, and safety practices for gas, electric, and induction stoves with Stove Recipe Hub.

You will know your stove is ready when the pan surface responds predictably to heat tests, showing a warm, shimmering surface before adding fat, and a quick water drop test dances and evaporates. These cues apply to gas, electric, and induction stoves and help you time cooking accurately.
Understanding Stove Readiness for Stove-Top Cooking
According to Stove Recipe Hub, stove readiness is not a mysterious moment but a series of reliable cues you can feel, see, and hear as you prepare to cook. The basics start with choosing the right pan and setting the heat to a conservative level. When the pan is properly heated, you will notice a warm sensation when you hold your hand near the surface, a light shimmer on oil, and sizzling when food touches the pan. By recognizing these cues, you can avoid burning oil, undercooked food, and uneven searing. This approach also helps you manage energy use and keep your kitchen safer, especially when multitasking with multiple pans.
Key indicators that the stove is ready for action
The first clear signal is the pan surface responding to heat. A cold pan will feel sturdy but a warm surface indicates the metal has absorbed heat. Next, when you add a small amount of neutral oil, it should shimmer and glide to coat the surface. A tiny droplet of water on the pan should sizzle and evaporate quickly, not bead up and roll around. Finally, the pan should maintain steady heat, evidenced by consistent searing rather than rapid temperature swings. These indicators work across gas, electric coil, and induction stoves, though the exact timings will vary by fuel type and pan material.
Test methods for different stove types
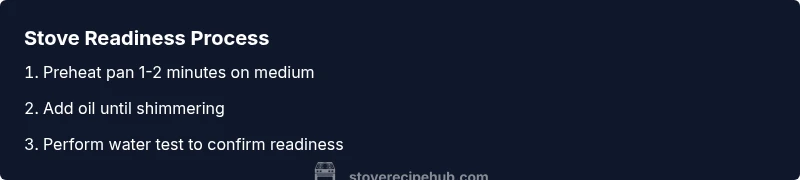
Gas stoves often heat unevenly, so preheating a skillet for 1 to 2 minutes on medium flame is usually sufficient for most tasks. Electric coil stoves may need a longer warmup as coils distribute heat more slowly; aim for 2 to 3 minutes on medium. Electric smooth-top appliances often require a preheat window of about 1 to 2 minutes at medium heat; induction stoves deliver rapid results, sometimes in under a minute, but you should still test with a small amount of oil to confirm shimmer. Regardless of type, perform a quick water test and adjust heat as needed to keep the food from scorching.
Practical demonstrations and quick tests you can perform
Use a single pan to practice the preheat and oil shimmer across a few sessions. If oil begins to smoke, cut back the heat and allow the pan to cool slightly before resuming. The water test remains a fast feedback loop: a few droplets should dance and evaporate within seconds. You can also snap a quick handheld thermometer into the oil to confirm temperatures around 325 to 350 F for many saut tasks, but a visual test suffices for most everyday cooking needs. By documenting your own stove specific cues, you will develop a personal readiness routine that reduces guesswork.
Safety and maintenance considerations
Always use heat resistant gloves or mitts when moving pans. Keep a damp towel handy for wiping up spills and a small eye on gas flames to avoid flare-ups. If you smell gas, turn off the burner and ventilate the area before testing again. Regularly clean the pan and burner areas to prevent residue from altering heat transfer. These practices protect you while you build consistency in stove readiness.
Common myths and how to debunk them
Myth: You must preheat until the pan glows. Reality: Excessive preheating wastes energy and can warp pans. Myth: Oil must always be smoking to be ready. Reality: This is a sign of burning fat; you should aim for shimmering oil instead. Myth: Water dripping onto a hot pan is dangerous. Reality: A quick water test is safe and provides reliable feedback when done away from your face and with the handle secured. By separating fact from fiction, you can train yourself to read the actual cues more reliably.
Tools & Materials
- Frying pan or skillet (8-12 inch)(Flat bottom; good heat conduction)
- Neutral cooking oil(Canola or light olive oil works well)
- Water for test(A few drops for the water test)
- Timer(Track preheat and test durations)
- Infrared thermometer (optional)(Quick temperature checks (optional))
- Oven mitts or heat resistant gloves(Protect hands during handling)
- Kitchen towel(Wipe spills and dry surfaces)
Steps
Estimated time: 15-20 minutes
- 1
Gather tools and set up
Collect a skillet, neutral oil, water, timer, and towels. Place near the stove so you can react quickly as you begin heating. This setup minimizes wasted motion and keeps your workflow smooth.
Tip: Having all items at hand reduces the chance of delaying the preheat step - 2
Choose pan and set heat
Select a pan that matches the dish and set the burner to medium heat to start. A pan that is too small or too large for the cooking task can heat unevenly, affecting readiness.
Tip: Smaller pans heat faster; use them for testing if you are unsure about your burner performance - 3
Preheat the pan
Allow the dry pan to heat for about 1 to 2 minutes on medium. You should feel the surface warming but not scorching. This confirms the metal has absorbed heat and is ready to receive oil.
Tip: Keep your hand at a safe distance to sense heat, not to touch the hot surface - 4
Add oil and check shimmering
Add 1-2 teaspoons of neutral oil and swirl to coat. The oil should shimmer and run smoothly; if it pools, there may be too much heat or the pan is not yet evenly heated.
Tip: If the oil starts to smoke, reduce the heat and pause to allow the pan to rewarm - 5
Perform the water drop test
Drop a tiny amount of water on the pan. If it dances and evaporates within a few seconds, the surface is ready for cooking; if it beads, the pan is not hot enough yet.
Tip: Stand back slightly to avoid splashes and always move hands away from the direct flame - 6
Proceed with cooking and adjust heat
Begin cooking and adjust heat to maintain a steady sizzle rather than rapid boiling or smoking. This ensures consistent browning and prevents sticking.
Tip: Keep an eye on the oil and food; adjust heat in small increments
Common Questions
What is the first sign that a stove pan is ready?
The pan should feel warm as it heats and oil should shimmer when added. You should see a consistent sizzle as soon as food touches the surface.
The pan should feel warm and the oil should shimmer before you add food.
Does preheating time vary by stove type?
Yes, gas, electric coil, and induction stoves heat differently. Start with a short test heating period and adjust based on observed cues.
Yes, preheating time varies by stove type; observe the pan cues.
Is it safe to preheat an empty pan?
Preheating an empty pan is generally safe for a short period, but can warp certain pans and waste energy. Always monitor heat closely.
Preheating an empty pan is possible but not ideal; monitor closely.
How can I tell if oil is at the right temperature?
Oil should shimmer and flow smoothly along the surface; smoking means the temperature is too high. Use shimmer as the cue.
Oil should shimmer, not smoke, as a cue to readiness.
Watch Video
Top Takeaways
- Identify reliable cues before cooking
- Test heat with a water drop and shimmering oil
- Adjust heat gradually to maintain consistent sizzle
- Prioritize safety and pan maintenance