How to Make Stove: Master Stove-Top Cooking
A complete, practical guide to stove-top cooking that covers safety, heat control, essential tools, and step-by-step techniques to consistently create flavorful meals on any stove.

Learn how to make stove-top meals with confidence, from planning and safety to heat control and plating. This guide provides a clear, step-by-step approach, essential tools, and practical tips to cook reliably on any stove. You’ll practice efficient prep, proper pan preheating, and timing to achieve flavorful results every time.
Why Mastering Stove-Top Cooking Improves Everyday Meals
For home cooks, learning how to make stove-top meals transforms routine dinners into reliable, flavorful experiences. Whether you’re sautéing vegetables, searing protein, or simmering a sauce, the stove is your primary tool. According to Stove Recipe Hub, mastering stove-top techniques reduces guesswork and helps you achieve consistent results with fewer mistakes. If you’re curious about how to make stove-top meals that taste like restaurant outcomes, this guide walks you through practical steps, safety routines, and timing cues that fit real kitchens. Embrace a calm, organized workflow and you’ll see stronger flavors, better texture, and less waste. This foundation sets you up for confident cooking that scales from weeknight dinners to weekend projects. By understanding the core concepts of heat, timing, and prep, you’ll feel more in control at every stage of the cooking process.
Safety First: Safe Practices on Your Stove
Safety is the foundation of every successful stove session. Keep hair tied back, avoid loose clothing, and install adequate ventilation to prevent smoke buildup. Always check for gas smells or unusual hissing before lighting a burner. For electric stoves, keep cords away from heat and water. Stove Recipe Hub emphasizes planning a clear cooking area, labeling hot surfaces, and using heat-resistant gloves when handling hot pans. Good habits protect you, your kitchen, and your ingredients, and they make the rest of the process smoother. In addition, keep a fire extinguisher nearby and know how to use it, and never leave a lit burner unattended when you step away, even briefly. These precautions create a safer environment that supports better results.
Understanding Heat: Low, Medium, High and When to Use Them
Heat control is the backbone of stove-top cooking. Low heat maintains gentle simmering and reduces the chance of scorching, while medium heat enables browning and more robust flavors without burning. High heat is best reserved for rapid searing and reducing liquids quickly, but it requires close attention to avoid scorching. Start most dishes at medium to gauge how fast your pan responds, then adjust. Preheating a pan involves warming it on the burner until you observe a faint shimmer on the surface; this ensures even browning and helps prevent sticking. Practice with simple vegetables or thin-cut proteins to learn your stove’s tempo. With time, you’ll anticipate sizzling sounds and color changes that signal the right moment to flip, season, or finish with a flavorful glaze.
Essential Tools and Pantry for Great Stove Dishes
A few dependable tools elevate stove-top cooking: a heavy-bottom skillet or sauté pan provides even heat and reliable browning; a matching lid helps trap moisture when needed; silicone spatula and tongs keep foods moving without damage. Keep a sharp chef’s knife, a sturdy cutting board, measuring spoons, and a basic salt-and-pepper setup close at hand. Have neutral oil with a high smoke point, plus pantry staples like minced garlic, onions, dried herbs, and a splash of acidity (lemon juice or vinegar) for quick flavor boosts. By stocking these essentials, you’ll reduce trips to the grocery and speed up your cooking sessions while maintaining control over texture and taste.
Preheating a Pan: Why It Matters and How to Do It
Preheating a pan is not a cosmetic step—it forms the foundation for even browning and prevents food from sticking. Begin with a dry pan on medium heat for skillet-based dishes. After a minute or two, drizzle a thin layer of oil and swirl to coat the surface. If the oil shimmers and lightly smokes, you’re ready to add food. For water or moisture-heavy ingredients, preheating helps drive moisture away quickly, sealing in flavors. If your pan seems to heat unevenly, rotate it or use a different burner. Preheating times vary with pan material, gas versus electric stoves, and the size of the pan.
Sautéing, Searing, and Simmering: Core Techniques
Sautéing uses a quick, medium-high heat with constant motion to cook foods evenly and develop aroma. Searing creates a brown crust to lock in juices, usually on higher heat with minimal agitation. Simmering allows flavors to meld gently by maintaining small bubbles; it’s essential for sauces and stews. Practice these methods on vegetables first, then progress to proteins. Always keep a safe distance from hot oil and adjust heat to avoid smoking. The right technique gives you color, texture, and depth.
Building Flavor on the Stove: Oils, Aromatics, and Timing
Flavor comes from choosing the right oil, adding aromatics in the correct order, and timing the sequence. Start with a neutral oil for most dishes, then introduce aromatics such as garlic or onion to release fragrance before adding other ingredients. Deglaze with a splash of liquid to lift browned bits from the pan, creating a quick sauce. Salt gradually, seasoning in layers rather than all at once. If you’re making a quick stir-fry, keep ingredients moving so the surface remains seared while the interior stays tender. This deliberate pacing helps you achieve depth without overpowering your dish.
Troubleshooting Common Stove-Top Problems
If food sticks, adjust the heat and ensure the pan is sufficiently preheated before adding ingredients. Overcrowding causes steam and steaming rather than browning; cook in batches if needed. Weak heat may leave proteins undercooked or vegetables soggy; increase heat gradually and allow proper contact with the pan. If you notice excessive smoke, reduce fat quantity and verify oil’s smoking point. Smoke clear and you’ll regain control of the cooking environment. Finally, clean as you go to prevent residue buildup that can alter flavor and browning in future sessions.
Getting Consistent Results: Plan, Plate, and Practice
Consistency comes from planning and repetition. Start with a simple, repeatable recipe and document your steps, timing, and heat levels. Mise en place—having all ingredients prepped and measured—reduces stress and prevents missteps. Plate your dish with intention: consider temperature, texture, and color balance to enhance perceived flavor. Practice makes progress; as you cook more on the stove, you’ll learn your equipment’s quirks and your own preferred timings, enabling you to deliver reliable meals with confidence.
Tools & Materials
- Heavy-bottom skillet (10–12 inch)(Cast iron or clad stainless; ensure flat bottom and even heat distribution)
- Lid for skillet(Glass lid preferred to watch progress)
- Spatula (silicone or wooden)(Heat-resistant)
- Tongs(For turning items without piercing)
- Chef's knife(Sharp and well-balanced)
- Cutting board(Stable surface)
- Measuring spoons(Even seasoning)
- Cooking oil (neutral flavor)(High smoke point)
- Salt and pepper(Basic seasoning)
- Food thermometer(Critical for poultry and meats)
- Heat-resistant oven mitts(General safety)
- Scraper or dry towel(For cleanup)
Steps
Estimated time: 45-60 minutes
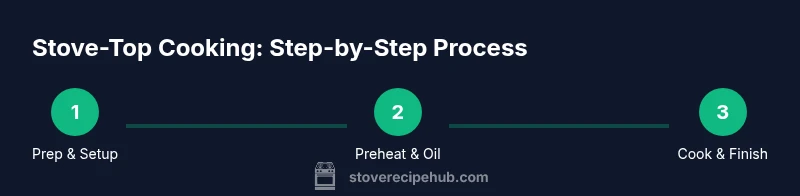
- 1
Prepare and organize your station
Clear the workspace, wash your hands, and gather all ingredients. Turn burners to off and set up your tools within reach to reduce unnecessary movements. This readiness minimizes mistakes and keeps the workflow smooth.
Tip: Lay out ingredients in the exact order you’ll use them to speed execution. - 2
Preheat the pan properly
Place the pan on the burner and heat on medium until you see a light shimmer. A properly preheated pan prevents sticking and ensures even browning when you add food.
Tip: Test with a drop of water; if it dances briefly, you’re at the right temperature. - 3
Add oil and aromatics
Pour a thin layer of oil and swirl to coat the surface once the pan shimmers. Add aromatics like garlic or onions and sauté briefly to release aroma without burning.
Tip: Keep the heat moderate to avoid scorching aromatics. - 4
Cook ingredients with proper spacing
Add food in a single layer or in batches to avoid overcrowding. Allow surface contact to create browning rather than steaming.
Tip: Overcrowding leads to soggy textures and uneven color. - 5
Adjust heat and timing to finish
Lower heat as browning occurs and finish with a glaze or sauce if desired. Stir or flip as needed to promote even cooking.
Tip: Avoid jumping between high and low heat; small adjustments yield better control. - 6
Rest and plate for best texture
Let proteins rest briefly after cooking and slice against the grain if applicable. Season lightly at the end to finalize flavor.
Tip: Rest time helps juices redistribute and improves tenderness. - 7
Clean up safely
Turn off burners, let surfaces cool, and wipe splatters as you go to prevent buildup that can affect future browning.
Tip: Clean while warm for easier residue removal.
Common Questions
What is the best pan material for stove-top cooking?
A heavy-bottom skillet (cast iron or clad stainless) provides even heat and browning, making it ideal for many stove-top dishes.
A heavy-bottom skillet is your best bet for even heat and good browning.
How do I prevent food from sticking?
Preheat the pan properly, use enough oil, avoid overcrowding, and choose the right spatula to avoid tearing the food.
Preheat, oil, and don’t overcrowd the pan to keep food from sticking.
Is it safe to use a nonstick pan on high heat?
Most nonstick coatings have heat limits; follow manufacturer recommendations and avoid sustained high heat for best longevity.
Nonstick pans aren’t ideal for very high heat over long times.
How can I tell when the pan is hot enough?
A drop of water should dance or bead and evaporate quickly, indicating the pan is at the proper temperature.
Drop a tiny amount of water—the droplets should dance on contact.
What are common mistakes to avoid on stove-top?
Overcrowding, skipping preheating, and overheating fats are frequent missteps that hinder browning and flavor.
Avoid overcrowding and preheat properly for better results.
How long does it take to learn stove-top cooking?
With regular practice, you’ll notice steady improvement as you learn your equipment’s quirks and timing.
Practice helps you learn faster and cook more consistently.
Watch Video
Top Takeaways
- Master heat control for consistent results.
- Prepare mise en place before cooking.
- Preheat pans to ensure browning.
- Cook in batches to avoid overcrowding.